
Bedding Plants QAL 3 – The Poppy Row
We’re back for part 3 of the Bedding Plants QAL and for this row of poppies we will be concentrating on curves!
 Curve piecing is one of my favourite techniques and I’m looking forward to sharing my ‘one pin’ method with you in more detail.
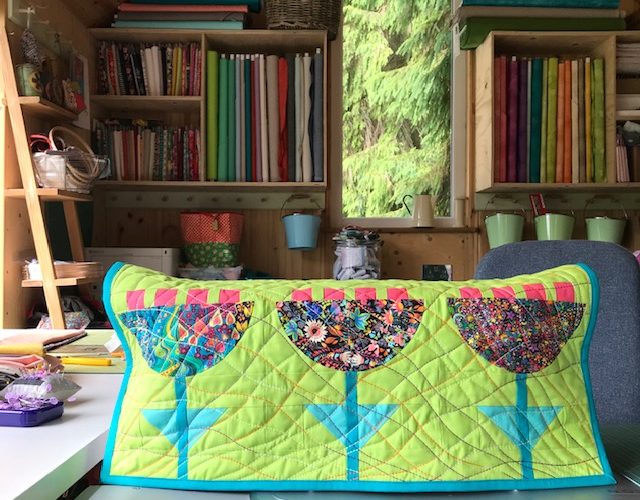
The small project for this row is a sewing machine cover!
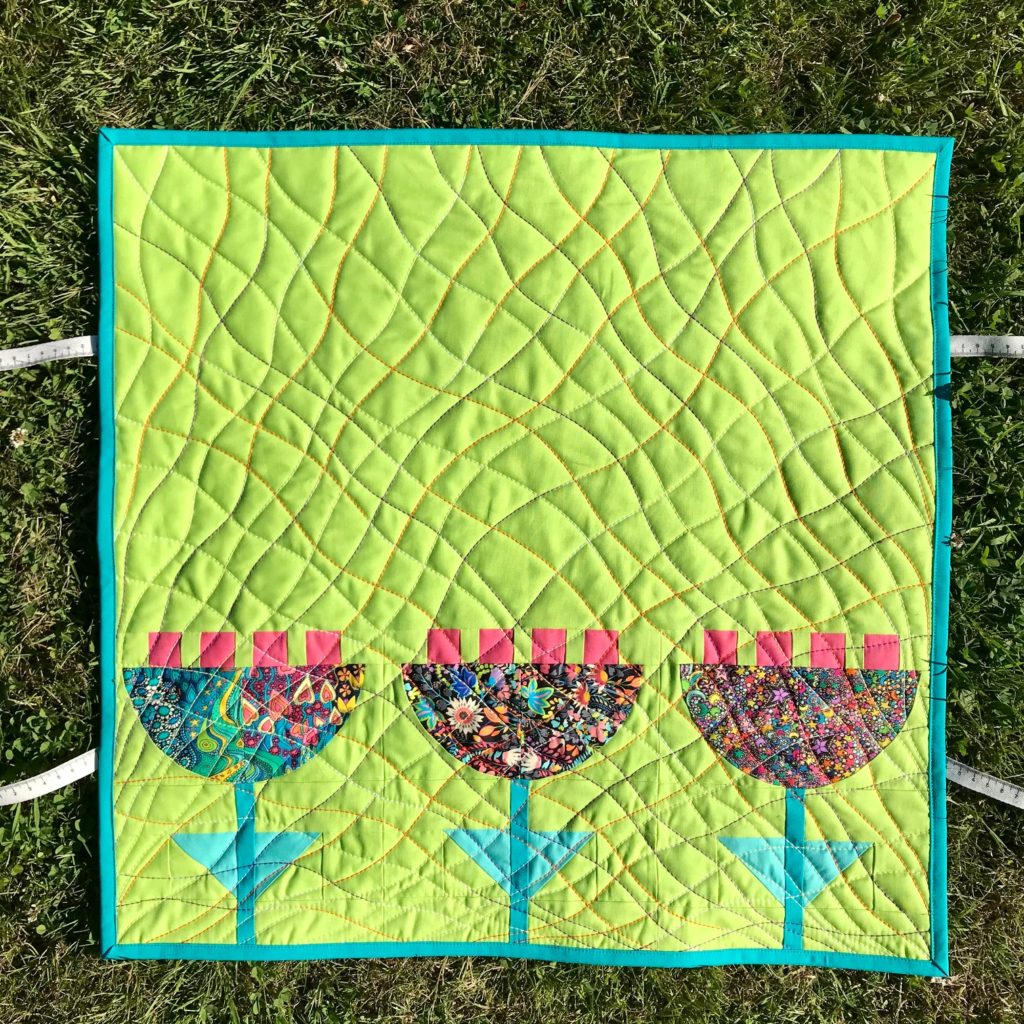
I love the look of three poppy blocks in a row (things always look better in threes) and was trying to think of what I could make with just three blocks. It was my Girl Friday, Jane, who came up with a sewing machine cover, thank you Jane!
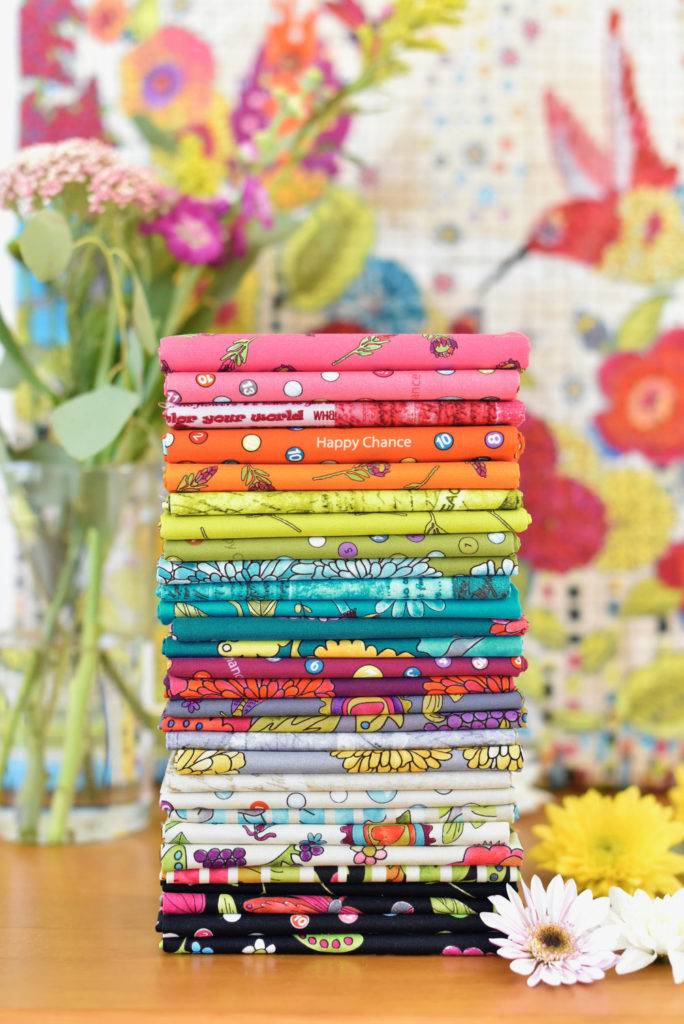
I chose to use the fabulous new capsule collection from Sally Kelly for Windham Fabric called Paradiso, for my poppies along with coordinating Pop Solids from Dashwood Studio. It’s absolutely amazing, especially this slightly crazy psychedlic print on the left, and works so well for the poppy blocks.

The best thing is that I didn’t actually have a sewing machine cover for my Janome in my Schoolhouse and now I have this beautiful Poppy cover! This is an incredibly simple pattern which invlolves the tiny edition of some ribbon ties to what is in reality a mini quilt.
Before we get started on curved piecing let’s look at the nifty bit of strip piecing you use to get your poppy seed tops.
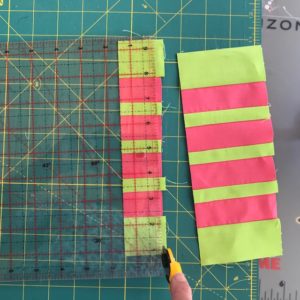
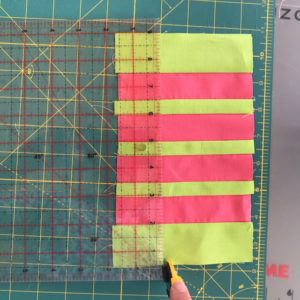
This involves sewing strips together to make a stripey fabric and then slicing strips from that.
As you can see above I cut the first strip using my ruler from the left hand side leaving a little extra for the scrappy edge. I then flip it over and trim it to the correct size before cutting the rest of the strips from the neatly cut side as shown below.

If you are making the sewing machine cover you will only need to cut the initial strips to 5″ rather than 11″ for the three blocks.
I thought it would be useful to show you how I go about cutting my curve piecing templates. I lay the corner of my square ruler over the template and cut this right-angle nice and square.
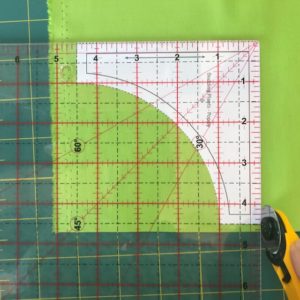
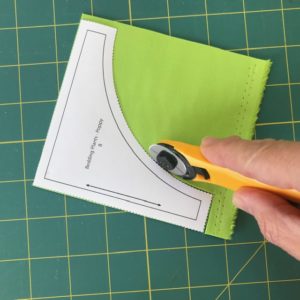
I then swivel the piece around without disturbing it (a small mat works well here as you can move the whole mat around) and cut the remaining sides. I small 28mm cutter also works well and is my favourite tool.
Normally my other hand would be pressing down on the template to stabilise it (but it was taking the photo here!) and this also means that the paper edge rises up slightly so that you can run your cutter alongside it and not cut through the paper.
I would normally cut through 2 or even 4 layers at a time this way and have cut whole quilts out from the same set of paper templates! Occasionally I will print a second set but even this is very low impact against buying sets of perspex/plastic templates for each quilt pattern which I feel is really unnecessary.
 If you are a complete beginner at curve piecing then I would suggest using the many pin method (see the skill building section of my book), but I use my one pin method when I curve piece exact templates (rather than improv curves which I don’t pin). I find this method gives great accuracy without all the fiddly pinning before sewing each seam.
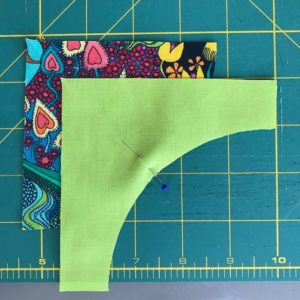
First fold and finger-press the fabric template pieces in half and pin in the center with the concave piece on top (as above). I usually press one piece right sides together and the other one wrong sides together, this way they nicely nestle on the fold.
Bring the straight edges together at the start of the seam and hold them in place until anchored by your machine presser foot.
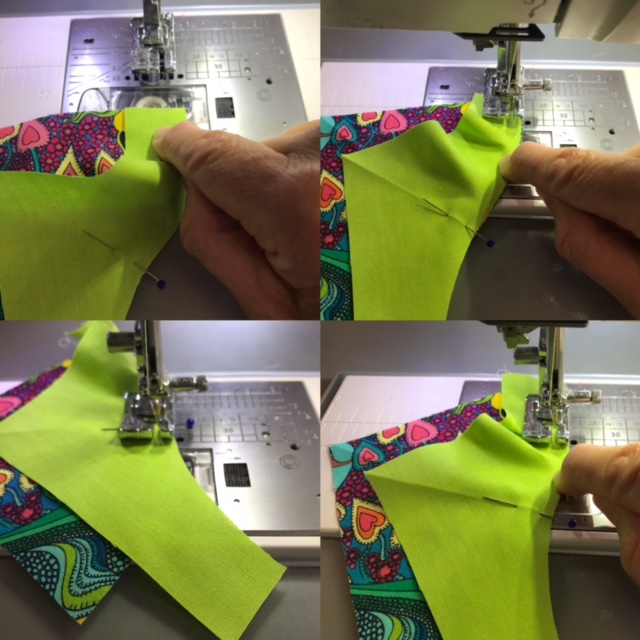
Begin to sew a few stitches, before stopping and smoothing the fabrics so that the raw edges sit together, hold them like this as you stitch. Begin again, stitching slowly and carefully, keeping those raw edges locked together and an accurate quarter inch seam.
Once you reach the center pin, remove it and bring together the straight edges at the end of the seam and move your pin there. Continue smoothing and easing the pieces as you sew to the end pin to complete the curved seam.
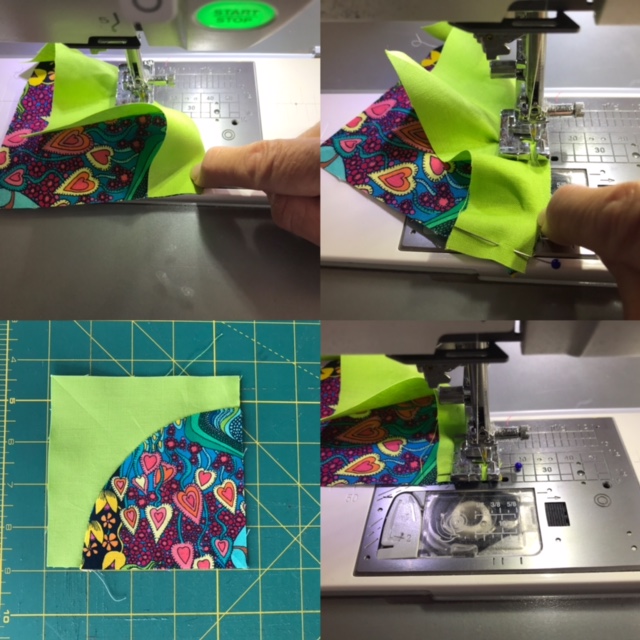
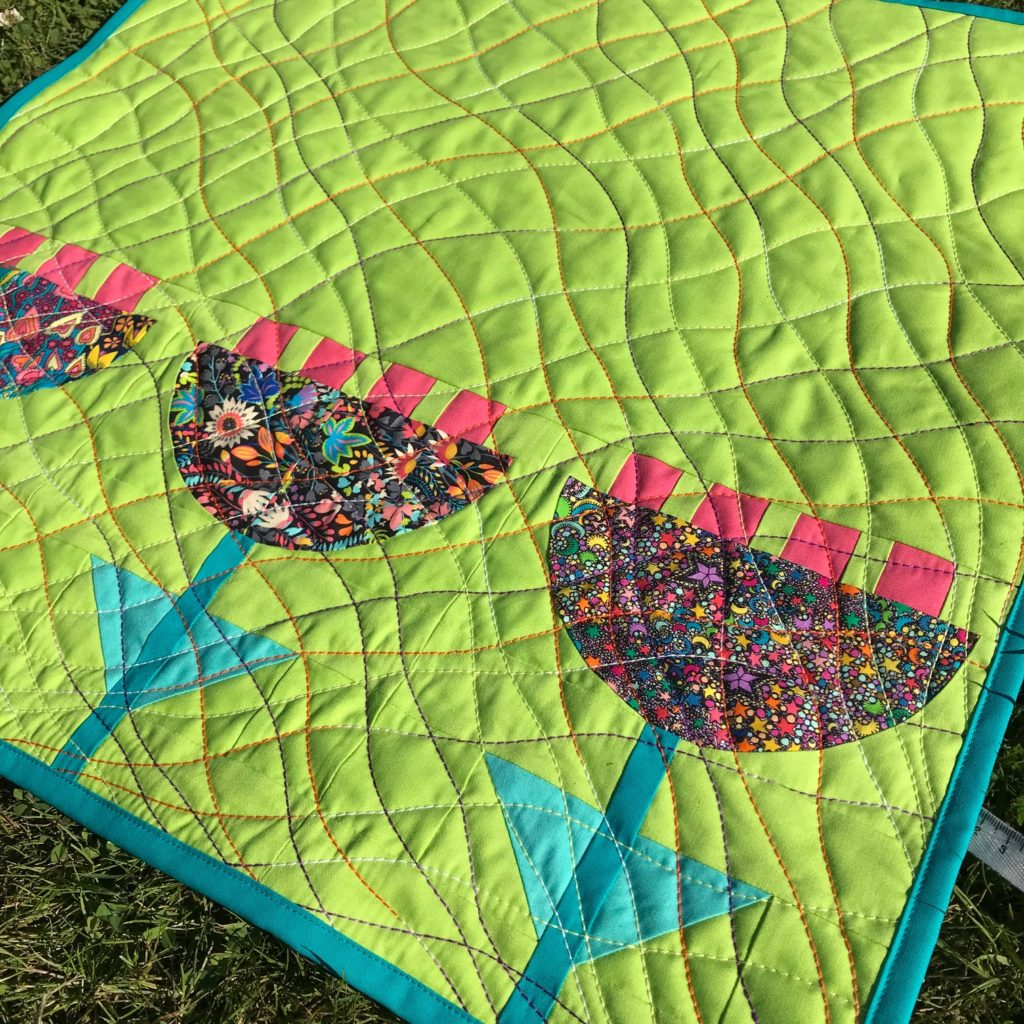
I usually leave pressing my two poppy halves until I’ve pieced both and then I press the seams together in opposite directions as shown on the right. They will nest together better this way and give you a smoother curve.
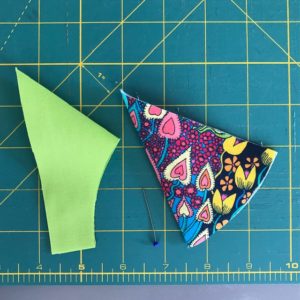
Once these pieces are sewn together I press open this seam as it is quite bulky at the bottom.


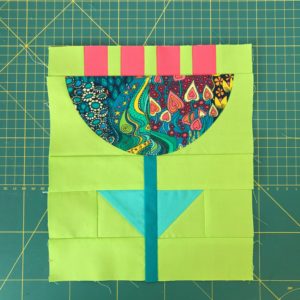
Even if you used all the pins and sewed the curves very accurately they may still be a bit ‘off’ at the top edge so I will often square this before adding the poppy seed strip above.
Don’t forget to trim away the excess background at the bottom of the curve leaving a quarter inch seam (as shown in the book).
There is a very clear section on making 2-at-a-time HSTs in the book so this leaf part of the block should be very straight forward. However just be careful keeping your HSTs the right way up as it is very easy to get this wrong and need your seam ripper!
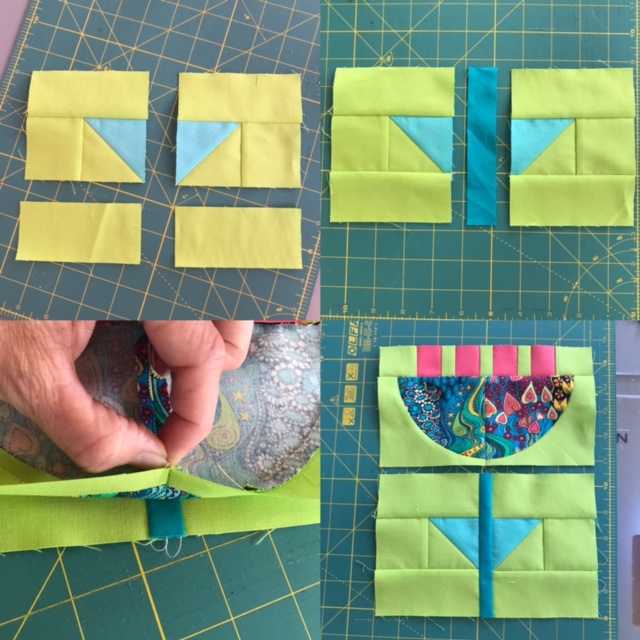
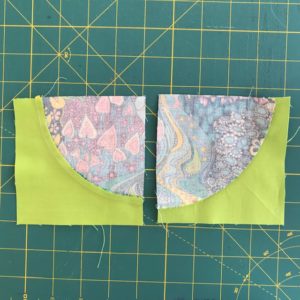
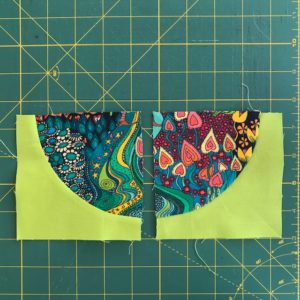
Before you piece the leaf section to the flowerhead just check that they line up at the centre as shown above left.
If you are making the sewing machine cover then do not sew the backgroud strip over the flower.
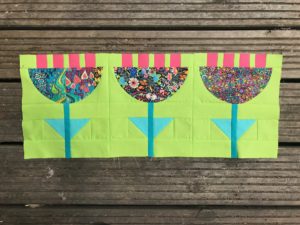
Instead just sew your three blocks in a row.
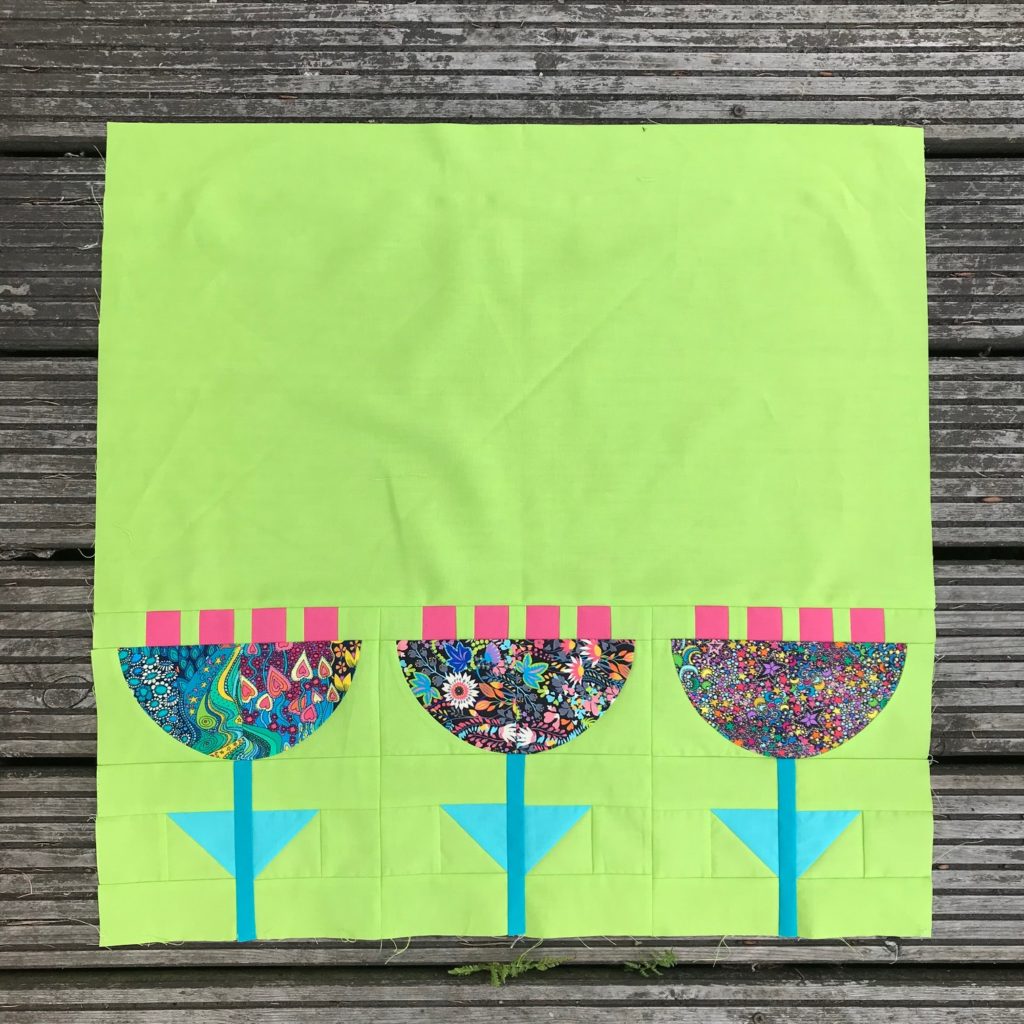
My machien is set into a table and therefore my cover needs to be particularly short. If I was making this for a machine that sat on the table I would have added a strip of ‘ground’ below the poppies, maybe 3″ or so?
You will nedd to measure over the top of your machine and then subtract the height of your poppies plus the ground piece. Add half an inch to this dimension (for seams) and cut a background piece that measures this by the width of your poppy strip. Sew this above the poppies.
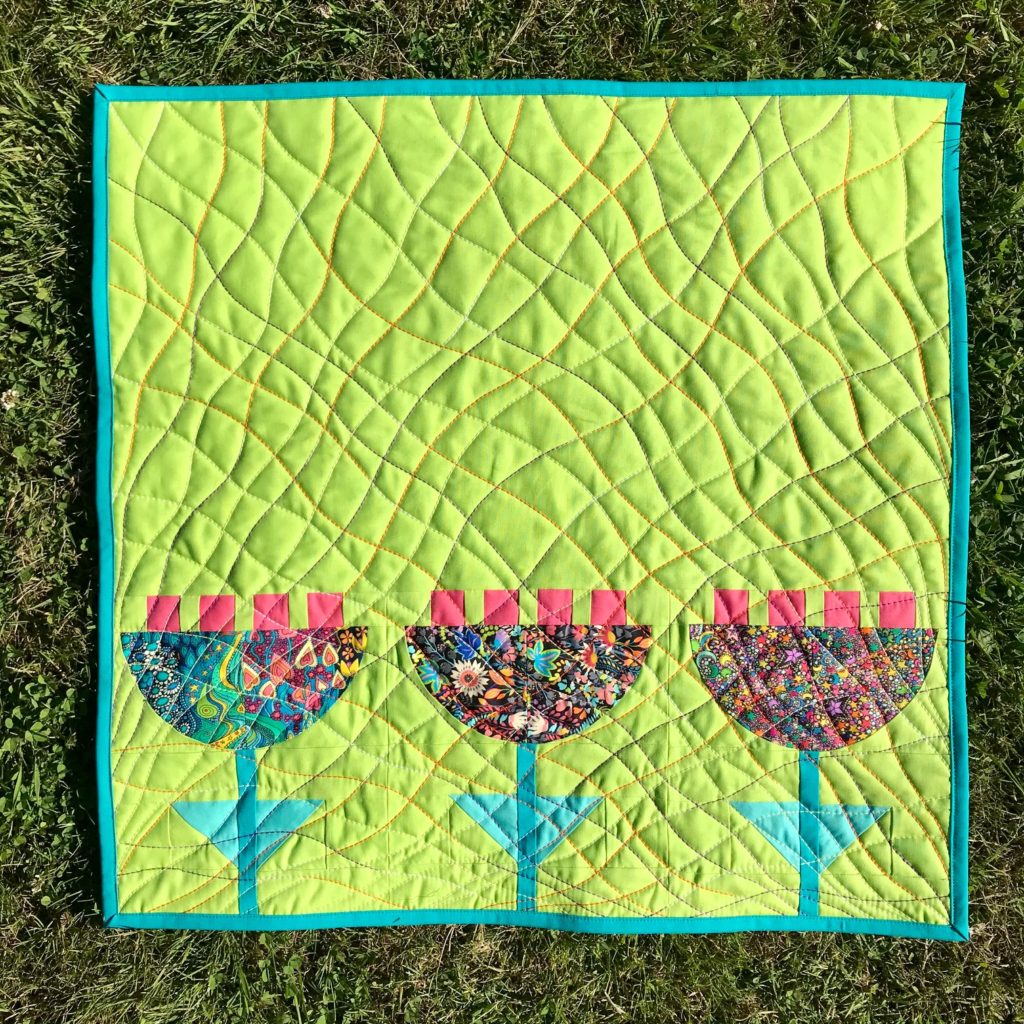
How good do these look in that Sally Kelly fabric?!
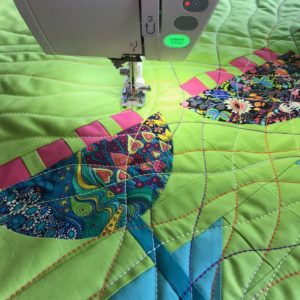
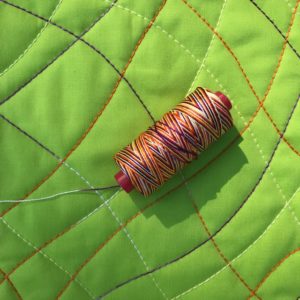
I then basted this to wadding and backing fabric and quilted it on my regular domestic machine using wavy lines and my walking foot and my favourite variegated shade (4648) of Aurifil 12wt cotton thread. This shade is in my Aurifilosphy collection box as it is such a versatile and fun colour for machine quilting. When using 12wt thread in your machine, use 50wt (or 40wt) in your bobbin and insert a size 90 or 100 needle. The variegated thread makes it look like you put a lot more effort into this then you actually did!
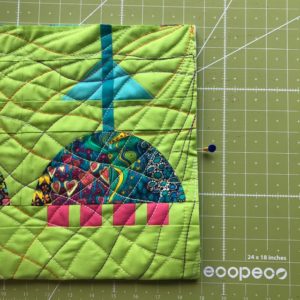
At this point you could just bind this and turn it into a lovely mini quilt (mine is about 24″ square). But if you want to use it as a sewing machine cover then fold it in half on the height and then find a mid way point along this half, mark with a pin as shown above.
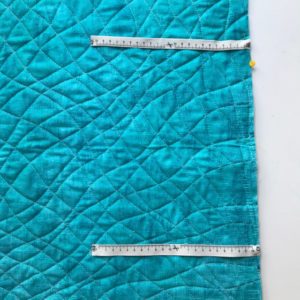
Take a yard of ribbon or cotton tape and cut into 4 equal lengths. Pin these to the back of the cover at the points marked by your pins, as shown above, and stitch in place with a few lines of stitches close to the edge (so they will be covered by the binding).
Now simply bind the cover in you usual method. I used my single-fold machine stitched method as show in this tutorial.
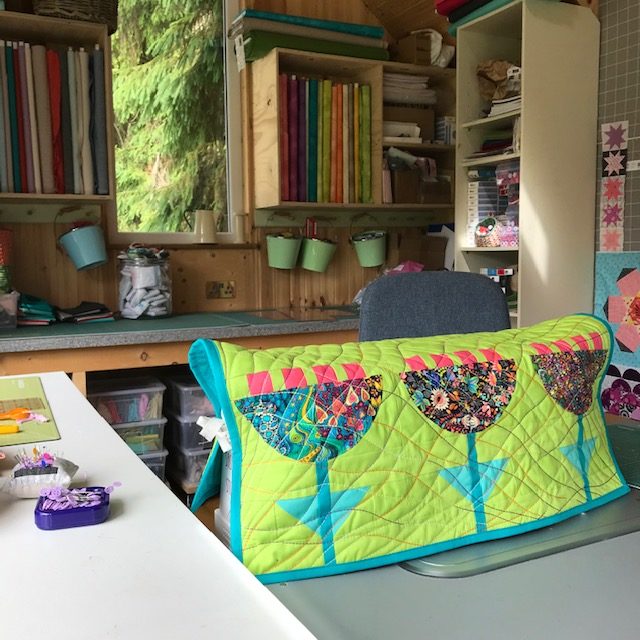
They looks so good on my machine in my Schoolhouse! I have the poppies facing outwards so they can greet me as I open the door in the mornings.
The Daisy Sponsored Prize!
Our sponsor for part two of the QAL is Windham Fabric who are donating this huge FQ bundle of the absolutely stunning new fabric line by Laura Heine ‘Happy Chance’!
I discovered Laura’s amazing work when I stopped at her stand at Quilt Festival Houston in 2019. I was absolutely knocked out by the riot of colour and patterns and went away with one of her scrap packs. This fabric collection looks so good I would like to win it myself!!
To enter the giveaway all you need to do is use the hashtag #beddingplantsQALpoppy when you post your Poppy blocks in your feed on Instagram, or share your Poppy blocks in a post in the Bedding Plants QAL Facebook group. I will choose a random winner from the combined IG and FB posts of Poppy blocks. You have from now until midnight GMT Saturday 3rd July to share your Poppy blocks on either platform. I will draw a winner on Sunday 4th July and post in both places on Monday 5th.
Well I think that’s a wrap for this latest Bedding Plants QAL post! Remember as your host I am here to help, so if you have any questions just comment below or send me an email to [email protected].
Looking forward to seeing a lovely crop of poppies!
I’m excited about these poppies and most appropriate as they are just beginning to flower in the garden . Thanks Jo very detailed explanations .