

Liberty Pants Panda Tutorial
Who wants to make a panda?!
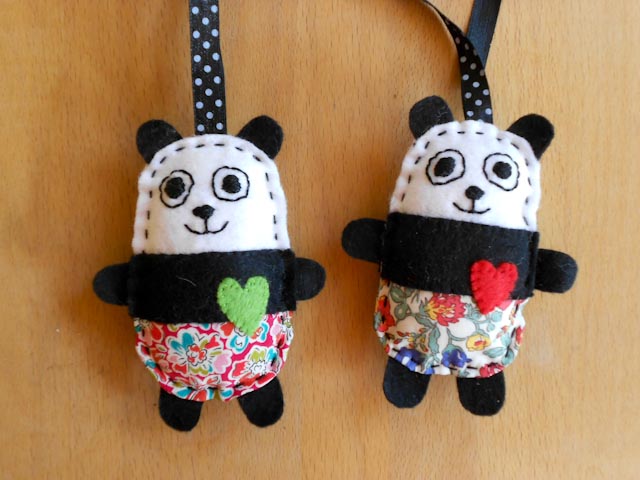
Not just any old panda, but one of these pandas wearing really cool Liberty pants ?!
Remember Sunshine and Sweetie up there? I did promise you a couple of months back that I would do a tute and here it is!
Please assemble:
Black and white felt plus a tiny scrap of contrasting colour (for the heart)
Small amount of Liberty Tana lawn (or some of the new Lifestyle cotton when it comes out!)
Black thread and black perle cotton 8 (or floss)
Glue stick
Toy filling
8″ piece of ribbon
The usual – scissors (small, sharp ones are best for fiddly cutting), needles and pins.
Now download the pattern PDF and print it.

Cut out your pattern pieces, pin to appropriate felt and fabric and cut out.

Place one of your white panda bodies on to the wrong side of your Liberty pants piece as above. Run your glue stick around the fabric.

Fold over and gently stick this to the panda’s body, evenly gathering it around. Repeat this with your other felt body and pants pieces.
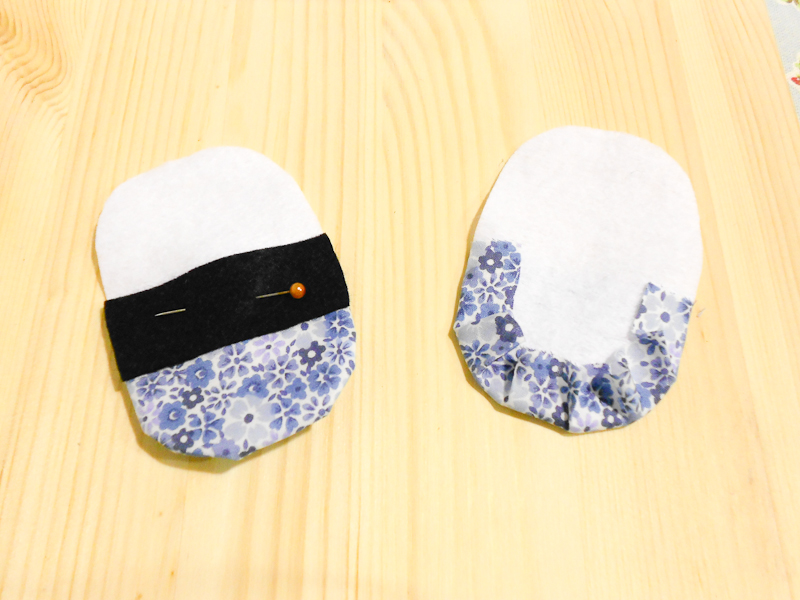
Pin your panda belt over the raw edge of Liberty fabric. It should be just below the half way point on the body, leaving more room for face than bottom.
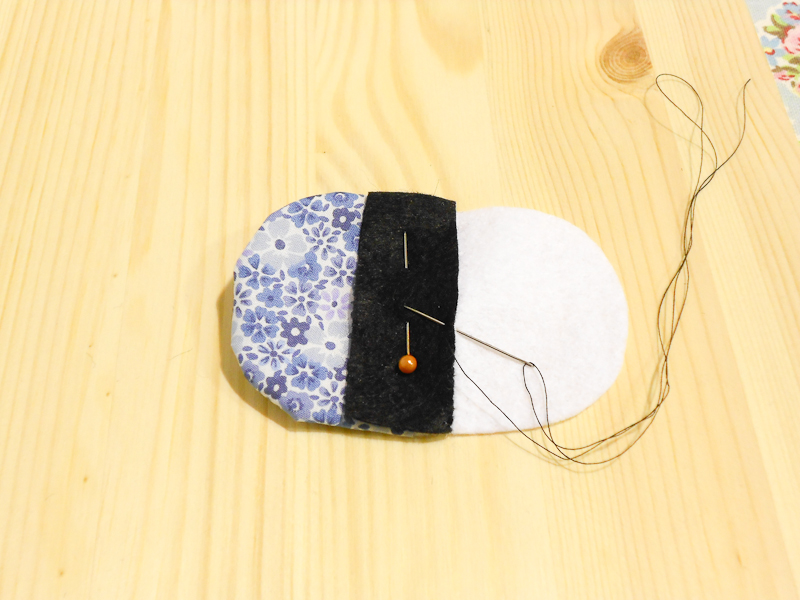
Using black thread, sew small over stitches along top and bottom of belt to attach to body. Repeat with other panda body.

Pin the 2 panda bodies wrong sides together, matching belt on both sides. Slip the feet, hands and ears into the appropriate spaces between the bodies and pin. You may need to trim the straight side of the ears about a quarter of an inch to get correct ‘ear appearance’. Fold ribbon in half and insert into seam as well.

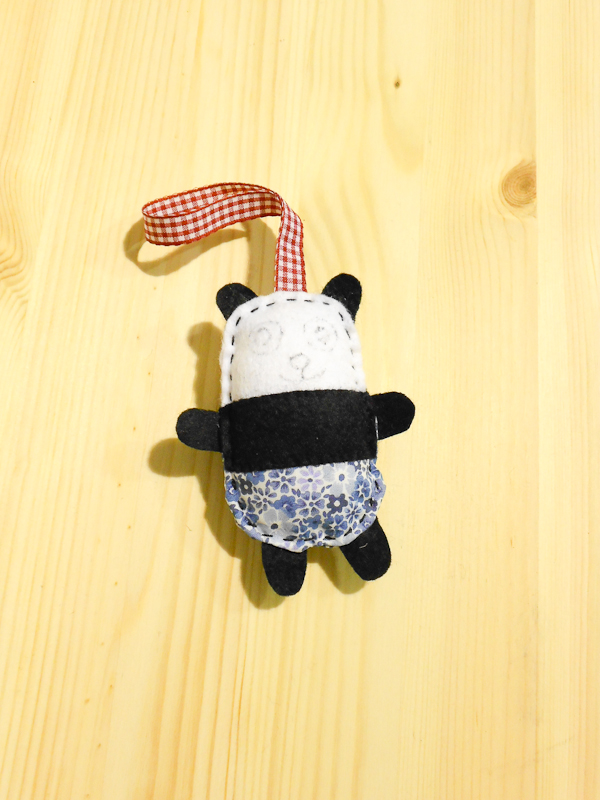
Using perle cotton and starting at one side of the head, sew around body close to the edge (but not so close that you tear the felt) using neat running stitches made in 2 parts. In other words don’t gather a few stitches on to your needle the way you would if you were hand quilting, send your needle down with stroke and up with the next. This is to ensure that the back stitches look as neat as the front.

Stop sewing once you get beyond the last hand, leaving a gap for stuffing.

Stuff gently with toy filling, taking care not to stretch the felt at the gap.

When you are happy with panda’s cuddliness sew up gap and fasten off.
Draw on face using top photos as a guide (though try to give your panda a personality of his own!)

Back stitch around inner and outer eyes and around nose and mouth. Fill inner eyes and nose with satin stitch.

Lastly, stitch you panda’s heart decoration on using tiny over stitches and matching thread.
Give your new friend a big smile because he’s so cute!!
I hope you enjoyed this tutorial and found it useful. You are welcome to use this to make as many pandas as you like, but please be courteous and credit me and also link to this blog where possible. Thank you!

The pandas were part of a new class I developed to make handmade party favours. I talked about this here. The ‘boys’ favour was a felt robot. I gave this class on Sunday (hence the photos for this tute) and also managed to make this Rainbow Robot for an extra demo. I though you might like to see him too.
It was a very fun class, I could hardly call it work!!
Those are some fancy pants pandas! Love the robot :oD
These pandas are so adorable! I will definitely be making a few of these 🙂 Thanks for the tutorial!
I love the pandas!! (And the robot!)
Loving this so sweet….
The cutest pandas ever. I see a need to make some soon too as I ordered some Liberty fabric today.
I cannot see any option to download the pdf – has it been removed?