
Winged Blog Tour – Meadow Applique

Welcome to my stop on the Winged Blog Tour!
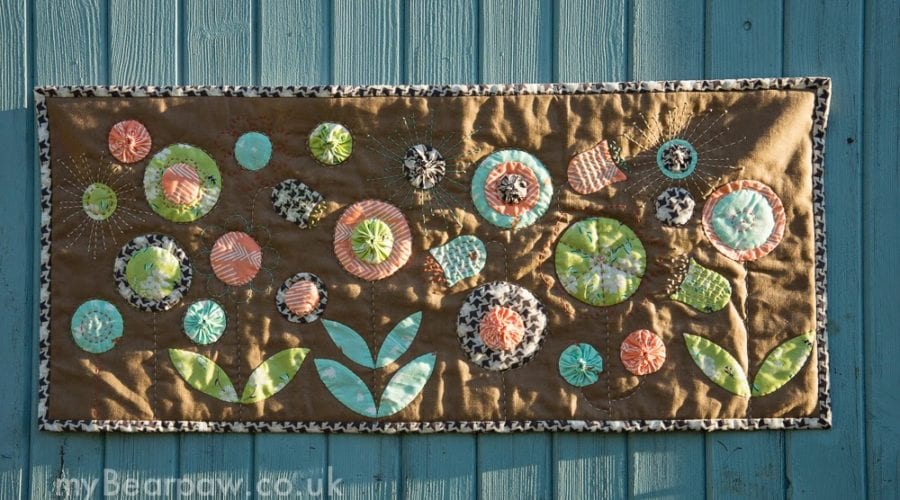
I am so delighted to be taking part and sharing this Meadow Wall Hanging I made with Bonnie Christine’s beautiful fabric line.

Once you’ve had a good read here you must check out some of the other posts on the tour – so much wonderful inspiration! I especially loved the previous stop Celebrate Life With Us, Karen made such sweet capes for her children and the photos of her little ones playing in them are just adorable!


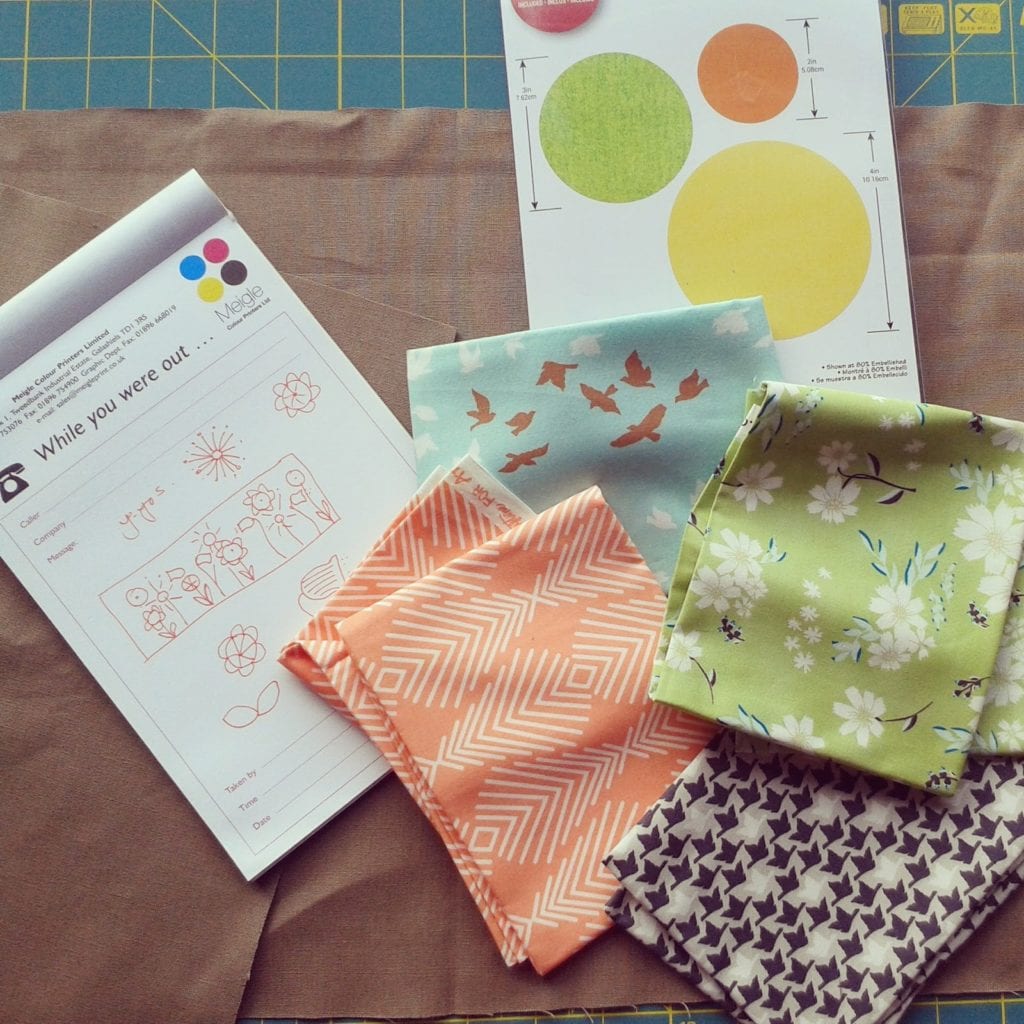

I have been using my Sizzix Big Shot a lot more lately and I recently bought some new circle dies. This seemed like the perfect opportunity to try them out!
My idea was to play around with some simple shapes, needle-turn appliqueing them to a taupe Essex Linen background, without too much planning. So I cut 3 sizes of circles with my Sizzix along with some simple leaves and seed head shapes (cut with scissors!).

I started off by making some of the larger circles (4 inch) into yo-yos. I love making yo-yos! Here’s a quick tute:
You will need to use a heavier thread like Aurifil no. 12. Perle cotton no. 8 also works well. Make a double knot in one end and start turning the edge of your circle over a quarter inch to the wrong side. Sew a running stitch with neat gathers.

Sew all the way round, gathering up your circle edges so it looks like a little shower cap!
Gather tightly and thread your neddle back and forth through a couple of the gathers a few times to secure. Turn the gathers slightly out towards you so you can knot your thread securely where you won’t see it. Cut thread.

Flatten out the yo-yo, pushing the gathers back down, and press from both sides. Your yo-yo is now ready to be appliqued.

I really wanted this design to grow organically, like a real meadow, so I started placing my circles, yo-yos and shapes in a pleasing arrangement and sewing them down.
To begin with I used the foil and card method of preparing my larger circles for applique (check out the excellent Sarah Fielke Craftsy tutorial on You Tube), but later I got too lazy and just turned my edges under as I went, which worked just as well for me.

After appliqueing some of the circles and yo-yos I tried out some embroidery to see if I could get the effects I wanted. I just used running stitch and French Knots and DMC perle cotton 8 in a few different colours.

I’ve been working on this over the last few weeks whenever I had the time to sit down and relax. The days are very short now and have been particularly gloomy so the lovely fresh colours and the Spring-like feelings the fabric evokes have been a real tonic.
Also the very fine quality of the Art Gallery fabric has worked especially well for hand applique, it is a joy to work with.

Here is the piece with all the hand applque and embroidery finished. I decided that any more details could be added as hand quilting. So I basted it and spent a lovely evening hand quilting stems for the flowers and extra outlines to give it some nice texture.

I bound it in Feather Flight Acorn at around 10.30pm Saturday night, and lo and behold the sun finally came out the next day! I had to be at my studio teaching my last full day workshop of the year, so my husband very kindly took the finished photos for me against our barn door.

Well I hope you have found some inspiration in my little project. I really wanted to show how a few simple techniques and a relaxed attitude to creating and playing with fabric could produce something worthwhile. Of course having beautiful fabric to begin with really helps!
Next up on the tour is Little Miss Shabby, so please check out her post tomorrow.
And don’t forget to take a look at the whole tour or use the hashtags #wingedfabric #wingedblogtour on Instagram!
Your flowers are awesome! Love the quilting you did too.
Love, love, love this! Thanks for sharing how you went about it. I'm taking Sarah's Craftsy class and am so glad I purchased it. I love how she teaches such varied techniques in it. Your applique is inspiring me to get started.
Oh my, this is so cute! I love how 'relaxed' it is, yet rich with color and texture. Your embroidery & design are beautiful, too. And tell your husband that he did a nice job with the photography!
Of course you rocked this but I have to say I love how Jonathan photographed it….sun and shadows…awesome!:)
Love this flower technique :o)
This is beautiful, it is amazing what you can do with just 4 fabrics. x