
Trip Around The World Cushions Tutorial


Those of you that know this technique will be able to just glance at the photos and move on I should think. But for those of you that are new to patchwork, or just bought my kit, this tutorial will hopefully be a big help!


You will need 4 different strips of fabric – 2½ inches x WOB (width of bolt).

Sew these together along their long sides to form one stripey piece.

Press the seams to alternate sides (rather than pressing them open or all to one side), this will make matching your points a little easier later.

Fold your pieced strips in half on the long side, right sides together, and sew along this seam to form a long ‘tube’.

Using your rotary cutter, mat and ruler cut 2½” strips from one of the short ends of this tube. You will need 16 of them.

Place these into 4 separate piles (of 4).

Using a seam ripper carefully unpick one of the seams. Lay your strip out flat.

Unpick the next seam along and lay next to your first strip.

Keep unpicking a different seam each time until your 4 strips show the squares moving in a diagonal pattern.

Sew these 4 strips together in this order. Press. (I’ve turned this one around after I’ve sewn it).

Make your next block in the same way, and after you have unpicked a seam and flattened a strip you can lay it next to the block you have already made to check on your layout for the next one.

To create the diamond shape you need to make sure your next block is a mirror image.

You can just make the block, then turn it around and hope for the best, but I find it’s quite helpful to build your blocks in this way.

Sew these 2 blocks together. You now have half a cushion cover.

Keep building your next 2 blocks, you can check them both out before you sew them together if you like.
I chose a directional print and decided I wasn’t bothered about the trees being all the same way up.

I’m sure with a little more thought I could have had them all the same way up – why don’t you try that!

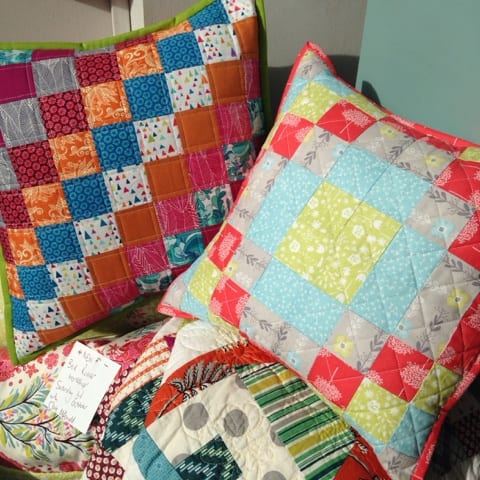
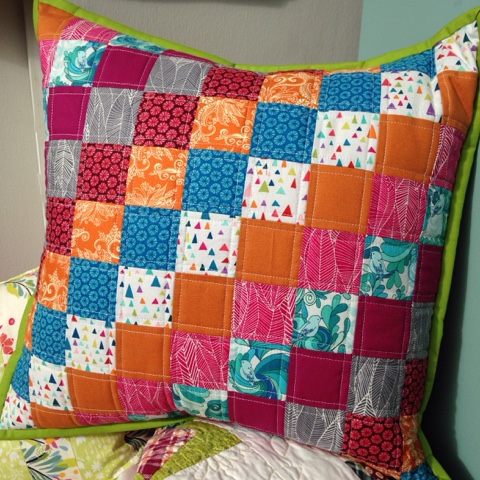
Here we are with all 4 blocks sewn together. At this point you could just make this into a cushion cover without quilting. Or sew a few more of these and make a quilt!

To make this into a quilted cushion cover see the bottom of this post. Meanwhile let’s have a look at the other version.
This one is called Trip Into The Distance. This makes an 18 inch cushion cover.
This time you will need 9 different strips of fabric – 2½ inches x WOB (width of bolt). This works best if you get a good contrast between the different fabrics.

As before sew your strips together…

Press the seams alternative direction

Fold your pieced strips in half on the long side, right sides together, and sew along this seam to form a long ‘tube’.

Cut 2½” strips from one of the short ends of this tube. This time you will need 9 of them.

As before unpick one seam and lay your strip out flat.

This time we are just making one big block, so keep going with all 9 strips.

At this point you can decide which strip you want going through the centre diagonal line by moving the strips around.

I decided to have a lighter fabric in the centre. Sew all the strips together. This one is so easy!
Now we are going to quilt our cushion cover.

Lay your finished block on top of the wadding piece and press from the fabric side. You can spray baste or use safety pins if you wish, although the wadding will naturally adhere to the fabric once you’ve pressed it so you shouldn’t need any other fixing.

I machine quilted a straight line a quarter inch either side of each seam line. This creates a nice lattice type pattern.

For the first cushion cover I quilted a diagonal grid.

Using a ruler and your Hera marker or removeable pen mark diagonal lines that cut through the centre of each square. Mark in both directions to form a diagonal grid.

Machine quilt along all marked lines using a slightly longer stitch than you use to piece with.
Let’s finish our cushions now, this is the Trip into the distance (18inch) cushion.

Take your remaining piece of fabric for the back, cut 2 pieces measuring 13 x 18½” (for the 16 inch cushion cut 11 x 16½”). Turn over a half inch, and then another half inch on one of the 18½” sides (or 16½” for the other one), pin and then hem. Repeat on other piece.

Press and then place these 2 back pieces on top of your cushion front, with wrong sides together, overlapping the back pieces. Pin and sew all around the cushion with a ¼” seam.

Now check out my single fold binding tutorial to see how to finish these!
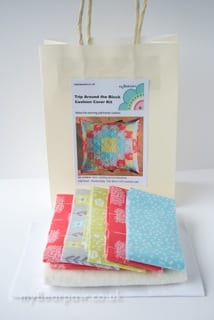
You can buy your kits here.
I do hope you enjoyed this tutorial. If you use this tutorial please remember to credit me and link back to the blog on any social media (if appropriate).
a quilt form this block is on my list but i will have to live to be a 100 to make all that is on it
Hey…I recognize the fabrics on the pillow on the right! *wink, wink* xoxo
louis vuitton outlet
coach outlet online store
north face outlet 70% off
fitflop sale
abercrombie kids
fendi
jordan 6
fitflops
north face outlet store
michael kors outlet
gucci outlet online
new balance
coach purses
hermes bag
hermes bags
louis vuitton belt
cheap jordan shoes
hermes outlet
toms shoes
converse shoes sale
ferragamo shoes outlet
louboutin shoes
coach outlet store
polo factory outlet
north face clearance
coach factory outlet
michael kors factory outlet online
jordan shoes
christian louboutin outlet
celine bag
michael kors sale
reebok shoes outlet
abercrombie promo code
converse shoes
ralph lauren extra 25% off
toms outlet
nike high heels online
lebron 12 shoes
abercrombie and fitch
jordan retro 11 legend blue
marc jacobs outlet
kobes shoes
coach bag
kids north face jackets
1015wjl
1nike sale
michael kors outlet handbags
canada goose clearance
dior outlet online
ghd flat iron
cheap coach handbags
pink jordans
juicy couture
wholesale jordan shoes
michael kors handbags sale
salvatore ferragamo outlet
ray ban sunglasses
abercrombie
michael kors handbags clearance
ghd hair straighteners
north face jackets clearance
hermes outlet online
canada goose jackets
http://www.coachoutlet.com
ray ban sunglasses
nike free
mont blanc
mbt shoes for women
kate spade outlet
celine bags
nike free run
oakley sunglasses outlet
salvatore ferragamo belt
cheap jordans
coach outlet
nike shoes
michael kors outlet online
prada outlet
nike nfl jresey
air jordan retro 6
oakley sunglasses outlet
new balance sale
air max
hermes belt
joe's new balance
abercrombie outlet online
coach outlet online store
girls north face jackets
ugg boots clearance
1015wjl
ugg boots on sale 70% off
fitflops sale clearance
michael kors discount handbags
ralph lauren factory store
coach handbags outlet
canada goose outlet sale
rolex watches for sale
north face jackets clearance
new balance outlet store
burberry outlet
michael kors outlet
under armour clearance
abercrombie and fitch outlet online
north face denali jacket
fitflop outlet
coach outlet online
kids jordans
mbt outlet
canada goose jacket outlet
michael kors outlet
michael kors outlet store
new jordans
polo factory store
coach outlet store online clearances
mont blanc pen
nike outlet store online
fendi shoes
clarks shoes outlet
timberland outlet
michael kors outlet 75% off
cheap nike shoes
coach factory outlet online
cheap purses michael kors
air jordan 11 legend blue
north face jacket
kobe bryant shoes
abercrombie and fitch outlet
kobe bryant shoes 2015
jordan 12
nike air max shoes
air jordan 13
clark shoes outlet
canada goose outlet
gucci handbags
20151019yxj-1
mont blanc pens sale
air max 2015
ferragamo outlet
ugg boots sale
gucci bags
fitflop shoes clearance
north face coat
ralph lauren polo shirts
michael kors handbags
louboutin outlet
coach handbags
north face outlet 70% off
nike heels
coach purses
prada sneakers
coach factory online sale
cheap vans
coach tote
jordans for girls
fitflops sandals for women
retro jordans
michael kors outlet online
canada goose jackets
coach purses outlet online
marc jacobs handbags
michael kors watches discount outlet
ralph lauren clearance
reebok pumps for sale
polo shirts for men
canada goose outlet
jordan 6
kate spade handbags
air jordan 11
nike outlet online
ralph lauren polo outlet online
lebron james shoes
cheap canada goose jackets
wholesale jordans
hermes scarf
clearance nike
fitflop outlet
cheap kd shoes
michael kors handbags sale
hermes outlet
20151019yxj-2
Hi dear, I like your post so much, and it is very good. Hope that we can communicate with each other. I want to introduce an aso services, I try it and I feel it is so good to us beginners.