
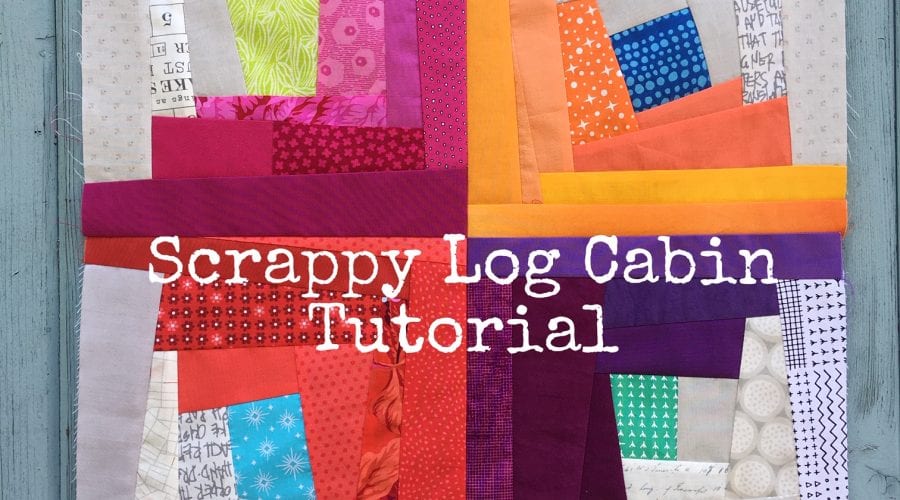
Scrappy Log Cabin Tutorial

Welcome to my stop on the Keep Calm Brit Hop! And thanks so much to Jo Westfoot for getting us UK based quilting businesses together and using our blogs and sewing wisdom to help keep you all distracted and occupied through the lockdown period. You can read Jo’s intro post here.
 I’m delighted to welcome any new readers who are following the bloghop, I hope you’ll stay and look around!
Today I’m going to be sharing a tutorial and it’s one of many free tutorials and patterns, from embroidery to crochet, that you can find by clicking on the ‘tutorial’ tab above.
Just a little bit about me as an introduction: I’m Jo Avery and I’m a quilt and embroidery designer and teacher based just outside Edinburgh. I have a shop and studio in the centre of Edinburgh, myBearpaw. Though the classes are cancelled and the shop is shut we are still providing an online service and you can view our fabric and yarn selection here.
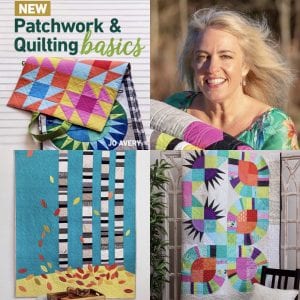
My first book, New Patchwork and Quilting Basics, was published in February. You can read more about it in this blogpost and buy a signed copy from my website here (where you can also view my patterns).
I also host the Thread House sewing retreats alongside Karen Lewis. As we have also had to cancel our Summer Retreat we are hosting a Virtual Retreat next weekend! You can read all about it and book a place here.
Right let’s get on with the Tutorial!
I’ve always loved a Log Cabin block and in fact it’s the subject of my Beginner’s Patchwork and Quilting class, but right now I can’t be bothered to do lots of accurate piecing, I just don’t have the concentration. I also want to try and make a dent in my heaving box of scraps and therefore avoid using up precious stash that I might need for commission quilts before the shops and manufacturers re-open.
 So I’ve been playing with a Scrappy Improv Log Cabin and I thought this would make a good subject for a tutorial.
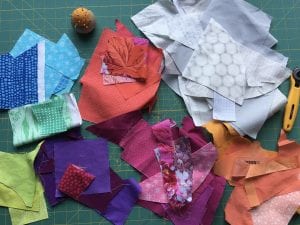
First of all have a good dig around in your scraps and pull out some different colours. Or perhaps you are the sort of person that already has their scraps organised into different colours? Well good for you, now all that hard work will pay off 😉
I’ve gathered together 5 different piles, orange, dark orange, purple, hot pink and a larger pile of low-volume fabric ( fabric that is light and neutral but with a pattern). Then I’ve also pulled 4 or 5 contrasting scraps in turquoise and green.
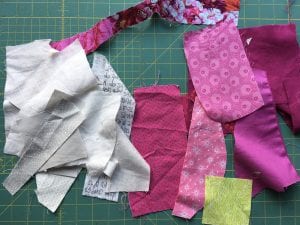 I’m going to start off with the pink fabrics and I’ve chosen some of the low-volume and a green square as a contrast.
We are going to be improv piecing now and that means I’m not going to be telling you the size of any of the pieces, you are going to decide that for yourself. If the piece if too big you will trim it and if it is too small you can add more pieces. There is nothing to fear as you are only playing with scraps so you have very little to lose if it doesn’t work out.
So just take a deep breath, relax and prepare to have some fun!
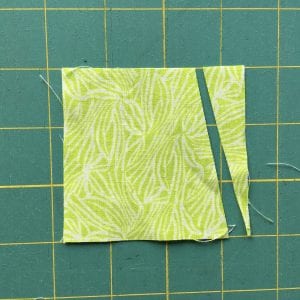
 This green square just so happens to be a perfect square and we don’t want that so I’m trimming an angle to ‘rough it up a bit’. We are making a deliberately wonky log cabin. If it only looks slightly wonky then it might look like you were trying to make a perfect log cabin but aren’t very good at patchwork. And we all know that isn’t the case, right??!!!
 The green piece is our centre and we are now going to build our cabin around it.
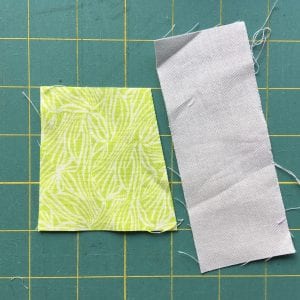
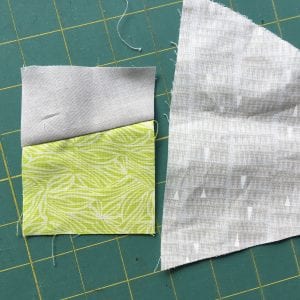
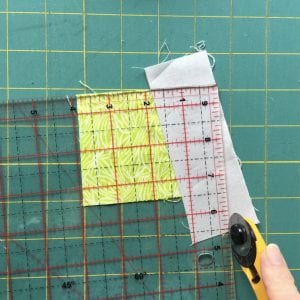
I’ve found a pale grey strip that I’m going to sew to one side. Once sewn I’ve trimmed it with a square ruler and have added a low-volume strip to the next side around.
Once that’s trimmed and tidied it’s time to add the colour.
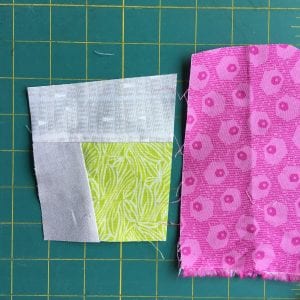
We will be piecing two sides of the log cabin with low-volume and the other two sides with the colour, in this case pink.
If your scrap happens to have an angled side like the second pink strip below, then keep the shape rather than trim it straight.

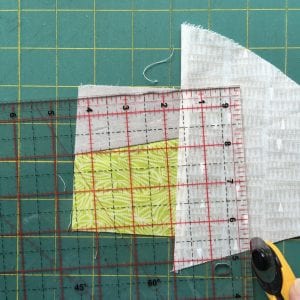
 When you trim your block you just need to make sure that your sides are straight, you don’t need to make it a square at this stage.
Once your centre has been surrounded by at least one strip on each side then go round again.
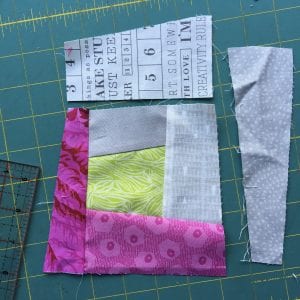
 Try to leave your longer scraps till the later rounds but if you have a couple of smaller pieces you really want to use then sew them together before piecing to the sides as I’ve done with these two pinks.
Once you’ve pieced another round with low volumes to one side and pink to the other then trim the sides again.
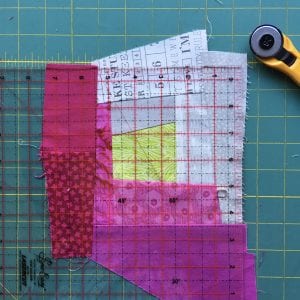
 Now we are on to our final round. We want this block to end up as 9 1/2″ so bear that in mind as you add your final strips. On the right I am trimming the round halfway and also checking the size to see approx how wide my strips need to be on the other side.
 The pink strip I’ve added at the top on the right isn’t quite big enough but I know I will be trimming some of the low-volume away and I really want to use that pink strip!
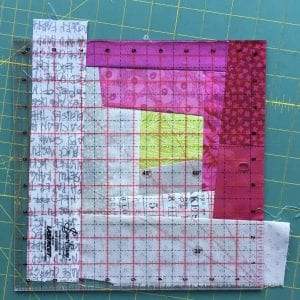
I made sure that my last pink strip was wide enough so that I had plenty of leeway with my trimming. If you don’t quite have the right size and colour of scraps then feel free to find something in your stash (I did here!).
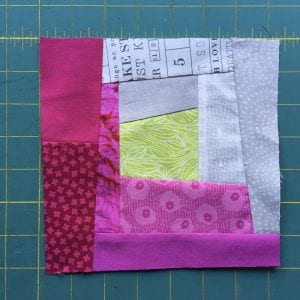
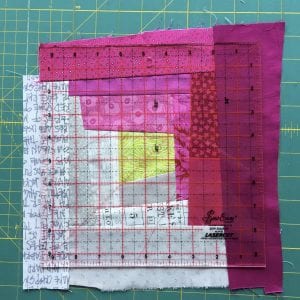
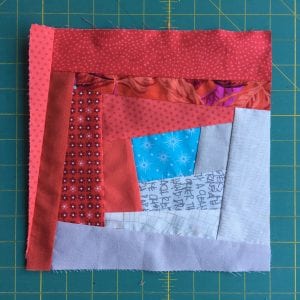
I’ve used my 9 1/2″ square ruler to make a final trim to the block.
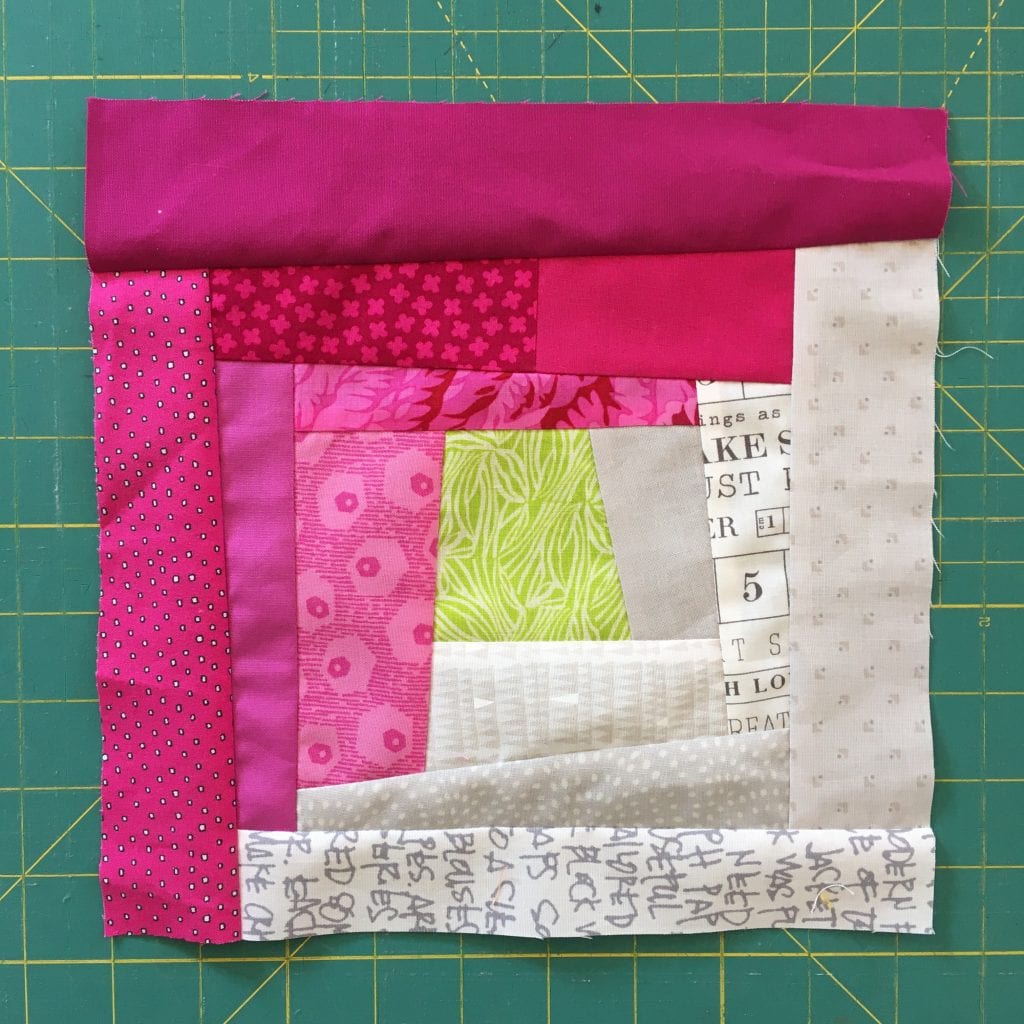
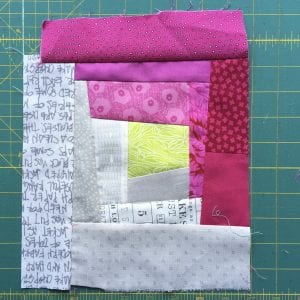
 And it’s finished! Or at least this quarter block is finished because we had all those other scraps to play with remember?
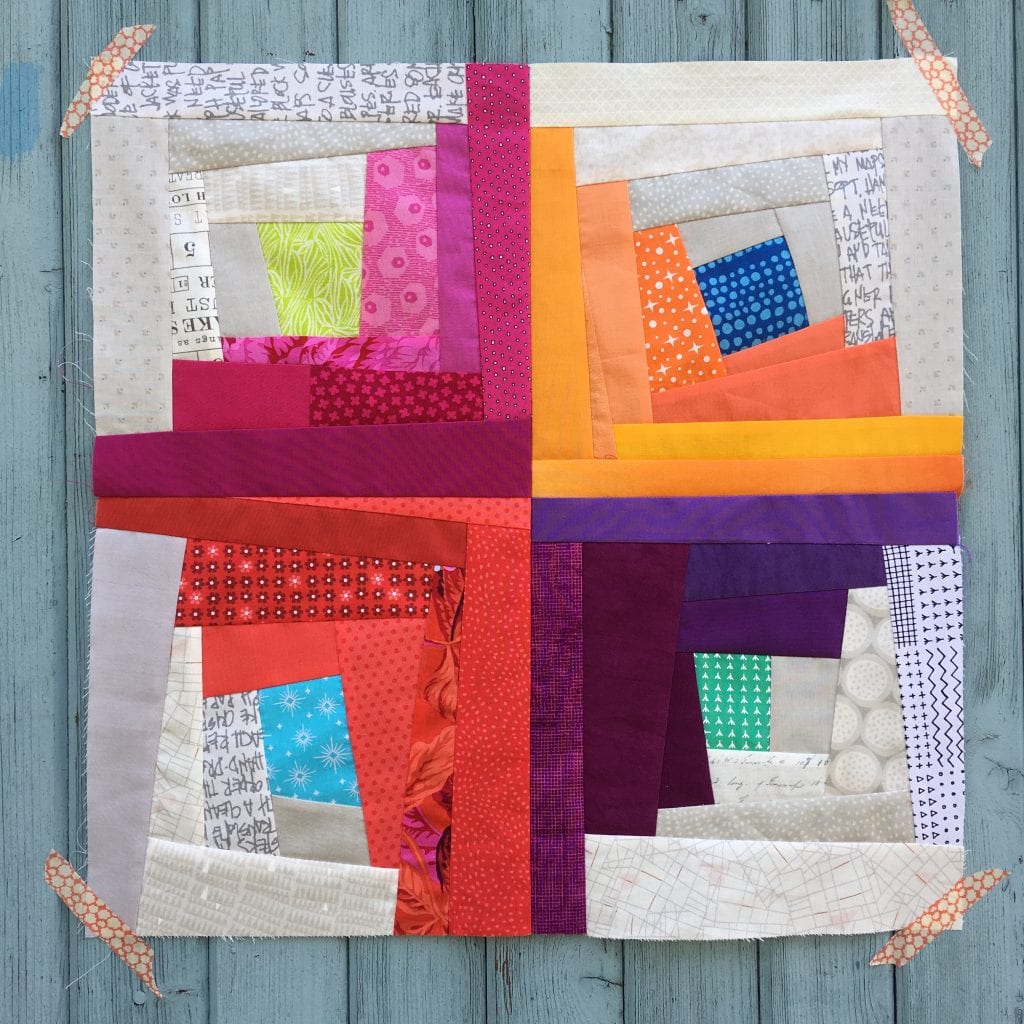
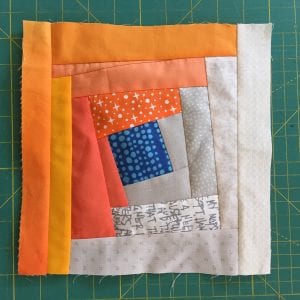
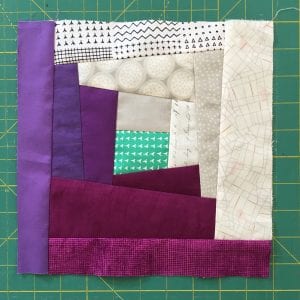
I went on to use up the scraps by making four blocks, each in a different accent colour with a different contrasting centre.
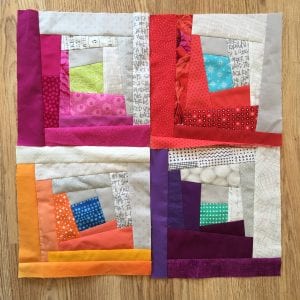 Now I had to decide how these should be put together.
Should they line up like a traditional Log Cabin on the right?
Hmmm, I do like this arrangement…
But then I tried this and I think I prefer it. This is a fast, fun and scrap busting 18″ block!
I was having so much fun I even wondered what a whole quilt of these would look like. So I had a little play around on the layout app on my phone…
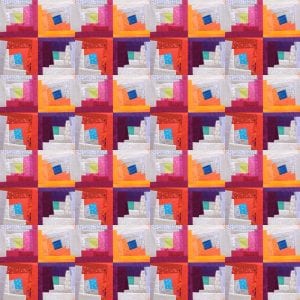
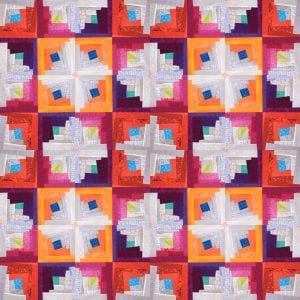 Either of these could be very effective quilts and it’s a comfort to know that should this situation go on for longer than we all hope I could still find enough scraps around to make one of these and keep myself productively occupied!
Well I do hope you have found something of interest here and perhaps you will even give this a go yourself?!
If you do please tag me in any posts you share! You can find me on Instagram as @joaverystitch. I also have a page for my shop on Facebook and a Facebook Group where I share all sorts of videos and Facebook Lives, you would be welcome to join!
Meanwhile why not check out all the other stops on the hop and see what everyone else has been up to!
Saturday, 28th March: Jo Westfoot | The Crafty Nomad
Sunday, 29th March: Amy Ball | Coffee Rings Studio
Monday, 30th March: Jo Hendy | Villavin Crafts & Retreats
Tuesday, 31st March: Nicola Dodd | Cake Stand Quilts
Wednesday, 1st April: Rachel Concannon | Rachel’s Textiles Studio
Thursday, 2nd April: Lou Orth | Lou Orth Designs
Friday, 3rd April: Sonia Spence | Fabric & Flowers
Saturday, 4th April: Fi | Pins & Needles Grayshott
Sunday, 5th April: Sarah Ashford | Sarah Ashford Studio
Monday, 6th April: Abigail | Cut&Alter
Tuesday, 7th April: Karen Lewis | Karen Lewis Textiles
Wednesday, 8th April: Joanna Kent | Crafty Quilter
Thursday, 9th April: Jo Avery | Jo Avery Stitch
Friday, 10th April: Pam | Sew Hot
Saturday, 11th April: Round Up Post | The Crafty Nomad
Scrappy and Log Cabin in the same sentence?? You are talking to me, for sure! I love this and will be spending some time soon digging through my scrap tub to make a few (or 100) of these beauties! Thanks for the creative idea and tutorial!