

Aurifil Rainbow Mini Quilt Text Tutorial with Templates
Have you seen the beautiful ‘Andra Tutto Bene’ Rainbow mini quilt that the Aurifil team are sharing?
Inspired by the stories of Italian children who turned to art as a means to cope with new restrictions and drastic changes in their day to day lives. They adopted a few simple words to spread hope and positivity throughout the country – Andra Tutto Bene, which roughly translates as ‘Everything will be ok’. These words, accompanied by a rainbow and other vibrant illustrations, can be seen on posters and banners throughout the country.

Aurifil wanted to find a way to carry them forward — to bring a message of hope and positivity to our own creative community. They have teamed up with the very talented designer Sheri Cifaldi-Morrill of Whole Circle Studio who has created this beautiful mini quilt pattern using FPP.
The pattern is available as a free download on the Auribuzz blog here, where you can also read much more about it.
 Aurifil asked a few of their designers to make a version of the quilt (not necessarily the actual pattern) and document different ways to create the message part. You can see fabulous versions by Pat Sloan and Wendy Shepperd, plus check out Sheri’s blog post where she shares lots of info about typographic customisation, including embroidery and the use of an inkjet printer.
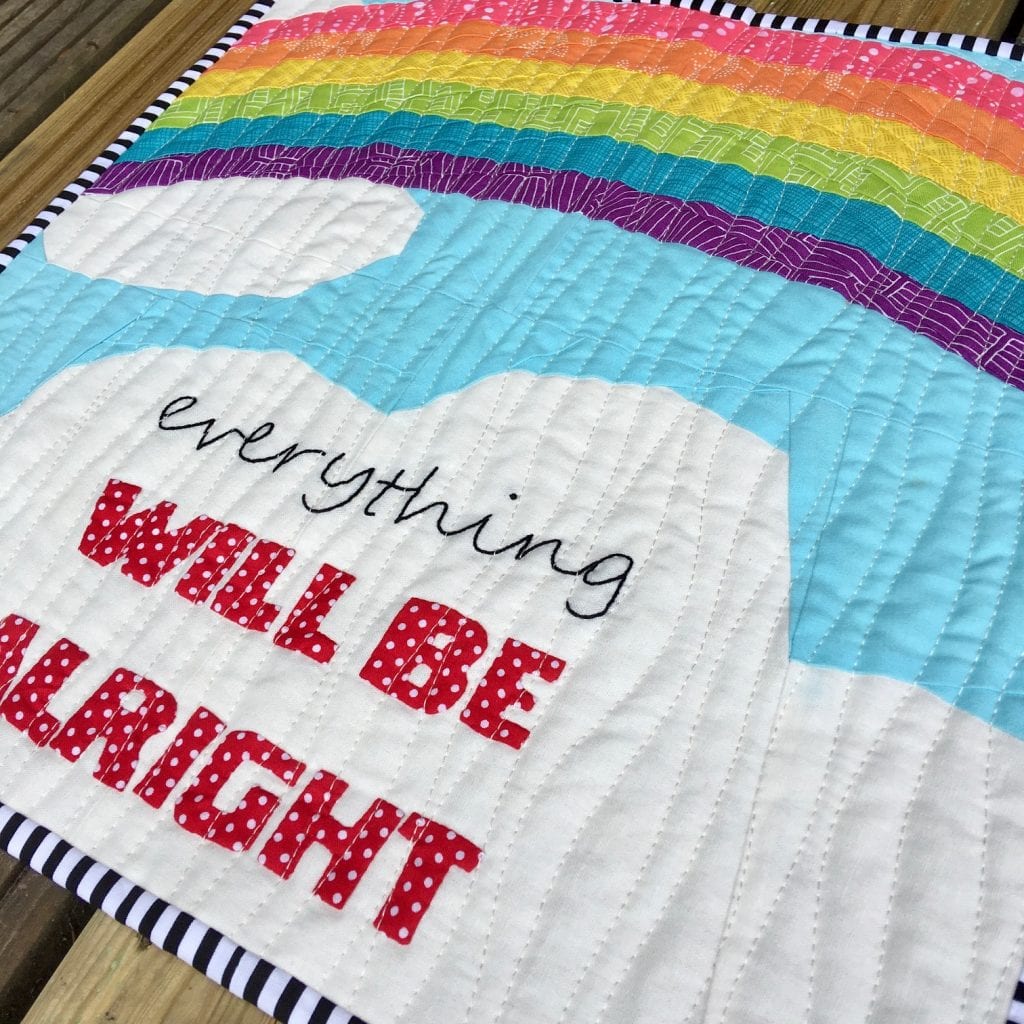
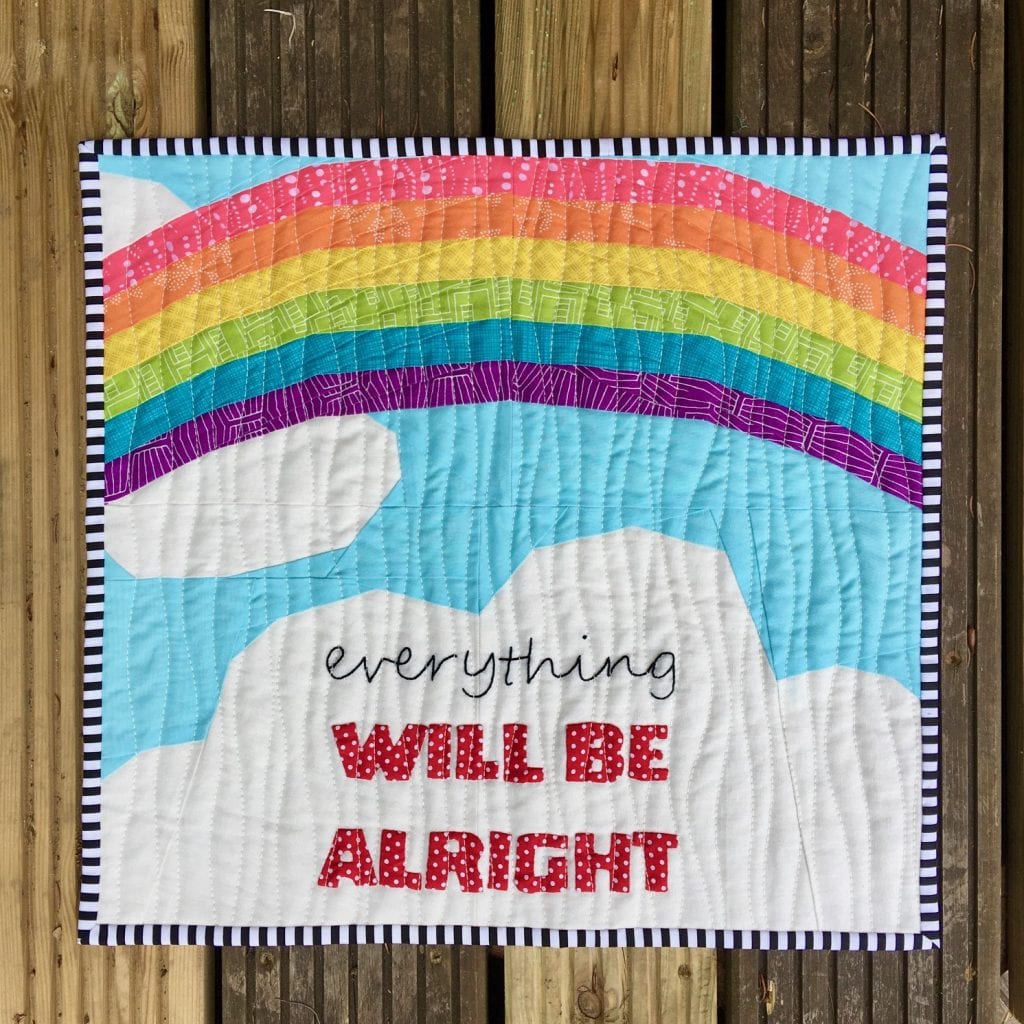
And this is where I come in! I love the mini quilt and hadn’t yet made anything rainbow themed (which is de rigueur for crafters in this lockdown season!) so I was very happy to join in and decided to use both of my great loves, embroidery and needle-turn applique, to create my text.

Sheri’s pattern is really excellent and I enjoyed choosing my rainbow fabrics. Thinking ahead to the embroidery I would be adding later, I chose Essex Linen in Unbleached White for the clouds.
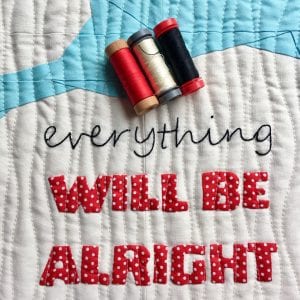
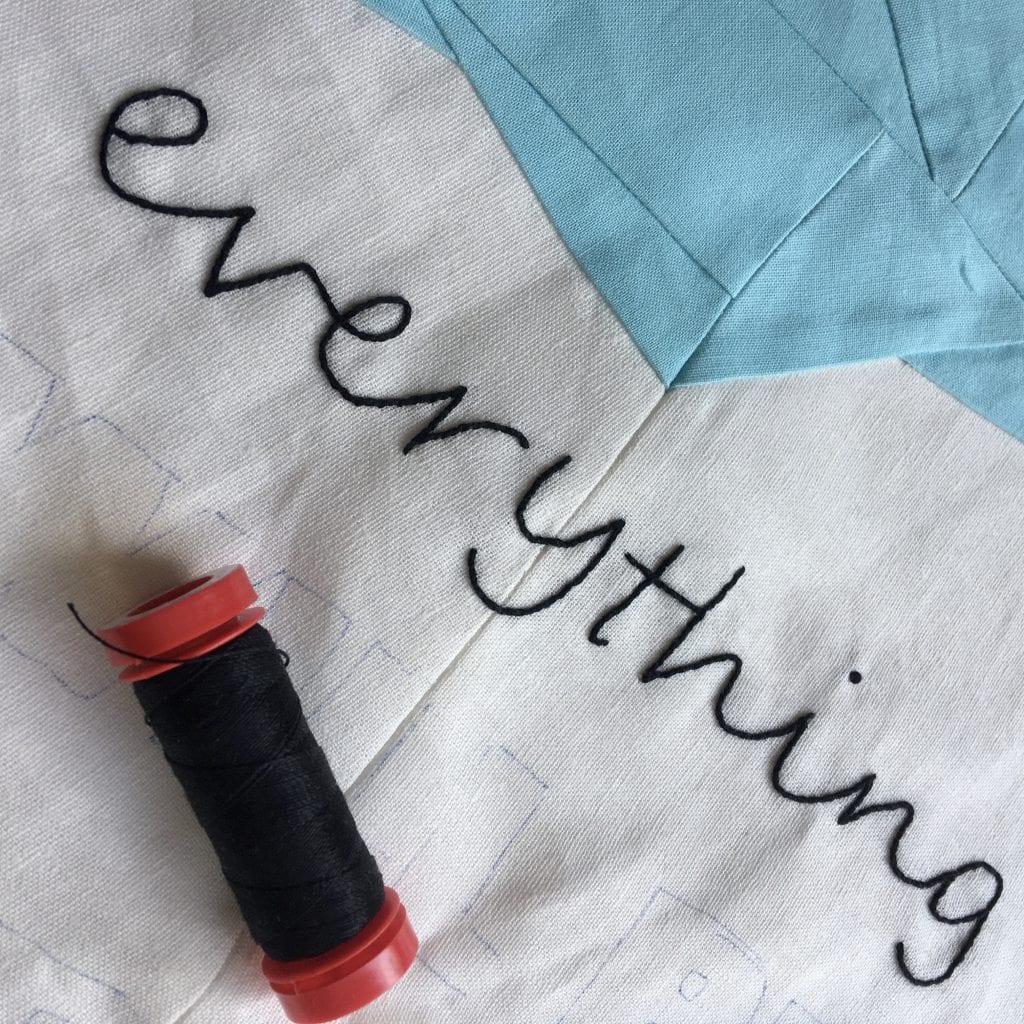
 Once I’d made the top, I grabbed some Aurifil 12wt cotton for the text (I chose black ).
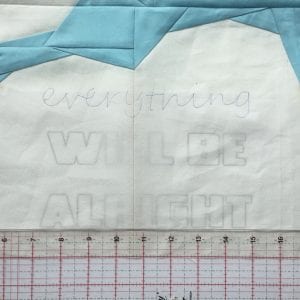
Next download the template from the link below, print off the 2 pages and trace from the ‘everything’ page first, before tracing ‘will be alright’ underneath. I used a ruler to make sure I was getting the words in a straight line. Use a water soluble pen or a pencil to mark your pattern.
I used a light box to help with this. If you don’t have one try making a quick and easy version to help with your tracing. Take a small shallow cardboard box with no lid and pop your phone inside it with the torch function switched on. Place a large square patchwork ruler on the box and trace your pattern on top of this!
Download your text templates from here
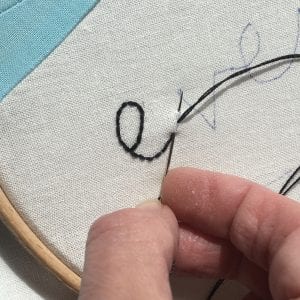
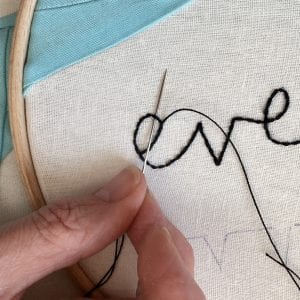
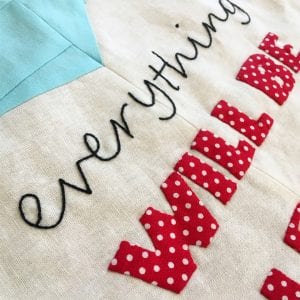
I used two strands of the 12wt cotton and a back stitch to embroider the word ‘everything’.
I decided to ‘whip’ my back stitch to give it more definition (this is also a great tip if your stitches aren’t very even as it hides a multitude of sins!).
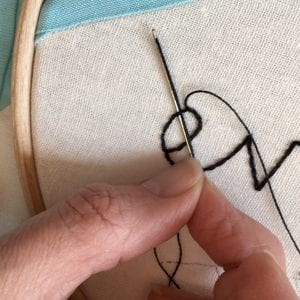
Once you have back stitched the whole word take a single strand of thread and whip your back stitch by taking your needle under each stitch and ‘wrapping’ the single strand around it.
Try not to catch any of the linen with your needle, the thread only goes through the stitch. If you are finding this difficult then turn your needle around so that the end with the eye goes through the stitch first.
Now all you have to worry about is stabbing yourself in the hand!
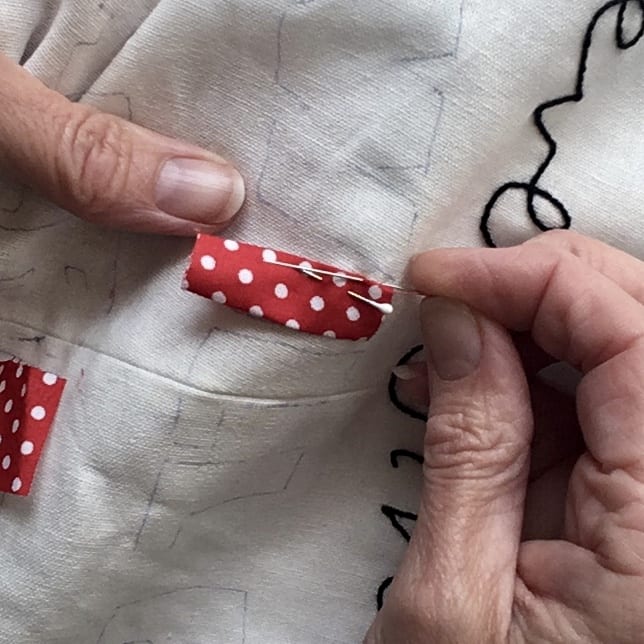
Next cut out the letters for the applique version of the pattern.
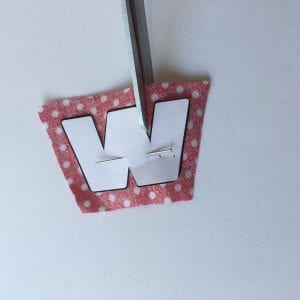 These do not include seam allowance so you will need to add this on. I usually use a 3/16th seam allowance for needle turn applique but these letters are very small so you might need to go as small as an eighth of an inch. Try for 3/16th and you can always trim a little more away as you stitch. For areas usch as the deep ‘v shape’ in the ‘w’ above snip right down through the seam allowance as shown.
I used Aurifil 80wt in a matching colour (red) for the applique stitching. This beautiful thread is so fine that even my clumsiest stitches will just melt away and appear invisible!
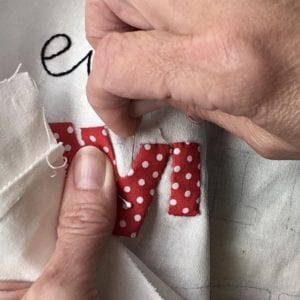
The letters will overlap too much if you try to pin them on together so pin and stitch them one at a time. The easiest letter to start with is the ‘I’ so I have started with this to show you a close up of the neat slip stitch you should use. As the ‘I’ has straight sides you can ‘finger fold’ these under before pinning in place. Stitch folded edge to background using tiny slip stitches, just catching the fabric very close to the fold and stitching straight down without slanting your stitch. Stitches should be at least the same distance apart as your seam allowance. Any ‘travelling’ between stitches should happen at the back of the work (your stitches should look longer there).
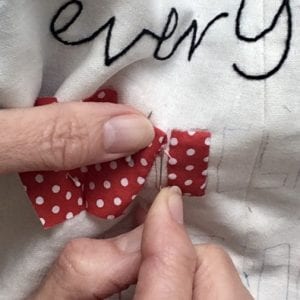
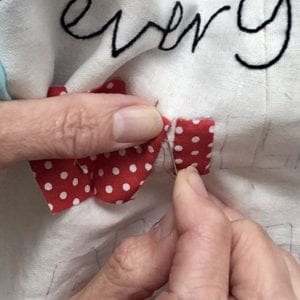 When it comes to more difficult shapes like the ‘W’ always start on a straight side, pinching the edges under ahead of your stitching. When you get to any ‘dog ears’ as in the photo on the left use your needle to push the excess fabric well inder the seam, as in photo on the right. Once dog ear is tucked under make your stitches closer together there to secure.
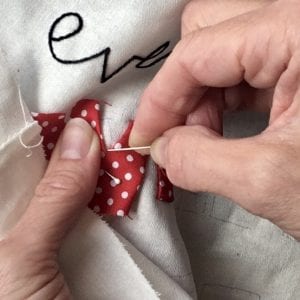
For V shapes as in the top of the ‘W’ you need to make sure that you have snipped right through the seam allowance before folding the edges under. Take your needle and use it to ‘swoop’ under the seam, taking all the straggly raw edges under at the same time before stitching down, as shown first in the left hand image and secondly in the right.
A damp needle will be very helpful here but don’t put it in your mouth! Instead keep a small moist sponge beside you for wetting your needle, or wet your fingers first and use these to wet your needle.

 For the small shapes in the centre of ‘B’ and ‘A’ it’s best to start your letter with these areas first, cutting a tiny hole in the fabric with small snips radiating around it. Then use your needle to ‘swoop’ around and under the seams as before. Cut the smallest amount possible to start with, you can always cut more if you need to. Once the ‘holes’ are stitched in place you can sew the outline of the letter.
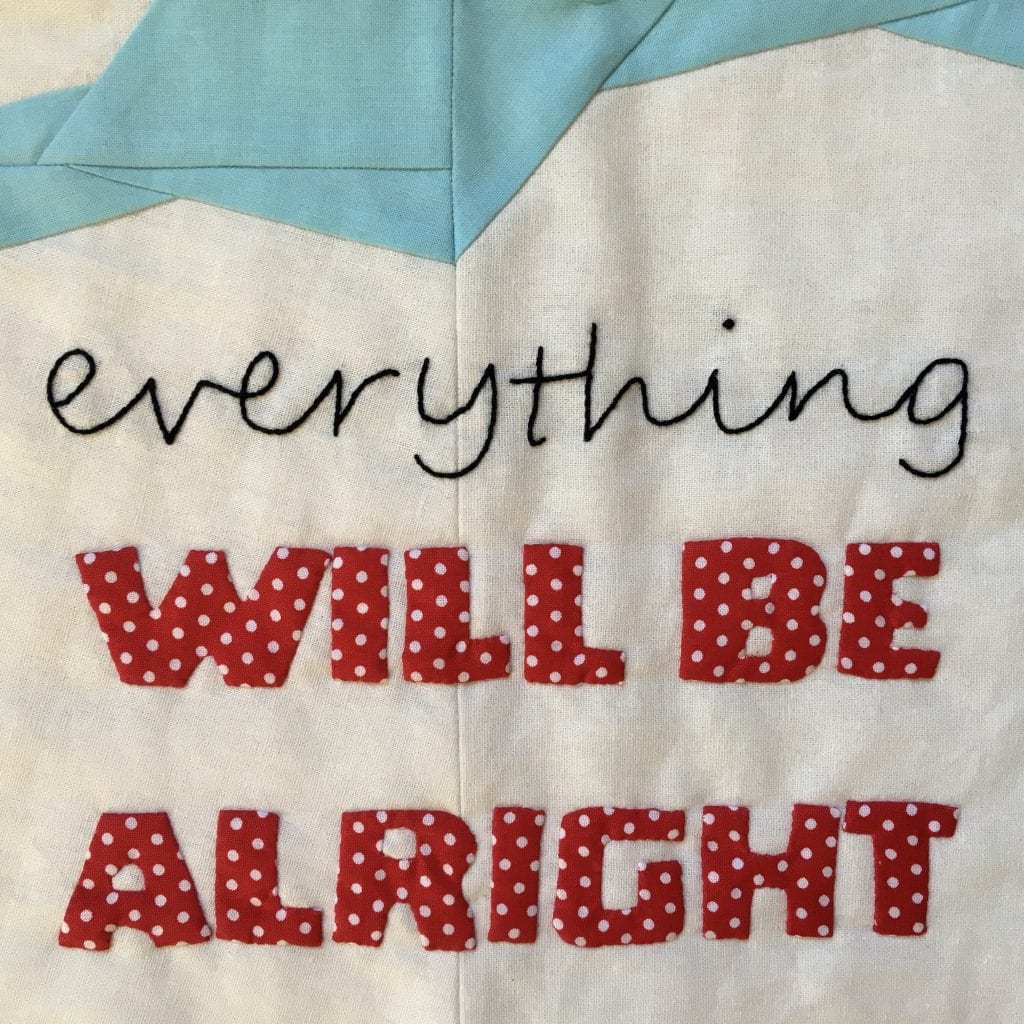
My letters don’t look exactly the same as the original patterns but that’s okay. There is no need to follow the traced pattern slavishly, it is just a guide and it is more important that your letters are neatly sewn with a consistent amount of seam allowance. And that you can read them!
I chose to say ‘alright’ rather than ‘okay’ as it seemed a more natural anglicised phrase for me. I loved the Italian words but there was a limit to how much I could fit on!
Once finished I used Aurifil 28wt in cream 2000 to machine quilt wavy lines using my walking foot. I think these look a bit like rain which is perfect for a rainbow!
The black and white stripey binding is from Sarah Ashford’s Great British Quilter Back to Basics range by Dashwood studio.
I do hope you will feel inspired to join in with Aurifil and their team and create your own version of the rainbow mini. I also hope that some of the instructions and tips above will be helpful for other projects.
Look out for more Rainbow Mini Quilt blog posts on the Auribuzz blog from other Aurifil designers and artisans coming soon!
I love your bright and happy mini quilt. Thanks for sharing the pattern and inspiration 🙂
What a fun and uplifting project!
Very pretty. Enjoy your day!! 🌻🌞
I love this project!