
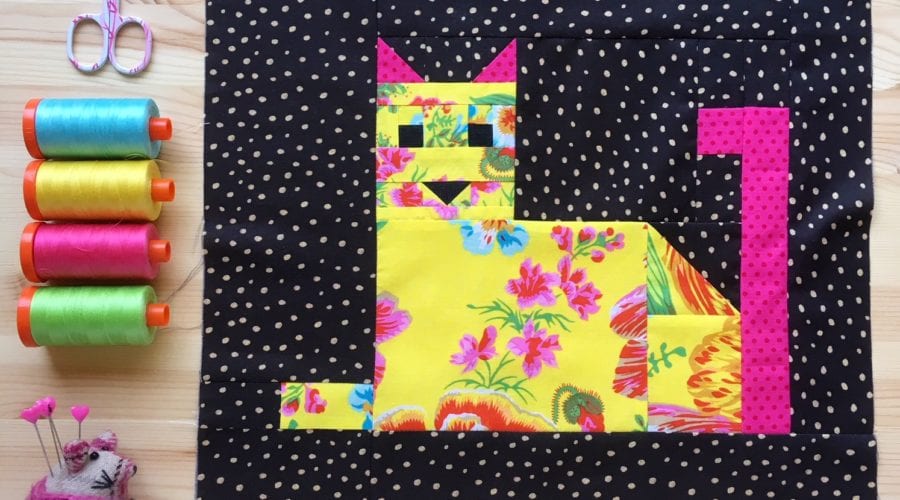
Resting Cat Block Tutorial
Regular readers will know that every year around this time I announce the Stitch Gathering Ticket Project. I will be hosting the 6th annual Stitch Gathering Retreat in October which means so far I have had to come up with six different ideas for this (why oh why…? *head in hands*)!
It does get harder every year but somehow I have managed to come up with something new each time. Last year we swapped Quilted Postcards so this year I thought we would go back to making blocks and use these blocks to make quilts for both charity quilt drives that I’m involved in and/or support – Social Bite Village and Siblings Together.
And so, with the idea that these quilts would end up with either ex-homeless folks or children, I wondered what the theme could be… and I came up with cats and dogs!! Lots of homeless folks have dogs and some even have cats (have you read ‘A Street Cat named Bob’? if not I would thoroughly recommend it!). And most children love cats or dogs, or both.
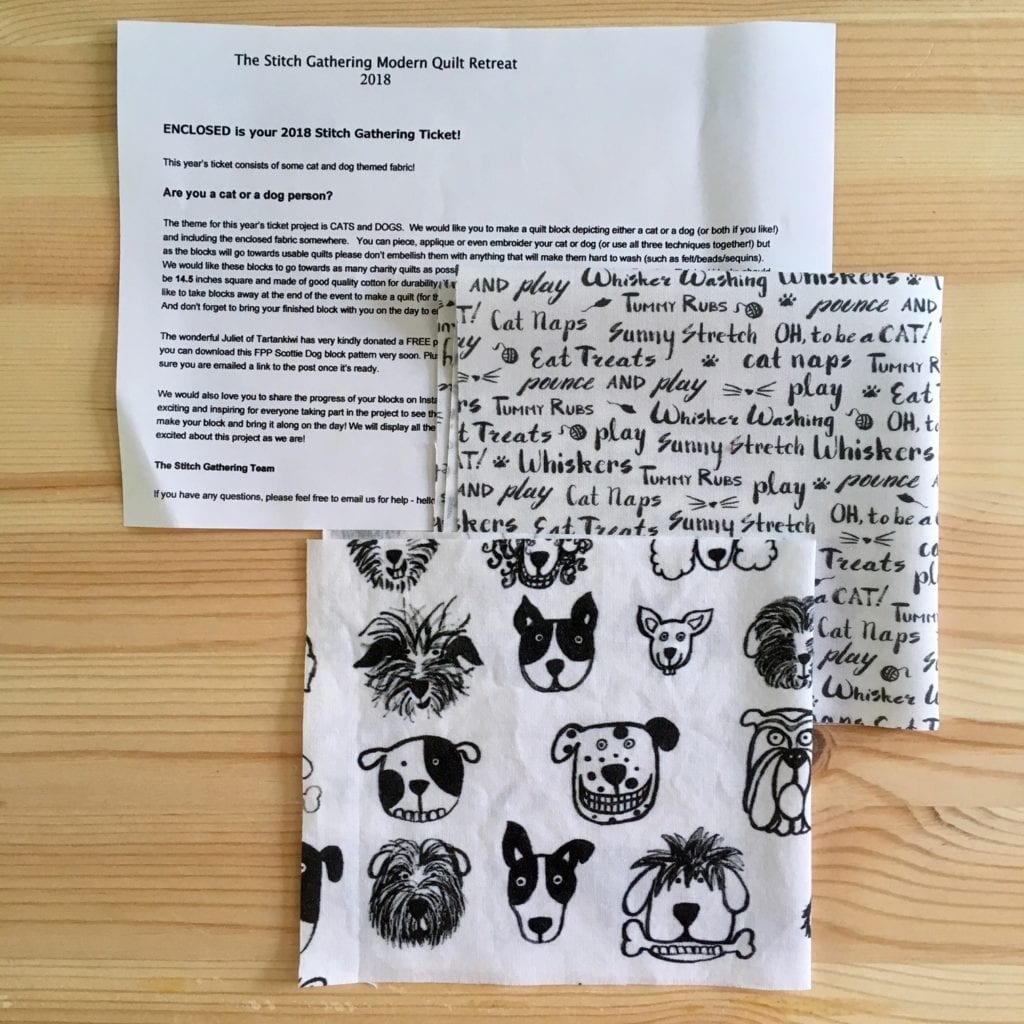
I did think about designing some special cat and dog themed fabric and getting it printed by Spoonflower (as we’ve done in previous years) but I’ve been too busy this year, so instead I looked around for suitable fabric. My sister Jane found the cat themed text fabric at a quilt show and I was able to order it from my suppliers (thanks Jane!) and I found the dog fabric on Spoonflower. Of course participants don’t have to use the fabric in their blocks if they don’t want to, but I do think it’s nice to get something tangible through the post 🙂
To make things a little easier for those taking part I have designed this Resting Cat block and there is a tutorial for it below (yes we are getting to that, hang on!).
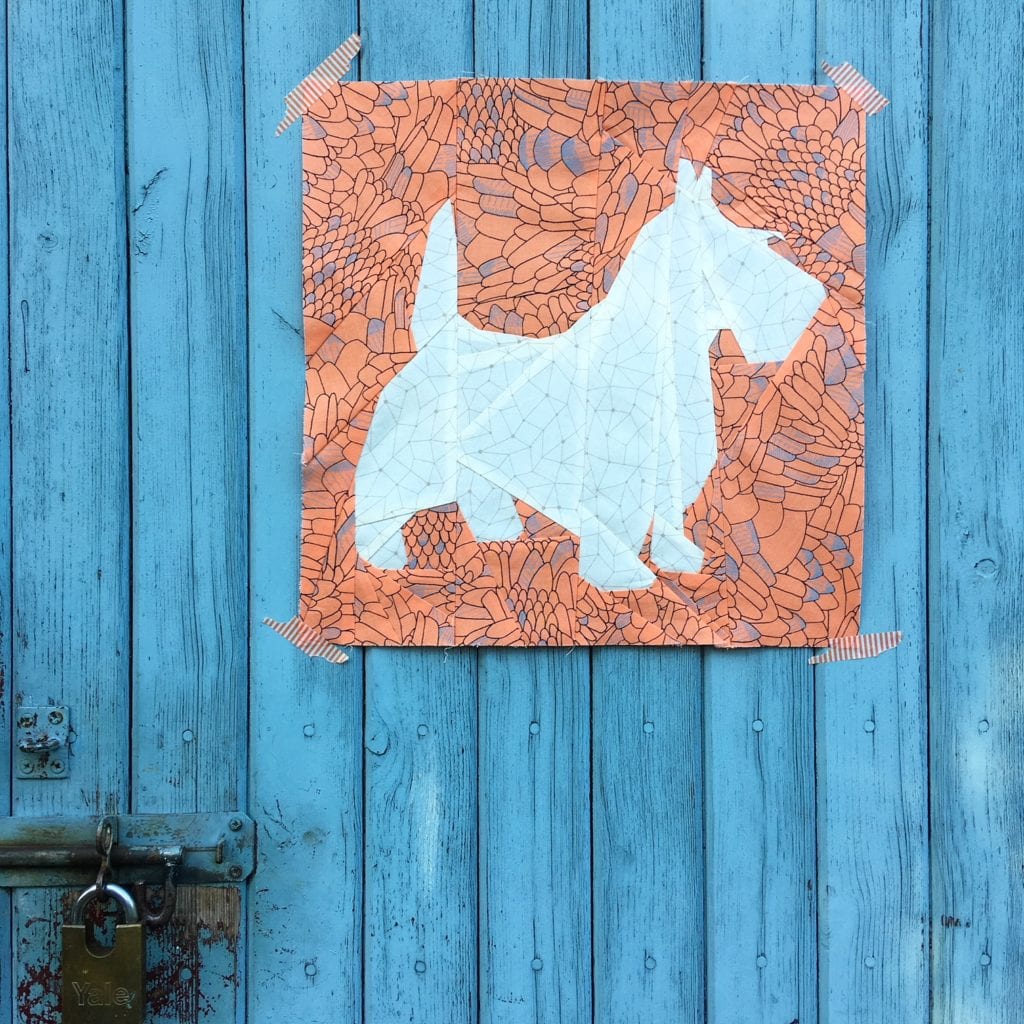
And I also asked Juliet of The Tartankiwi for her help. Juliet designs amazing FPP patterns and originally hails from Edinburgh so I knew she would be happy to support blocks going to the Social Bite Village Quilt Drive (which is based in Edinburgh).
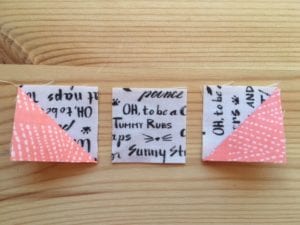
She very kindly donated a free Scottie Dog pattern for each Stitch Gathering attendee! I made my own version at the weekend, above, how cute is he??!!
Meanwhile those of you not attending can buy your own Scottie Dog pattern here as Juliet has just released it this week. Also check out all Juliet’s fabulous patterns at her Etsy Store here.
Okay so on to the Cat Block Tutorial! You’ve been very patient 🙂
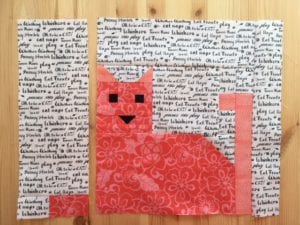
This pattern makes a 14½” block.
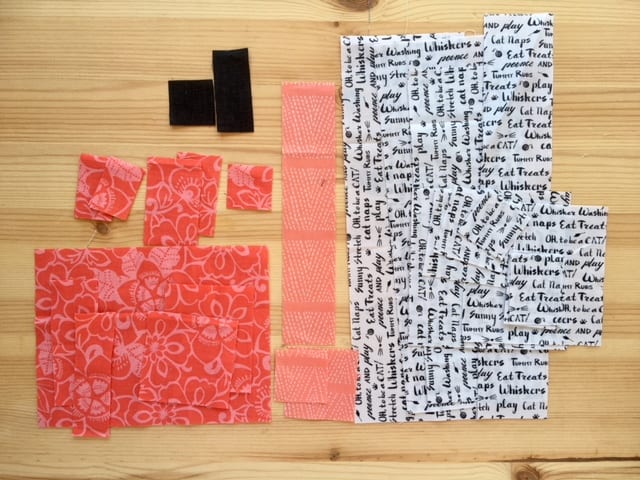
You will need:
Fabric for background – 17″ square.
Fabric for cat – 10″ square.
Fabric for tail and ears – 2″ x 12″ strip.
Fabric for eyes and nose – 3″ square.
Cutting:
Background –
One each of the following strips: 3½” x 14½”, 2″ x 11½”, 4″ x 10½”, 3″ x 9½”. One each of the following squares: 4½”, 2½”, 2″, 1½”, and four strips: 1½” x 2″.
Cat Fabric –
One each of the following strips: 1¼” x 2¼“, 1½” x 1¾“, 1¼” x 3½”, 1″ x 3½”, 1½” x 2½”, 2½” x 3″, 5″ x 6½”. One each of the following squares: 1½”, 2½”, and two strips each of: 1″ x 1½”, 1″ x 1¾”.
Tail and ears fabric:
one 2″ square, one 1½” square and one 1½” x 7½” strip.
Eyes and nose fabric:
one 1½” square and one 1” x 2¼” strip.
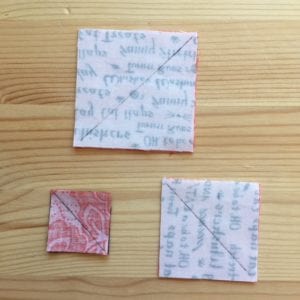
 First of all we are going to make some HST (half square triangles).
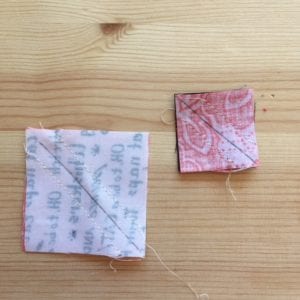
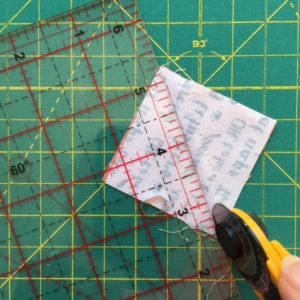
Take the 1½” square of nose fabric and the 1½” square of cat fabric, place RST and draw a line diagonally, corner to corner. At the same time you can also do the same thing for the 2″ background and tail/ear fabric squares and the 2½” background and cat fabric squares (which I will now refer to as the ‘large square’). Stitch along the drawn line of this large square. We will be making just 1 HST from this so cut away excess fabric by trimming away a corner and leaving a quarter inch seam allowance, as shown below on the left.
Press open and set aside this large square HST for now.
For the two smaller squares sew a quarter inch seam either side of the drawn line, as shown above on the right. Cut along the drawn line (right) open out and press.
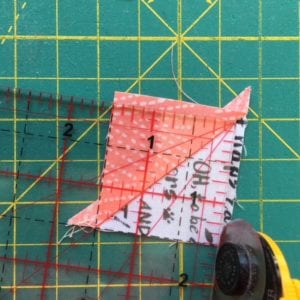
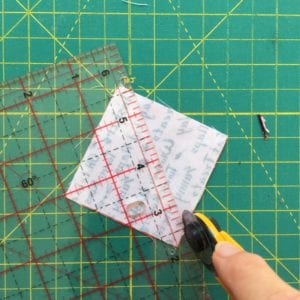
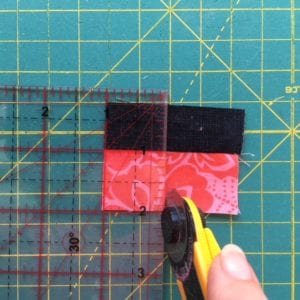
Using your ruler trim the two tail/ear and background HST (larger of the two remaining) to a 1½” square (left) and the two smaller nose and cat fabric square to a 1″ square (right).
I know these pieces are really tiny but they are definitely manageable with patience and care.
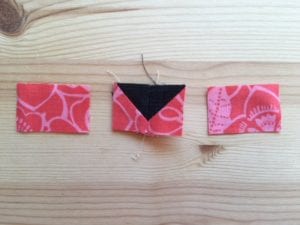
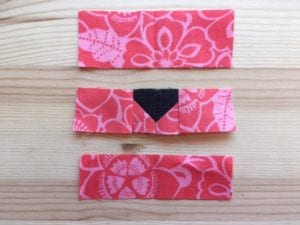 Sew the two nose/cat fabric squares together to make the nose, as shown on the left. Sew the two 1″ x 1½” cat fabric strips either side of the nose. Sew the 1¼” x 3½” cat fabric strip above the nose strip and the 1″ x 3½” cat fabric strip below.
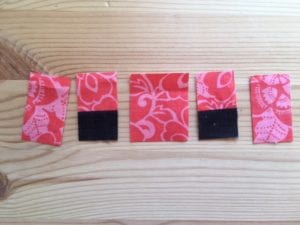 Sew the remaining 1” x 2¼” nose/eye fabric strip to the 1¼” x 2¼” cat fabric strip. Trim two 1″ strips from this (as shown left) for the two eyes. Sew strips together from left to right – 1″ x 1¾” cat fabric, eye strip, 1½” x 1¾” cat fabric, eye strip, 1″ x 1¾” cat fabric (as shown on the right).
Take the two ear/background HSTs you made earlier and sew them either side of the 1½” background
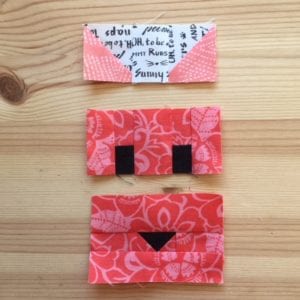 square, taking care to get the HSTs the right way around to become ears (as shown left). Sew the ear strip above the eye strip and the nose strip below that (right).
Sew the finished cat head to the left of the 4½” background square. Sew two of the 1½” x 2″ background fabric strips either side of the 1½” square of tail fabric along their short ends.
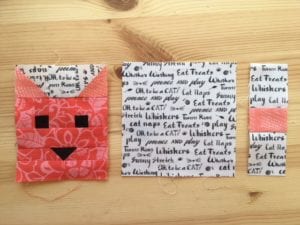
 Sew this strip to the right of the 4½” background square as shown on the left.
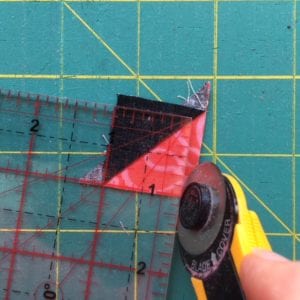
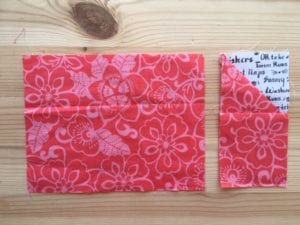
Take the ‘large square’ 2½” HST made earlier and sew it to the 2½” x 3″ square of cat fabric (taking care with the placement, it should look like photo above right). Sew this to the right of the 5″ x 6½” cat fabric rectangle.
 Sew the cat head unit above the cat body unit (left). Sew another 1½” x 2″ background fabric strip above the remaining tail fabric strip. Sew this to the right of the cat (right).
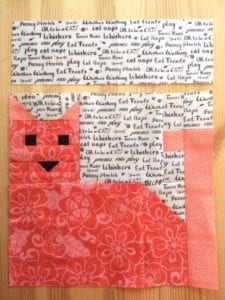
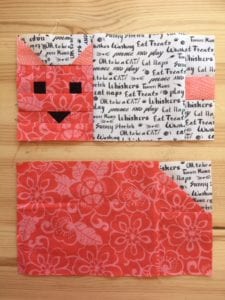
 Sew the 3″ x 9½” background fabric strip above the cat.
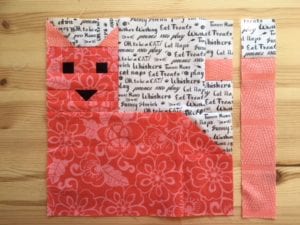
Sew the 2″ x 11½” background fabric strip to the right of the cat.
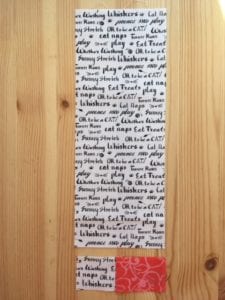
 Sew the remaining 1½” x 2″ background fabric strip to the left of the remaining 1½” x 2½” cat fabric strip.
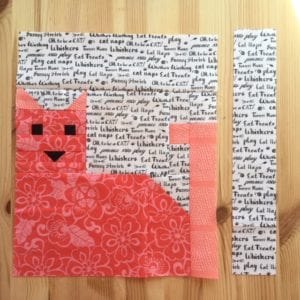
Sew the 4″ x 10½” background fabric strip above this and sew the whole strip to the left of the cat.
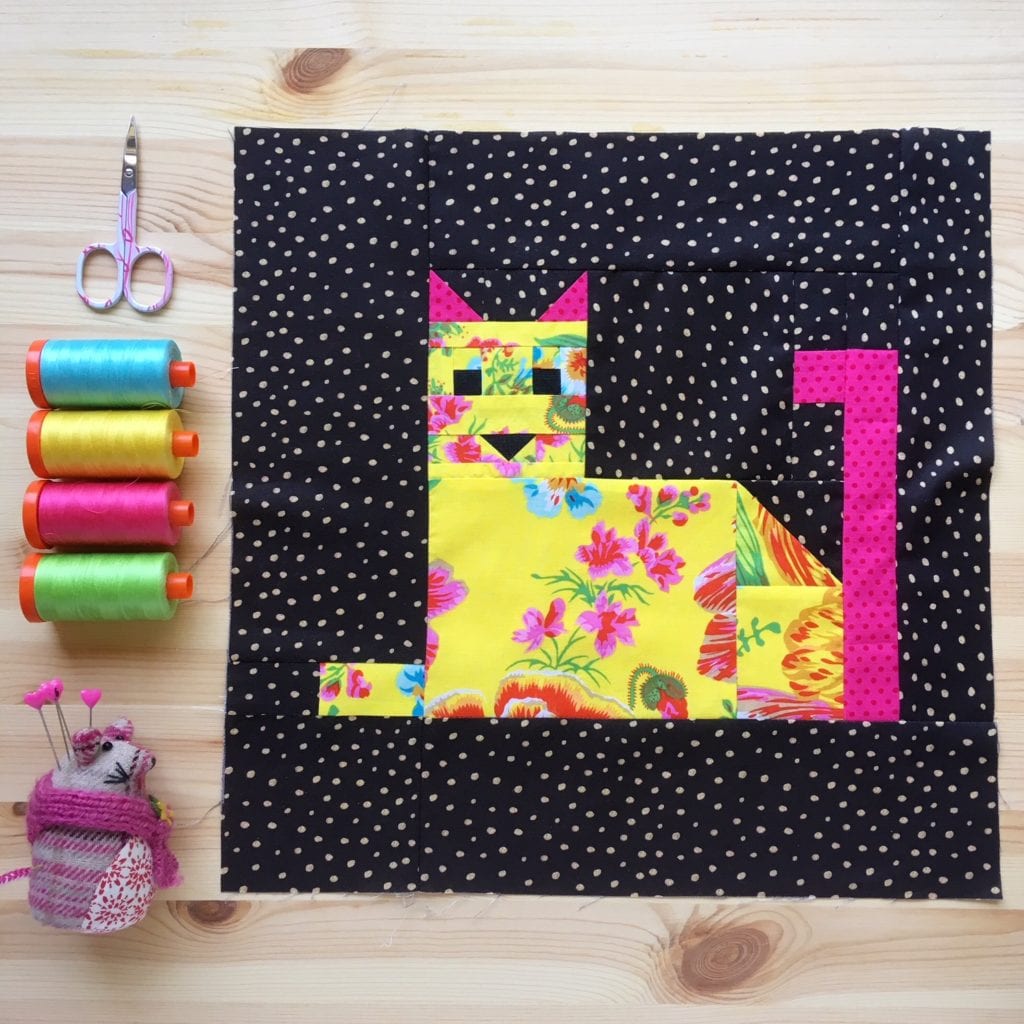
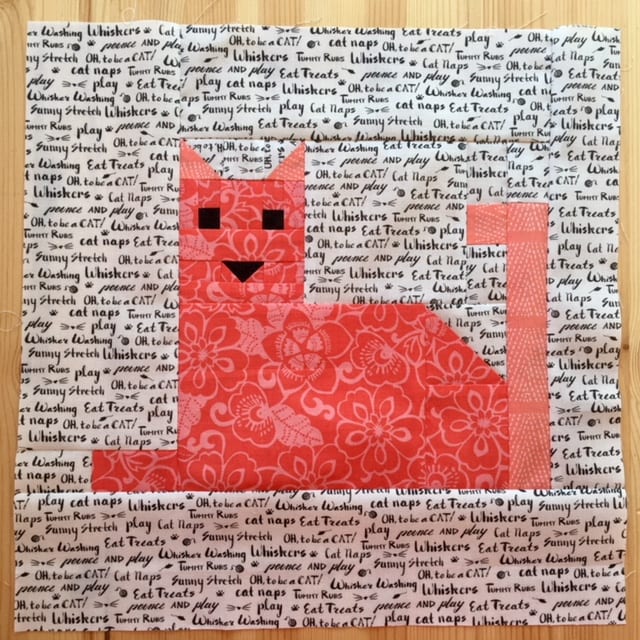
Finally sew the remaining 3½” x 14½” background fabric strip below the cat.
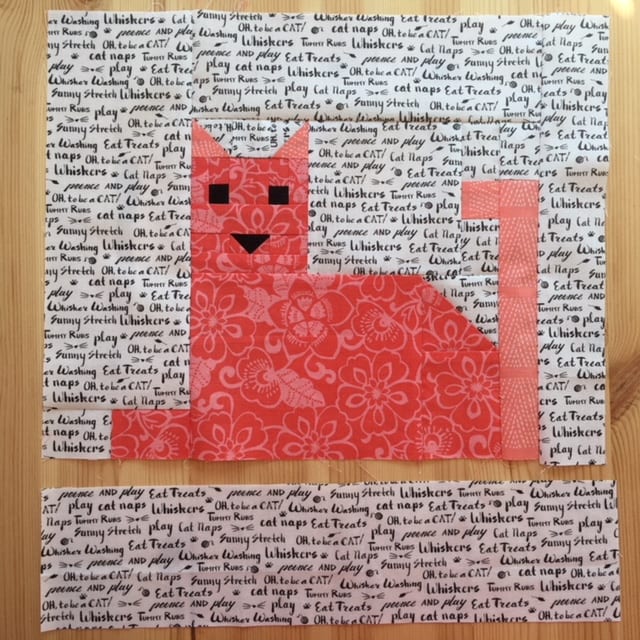
The Resting Cat Block is finished!
This is a new design and, despite my best attempts, there may well be some errors in this pattern, if you find any please point them out to me so I can correct them!
I do hope you enjoyed this tutorial. Please credit me if you use it and link back to this post if possible.
Leave a Reply