
Water Lily EPP Hoop Art Tutorial
Welcome back for part 2 of this week’s Hoop Art Tutorials!
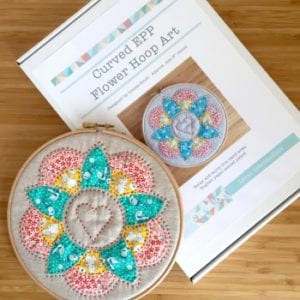
Following on from the earlier post I am offering a second hoop art idea, this time EPP and this post also comes with the free templates and tutorial to make this Water Lily EPP block.
Why all this Hoop Art? It’s all to do with this year’s Stitch Gathering ticket project, and you can read all about that in the first post here.
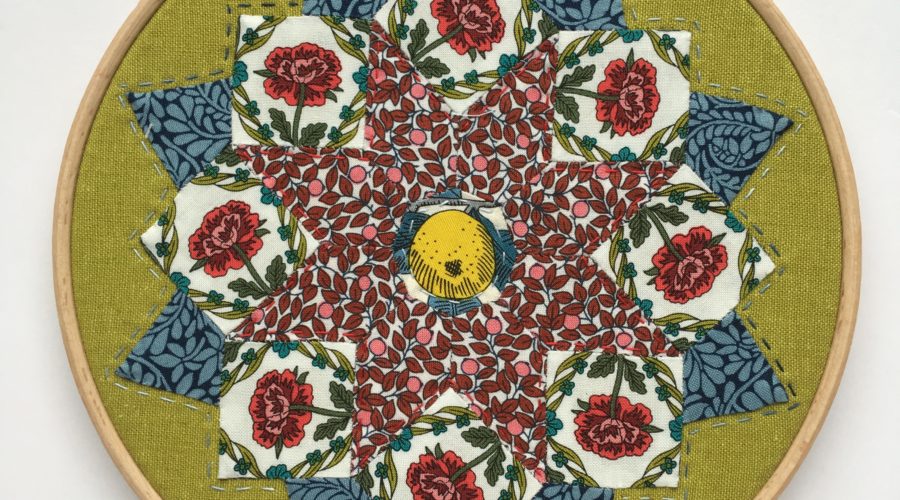
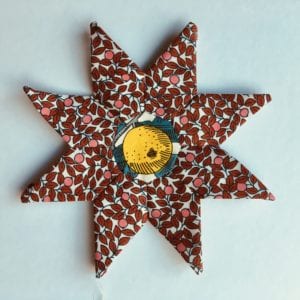
I first designed this Water Lily block for the Today’s Quilter ‘A Month in the Country’ Block of the Month back in 2016. It’s inspired by the water lily flowers in our pond at Shangri la Farm.
I have scaled it down here to fit in the 8″ hoop.
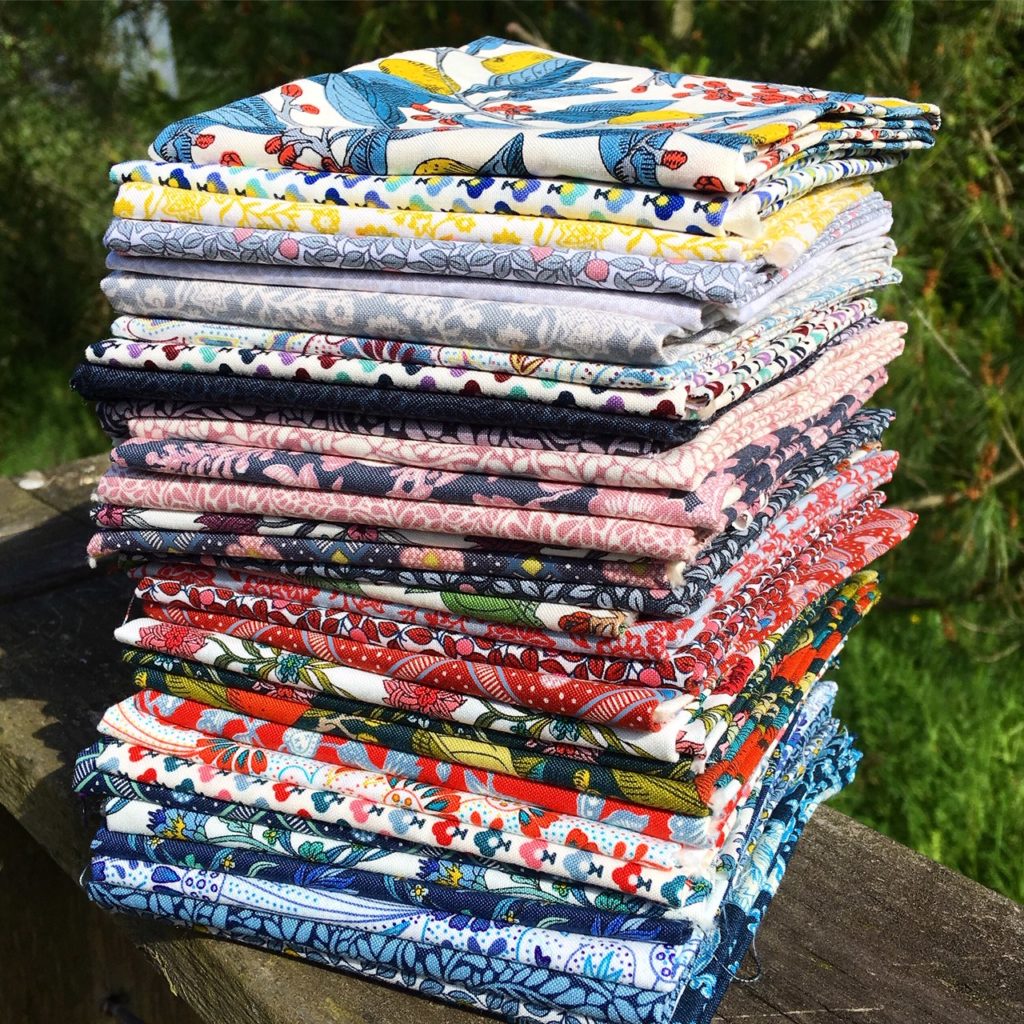
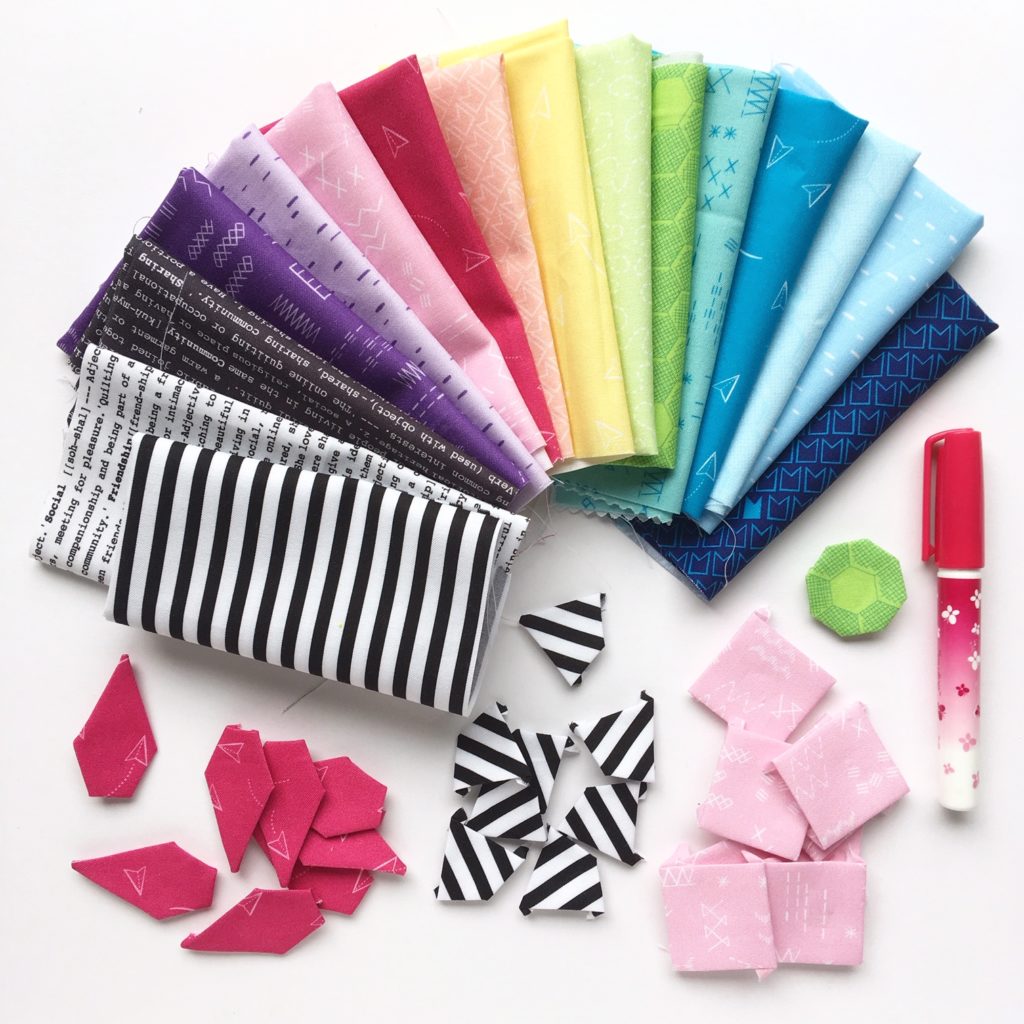
I was recently sent this amazing bundle of the new Liberty Craft Cotton collection Summer House (due out in a couple of months) and I couldn’t wait to start using it.
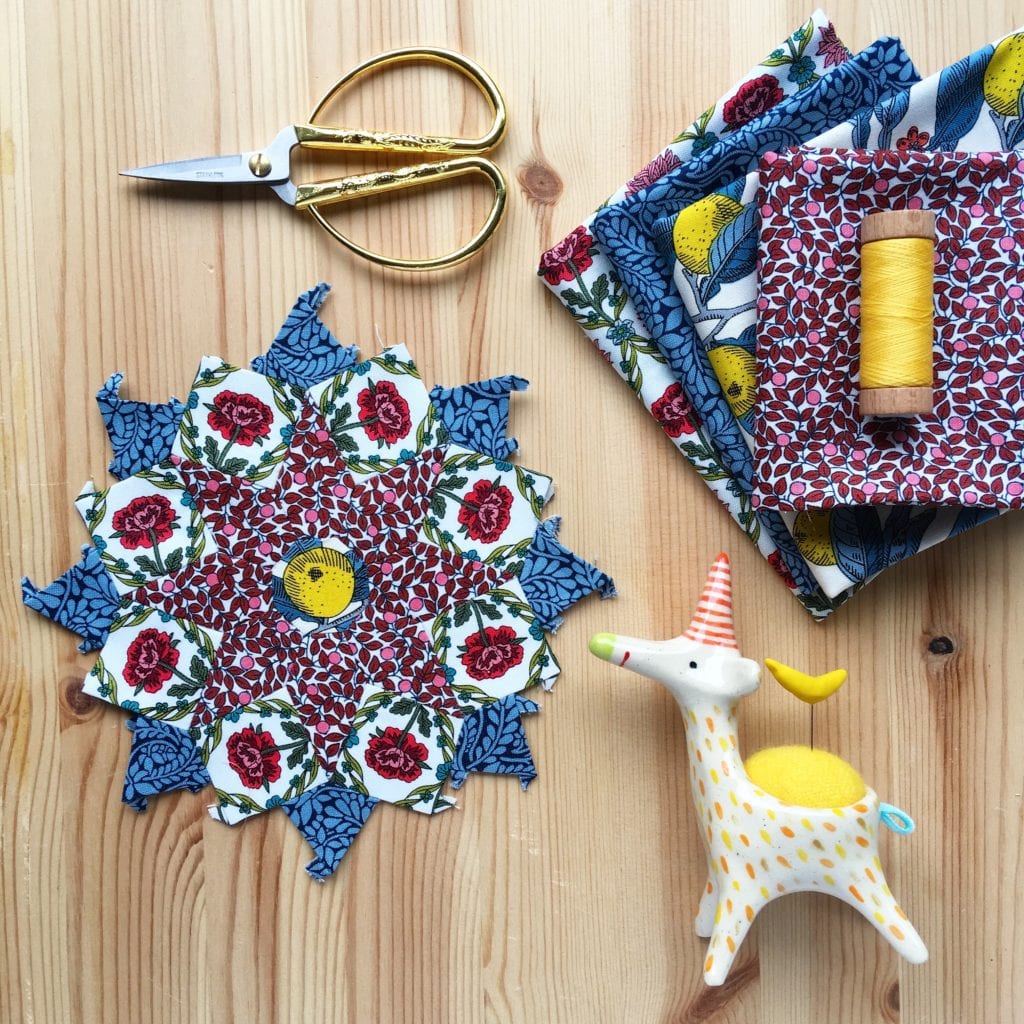
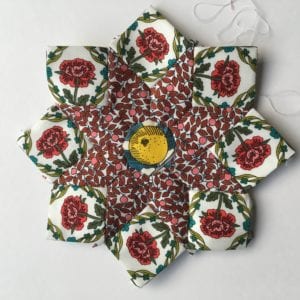
You will need four different fabrics for the EPP:
For the centre octagon (A) you will need a 2″ piece. For the star shape (B) you will need 6″ x 8″ piece. For the squares (C) and the shapes in the last round (D) you will need a 6″ square for each.
You will also need a Sewline glue pen or similar (unless you want to thread baste of course) and matching 50wt and 80wt thread (if possible).
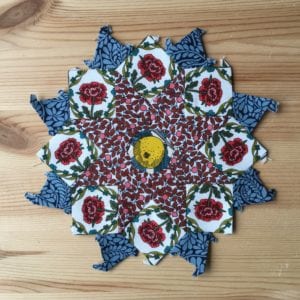
I chose a piece of Essex linen in Pickle for the background and cut a piece approx. 10″ square
You will also need the paper templates. You can find these here along with the templates from the Mini Dresden Hoop, and an 8″ wooden hoop.
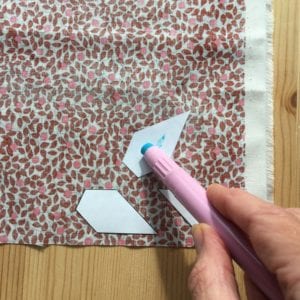
 You need to cut out one of template A, and 8 each of templates B,C and D. You can use the pattern pieces on the template page for this.
But this is how I cut out my pieces when I have multiples to cut from the same fabric. I use a small spot of glue and place them on the wrong side of the fabric with at least half inch between them.
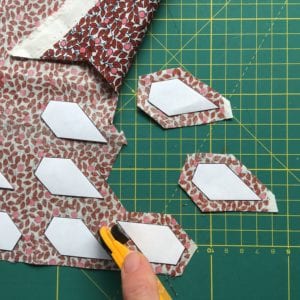
 I then use my rotary cutter to cut them (just by eye, I didn’t use a ruler, though you may prefer to use one!). You can also use scissors here.
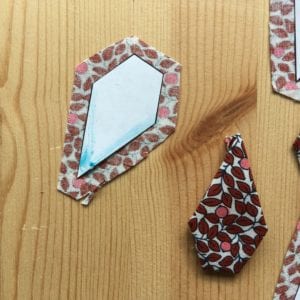
Then I put glue around a couple of the sides and fold the edges over before adding glue to the next sides.
 I find if I glue the whole perimeter to start with then by the time I am folding the last edge over the glue has started to dry.
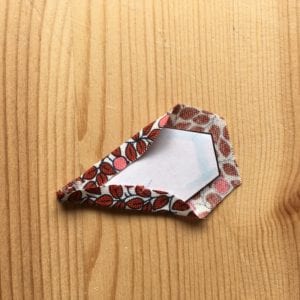
I folded the tip of the point over before I stick the edges either side.
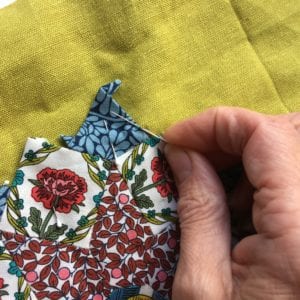
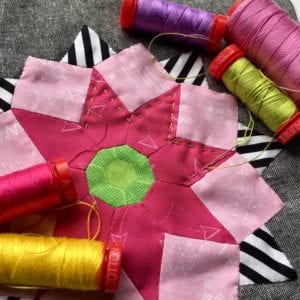
Once you have glue basted the whole way round all of your different template pieces you can begin stitching them together, starting with the centre A piece and one of the B pieces.
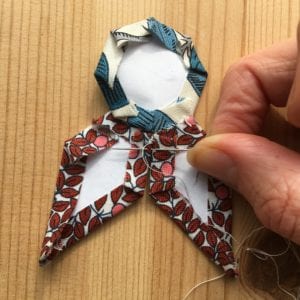
 Stitch along one side then join another B piece and stitch these sides together as shown. Continue adding B pieces in this way all the way round.
Check out my last post for info about starting and finishing your threads. In the last post I stitched my Dresden pieces together with the right sides squeezed together. But this is another way of stitching them, where you keep your pieces flat and stitch a type of ladder stitch from the back. The needle goes right through at the folded edge, and behind the papers.
I found out about this method from Lucy Brennan, third hand via my student Dawn who attended Lucy’s class at the Stitch Gathering last year. It slightly blew my mind at the time as I have been stitching EPP since I was 10 years old and never considered there might be another way to do it!
 And since then I have learnt TWO MORE ways to do it (more on one of these below)!! But I have settled on this method as I think it has the neatest stitch but with enough security to keep your pieces safely together.
Check out the previous post for my original way of stitching (which I still use sometimes).
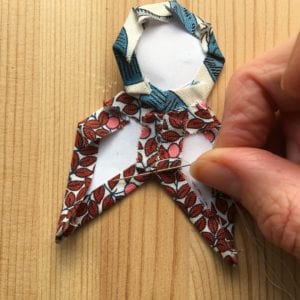
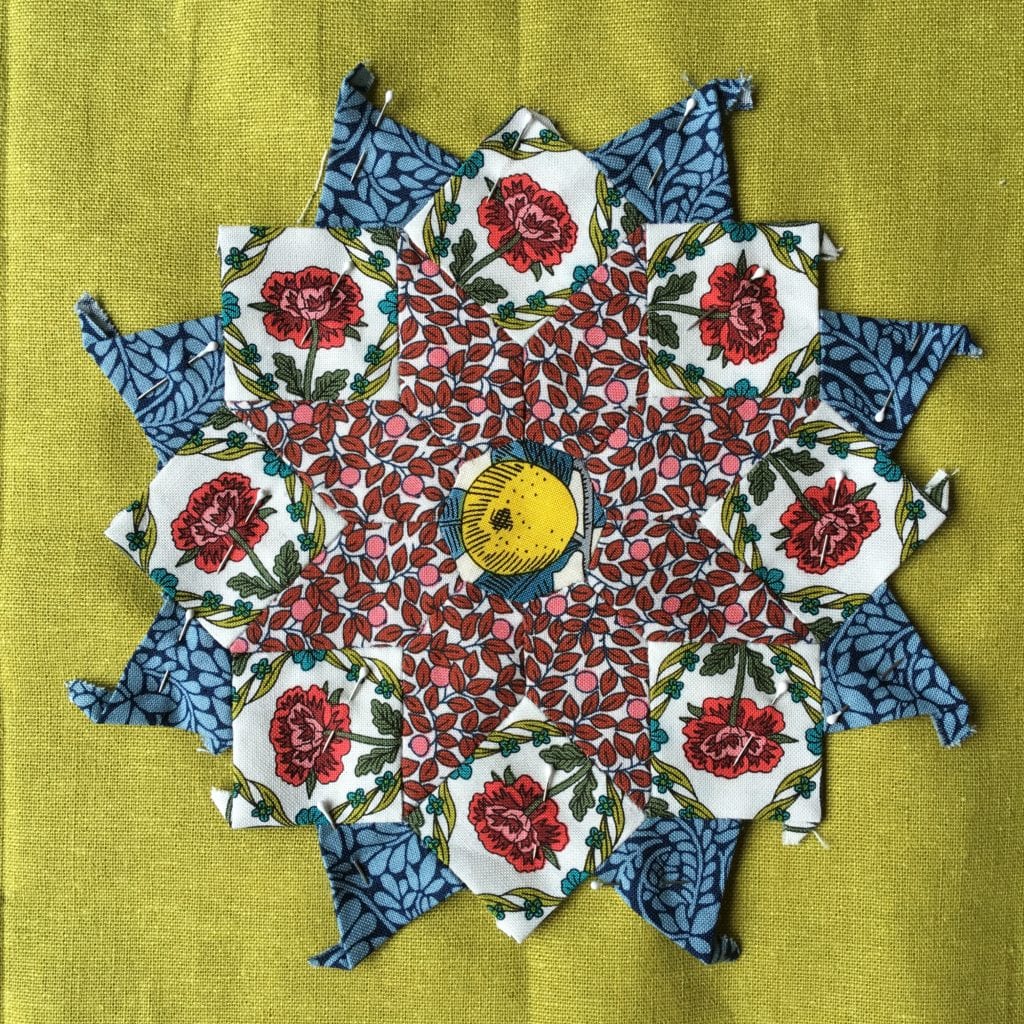
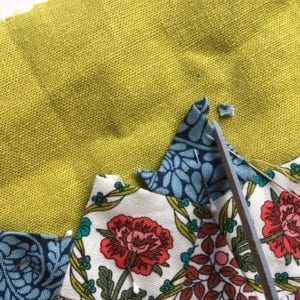
 Add all the C shapes (you can keep one thread going all the way around on this round). And then the D shapes.
Press well from both sides (I like to use a little steam or Flatter spray to ‘relax’ the seams) and then remove the papers.
Fold and press your background fabric to find a centre cross and pin your EPP water lily down using this as a guide.
I switched to a pale grey (2600) Aurifil 80wt thread to applique the EPP to the background, using tiny neat slip stitches.
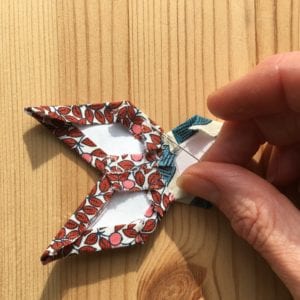
When you get to the point you can trim a little from the dog ear (but not too much!). Stop stitching around a half inch from the point and use your needle to ‘fold’ the point under the seam as shown below.
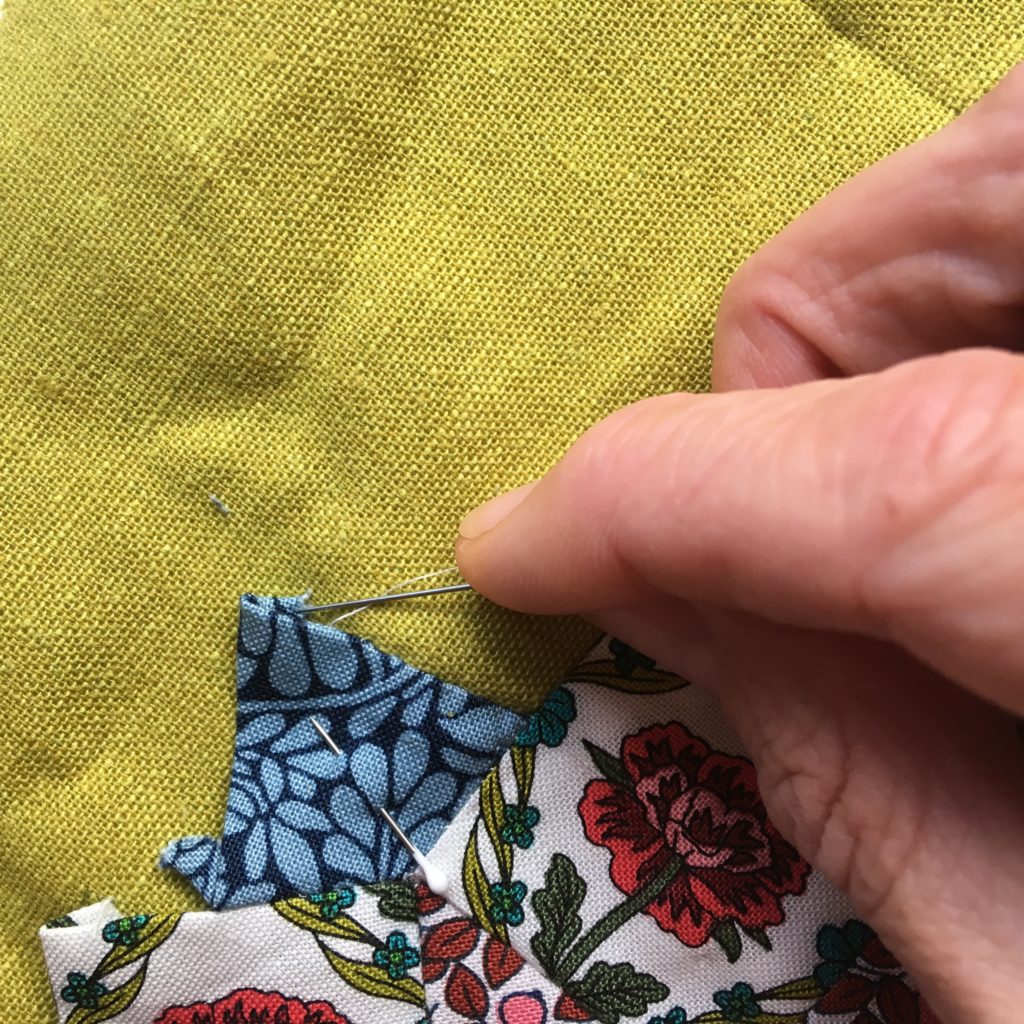
once it is sitting under the seam continue stitching to secure. The dog ears between the D and C pieces will fold under easily as will the point of the square C piece. It is just the points of the D pieces that are a little tricky. Stitch all the way around and then press again.
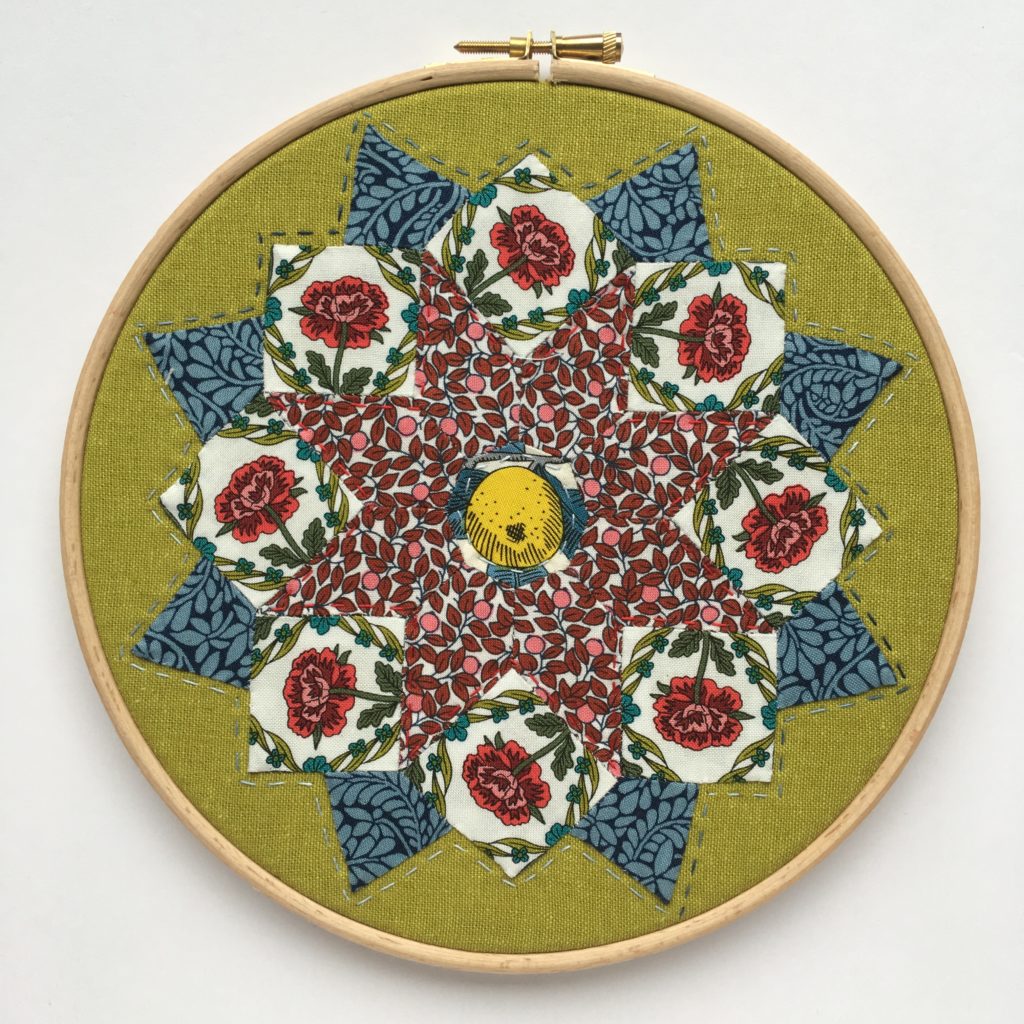
I added a little hand quilting to the EPP using Aurifil 12wt cotton. I added a piece of wadding to the back before quilting (no backing) using a little 505 spray. Once I had hand quilted I cut away the excess wadding before placing in the hoop.
Check out the previous post for how to finish off your hoop.
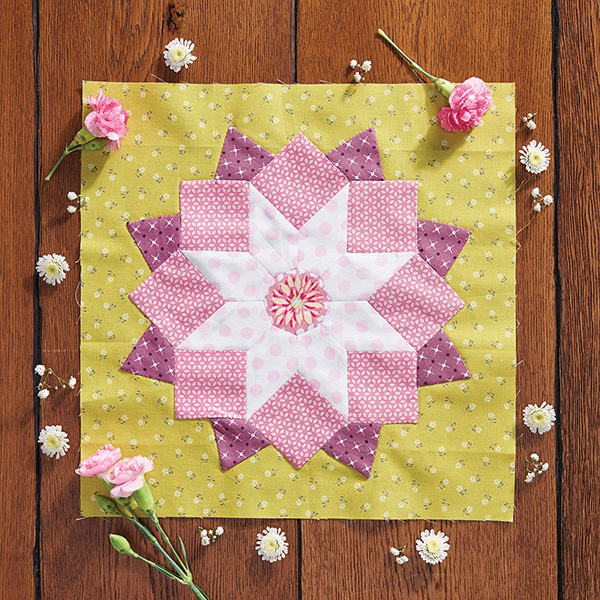
Meanwhile I thought I would make a second Water Lily EPP hoop to show you an alternative look.
My very clever pal Sarah Ashford has just announced her first fabric line! This is the Great British Quilter Back to Basics collection by Dashwood Studios which will be out later in the year/early next year (and which we will certainly be stocking!).
Sarah sent me a small piece of most of the collection to have a little play with (we are missing about 4 fabrics in the photo above).
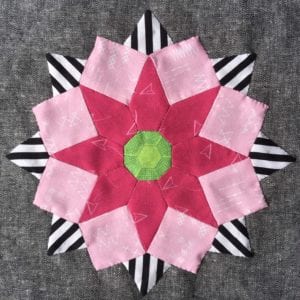 How different does the Water Lily block look in these bright modern fabrics?! I love that black and white stripe. I used a black Essex Linen for the background and just finished appliqueing it last night.
Now I am using more Aurifil 12wt cotton threads to hand quilt. I am off to the Thread House Summer Retreat tomorrow and this is coming along with me as one of my weekend projects.
Speaking of Sarah Ashford, she has also just published her own EPP hoop art tutorial on the Polka Dot Chair blog here.
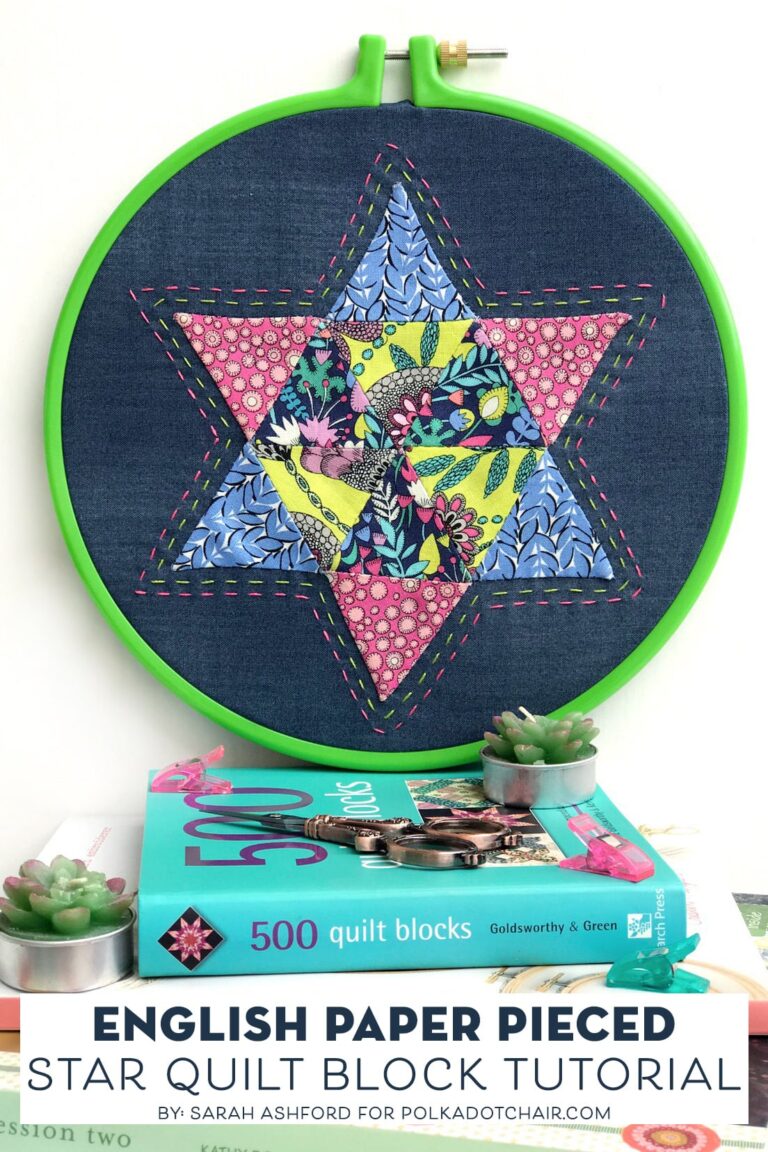
Sarah shows you one of those other methods of stitching your EPP pieces together that I was talking about earlier.
Don’t forget you can get a 10% discount on any of Sew Motion’s fabulous Hoop Art kits!
Just use code Stitch10 at checkout to claim it!!
If you haven’t visited the previous post yet (and you have certainly been prompted plenty!) then you will also find more ideas for your hoop art project, all useful and great fun, whether you are coming to this year’s Stitch Gathering or not!
I also hope you enjoy making the Water Lily EPP hoop art. And if you do and share the finished item then please credit me and link back to this tutorial wherever possible.
So pretty. I have to admit to always sticking to the same traditional way to EPP, I just can’t imagine how to do the other way. EPP is still my favourite way to sew after all these years. x