
Mini Dresden Ring Hoop Art Tutorial
As many of you will know I organise an annual one day quilting retreat called the Stitch Gathering. Every year we have a Ticket Project where I send something to all the attendees which they use to make their ‘ticket’ they then hand this in on the day to gain admittance.
in previous years I have sent special fabric and asked everyone to make a particular themed block which are later made into charity quilts. Other years we have sent tote bags (to be embellished and swapped) fabric stamps (to be used on quilted postcards and swapped) or special printed fabric that was embellished and made into a quilt that was raffled for charity. Every year I have to come up with something new (!) and I usually accompany it with a tutorial or two.
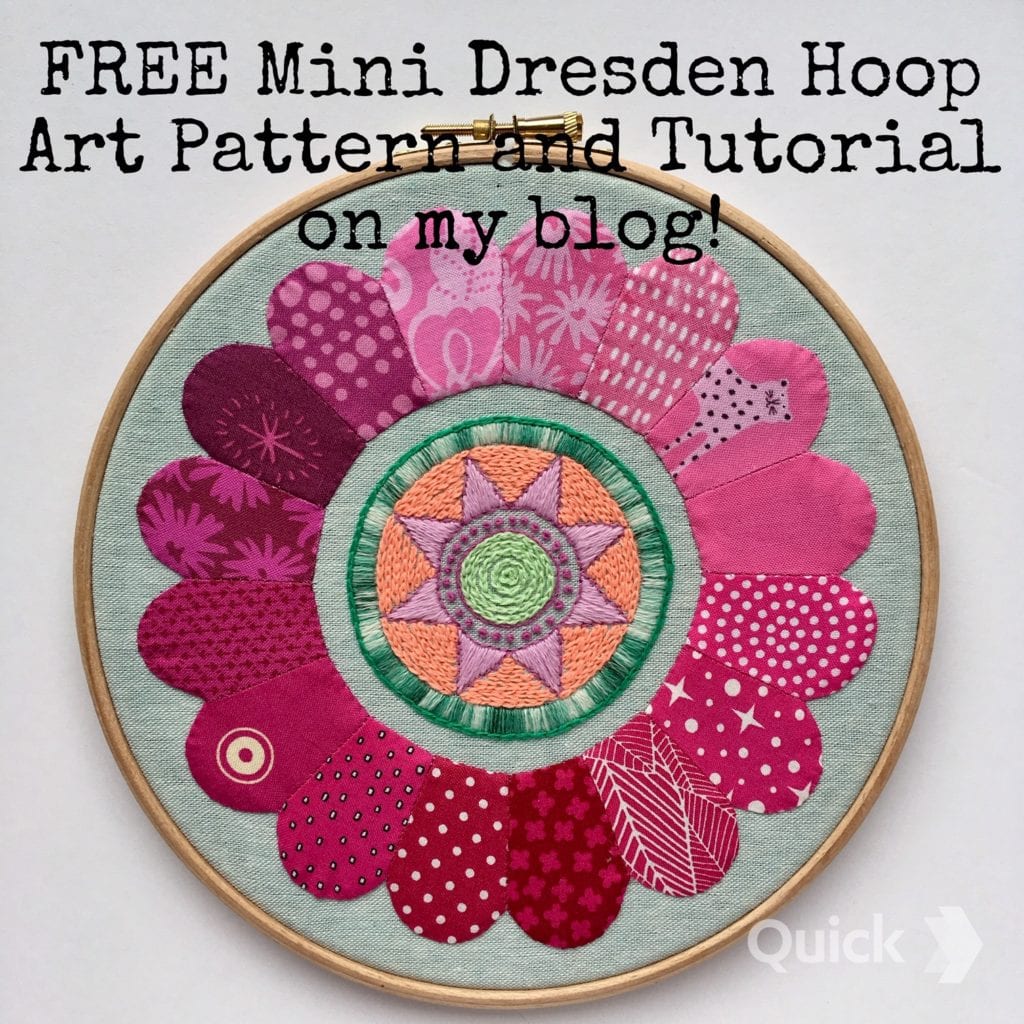
So this year we are doing Hoop Art! Everyone is getting a free 8″ hoop and are being asked to use all and any sorts of sewing and needlework to make a beautiful piece of art. These will then go into a ‘lucky dip’ swap (unless their maker really wants to keep their own!) at the event.
This is the first of two tutorials on Hoop Art that I’m sharing. This one features a little mini Dresden and some embroidery and the second one is a different EPP pattern. In both tutorials I am also going to include some other ideas and inspiration for other types of Hoop Art, and in this tutorial I show you how to finish the back of your hoop.
But first let’s get started on this really simple little hand sewing project.
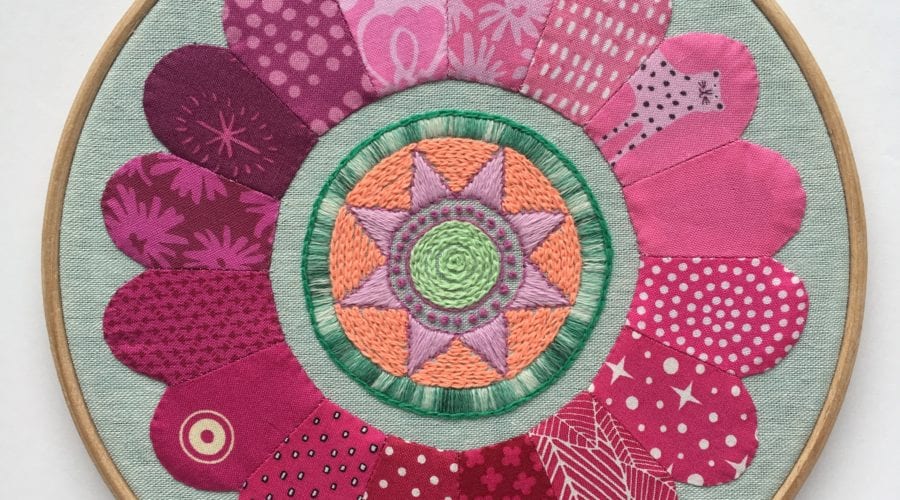
First off you will need a piece of background fabric measuring approx 12″ square. I used Essex linen. Then you will need some fabric for the Dresden ring. I chose all pink and graded the colour from light to dark. You could use scraps entirely for this as the pieces need be no bigger than 2 1/2″.
You will need some threads for the embroidery. I used Aurifil 12wt wool thread in the following colours: variegated green, orange, pink, dark pink, light green. You will also need matching thread for sewing the Dresden, I used 50wt Aurifil for the EPP part and Aurifil 80wt for the applique, and needles to match your thread.
To finish you will need a 10″ piece of lining fabric and a 7″ piece of wadding (optional). And you will also need an 8″ hoop! I like a wooden Elbesee hoop, and all Stitch Gathering attendees will be provided
Click this link to download the Dresden templates. Print and carefully cut them out.
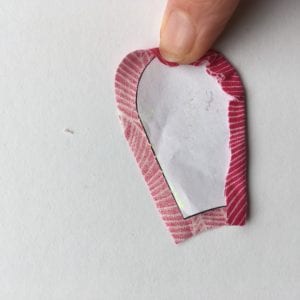
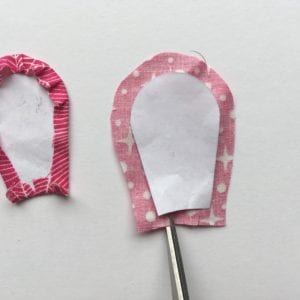 I have produced a sheet with all the 16 paper templates you need alongside one for the fabric which has a quarter inch seam allowance.
I use a Sewline glue pen to baste my Dresden petals. First I use a little to fix the the paper piece to the back of the fabric. Then I glue around the curved edge and fold over to stick, a little at a time as I go around the curve. Snip into the curved bottom edge a little before sticking this last side.
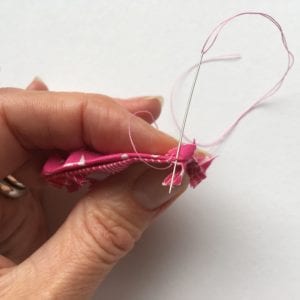
 Once you have glue basted (our thread basted if you prefer) all your 16 pieces you can now sew them together. I always start a few stitched from the edge and work outwards before going over those stitches again to secure as I sew the whole side. It’s a bit like starting your machine seams with a few reverse stitches.
I learnt this from a Japanese book about 25 years ago and have done this for EPP ever since, it’s a belt and braces approach which is worth the extra effort IMHO.
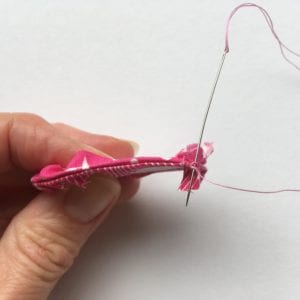
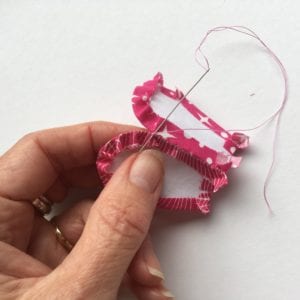 I am using a matching Aurifil 50wt thread and my favourite needle here: Millward Straw/Milliners number 10.
You can see it has got a little bent with use but that’s okay!
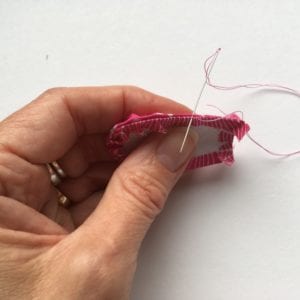
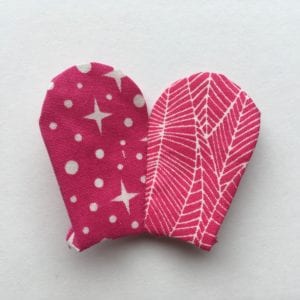
Continue with small neat stitches that just catch the edge of the fabric until you reach the start of the curve (I have opened the pieces out in the photo above right so you can see where to stop). In my next Hoop Art tutorial post I am going to be showing you another way to stitch these togethr. Meanwhile I also wrote an EPP tutorial post many years ago which has more info (for instance thread basting) and may be worth a look, though bear in mind it is very old now!
 Continue to
 stitch your petals together until you have a ring. Press from both sides then carefully remove your papers. Set aside for now and start the embroidery. Or you may just want to use your Dresden as it is with no centre or a different fabric centre (to your background). In which case just skip over the embroidery bit.
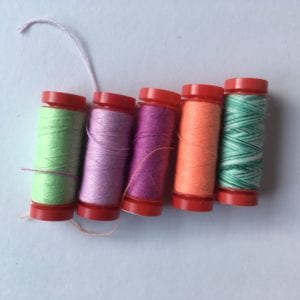 I am very keen on the Aurifil 12wt wool thread at the moment and these are the colours I chose for the embroidery.
The embroidery part of this tutorial is sadly lacking in photos and I’m assuming that you have done some embroidery before and are familiar with the stitches mentioned. If not, then there are plenty of embroidery stitch tutorial sites online (hello Mr Google!).
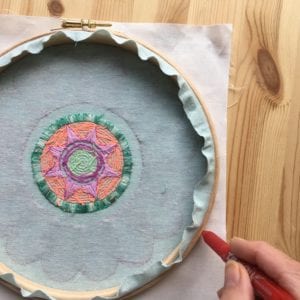
You can download and print your embroidery pattern at the same place as your Dresden templates here. I used a Frixion pen to mark my pattern. Any good erasble pen will do, though always test your fabric first (to see that it will properly erase when needed).
Insert you marked linen into the hoop. Make sure it is tight like a drum and use a slotted screwdriver in the slot provided to tighten it properly.
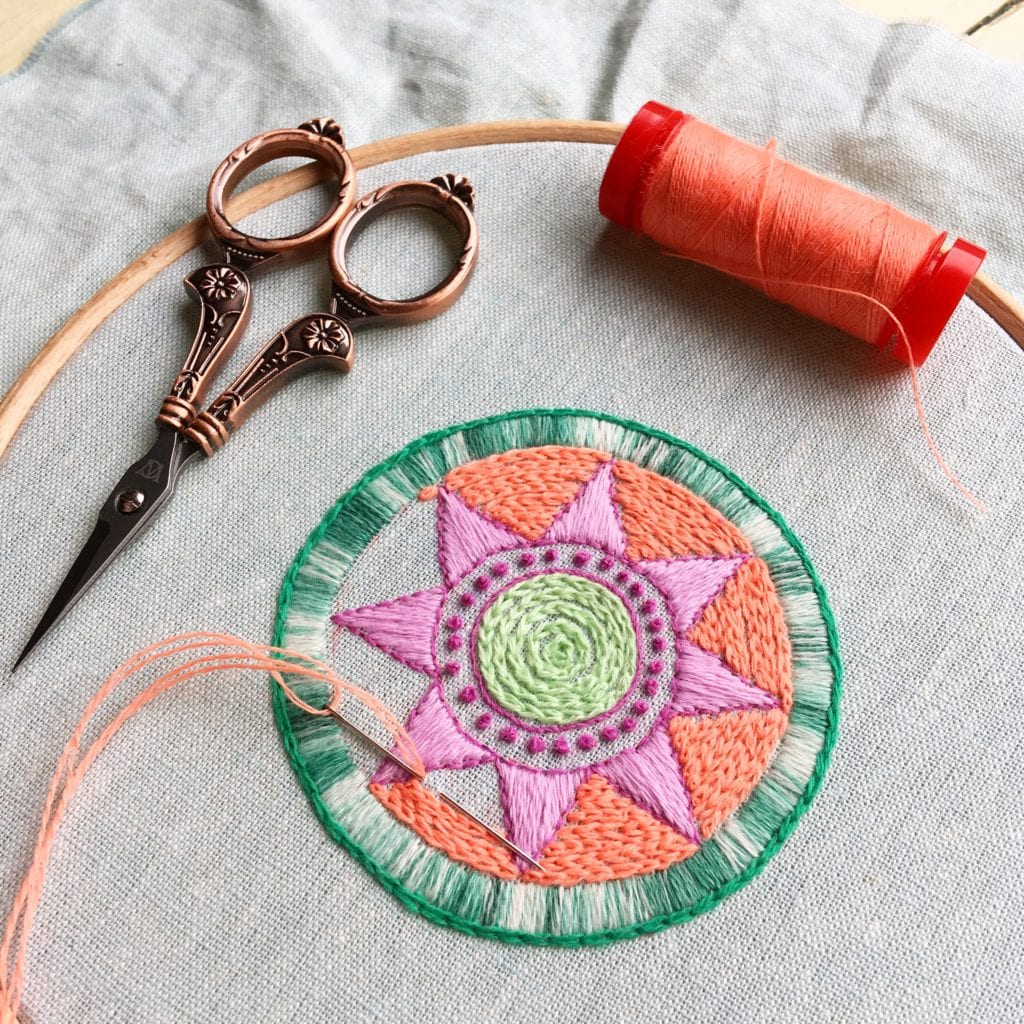
I used a double thread of wool everywhere except the back stitch outlines in pink.
I started with the varigated green shade and a straight stitch/satin stitch all around the outer ring. I used a darker green (not pictured as I forgot about it till this very minute!) shade and a chain stitch to outline the outer circle. I then used a small back stitch in pink shade to outline the stars and both of the inner rings, and for the inner circle only I also ‘whipped’ the back stitch. I stitched Colonial knots all around the inner ring with the same pink. I used pale green shade and a spiral of chain stitch (starting at the outer edge and travelling inwards) to fill the centre circle. I used a satin stitch in pale pink shade to fill the star, and lastly I used lines of chain stitch in orange shade to fill the background to the star.
I use a Millwards Sharps number 5 needle for this weight of thread. Once finished I pressed the piece from the back and used a pressing cloth to press from the front also (this removed any stray pen marks).
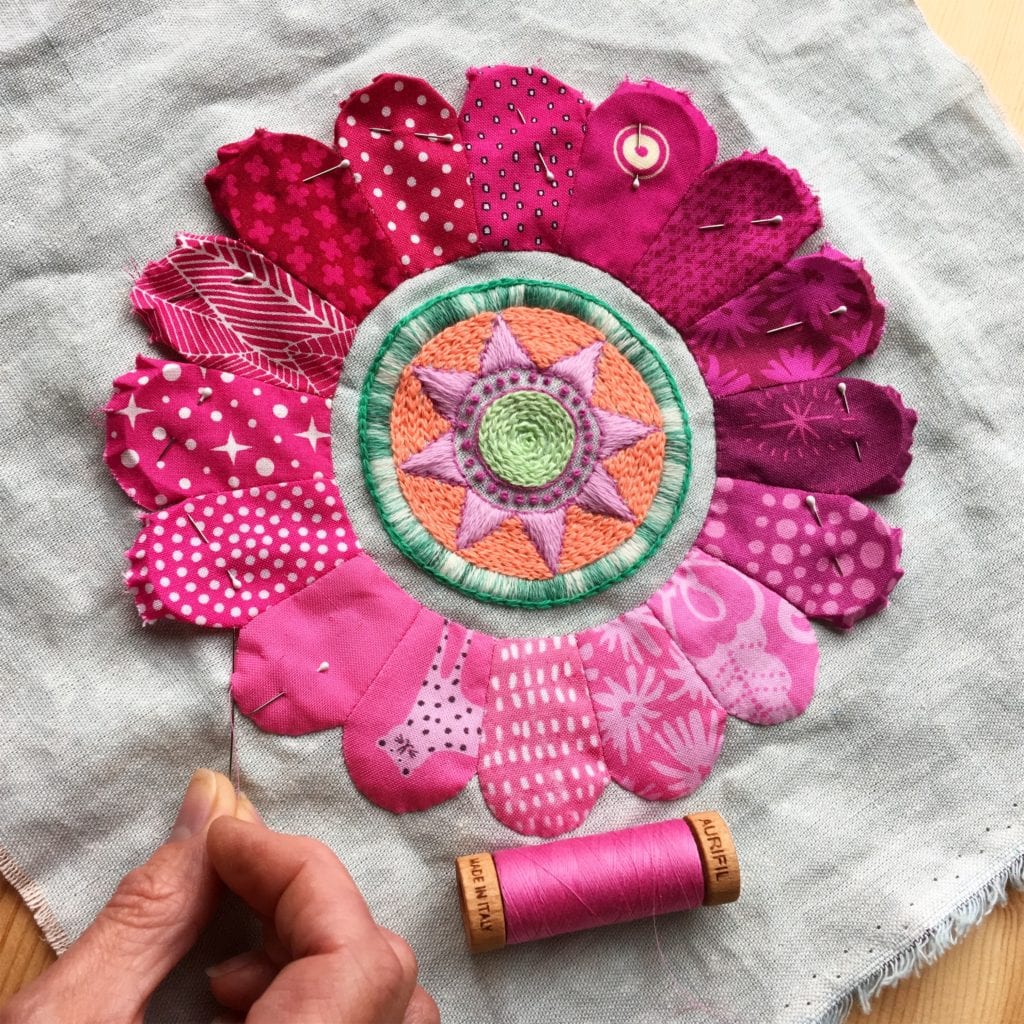
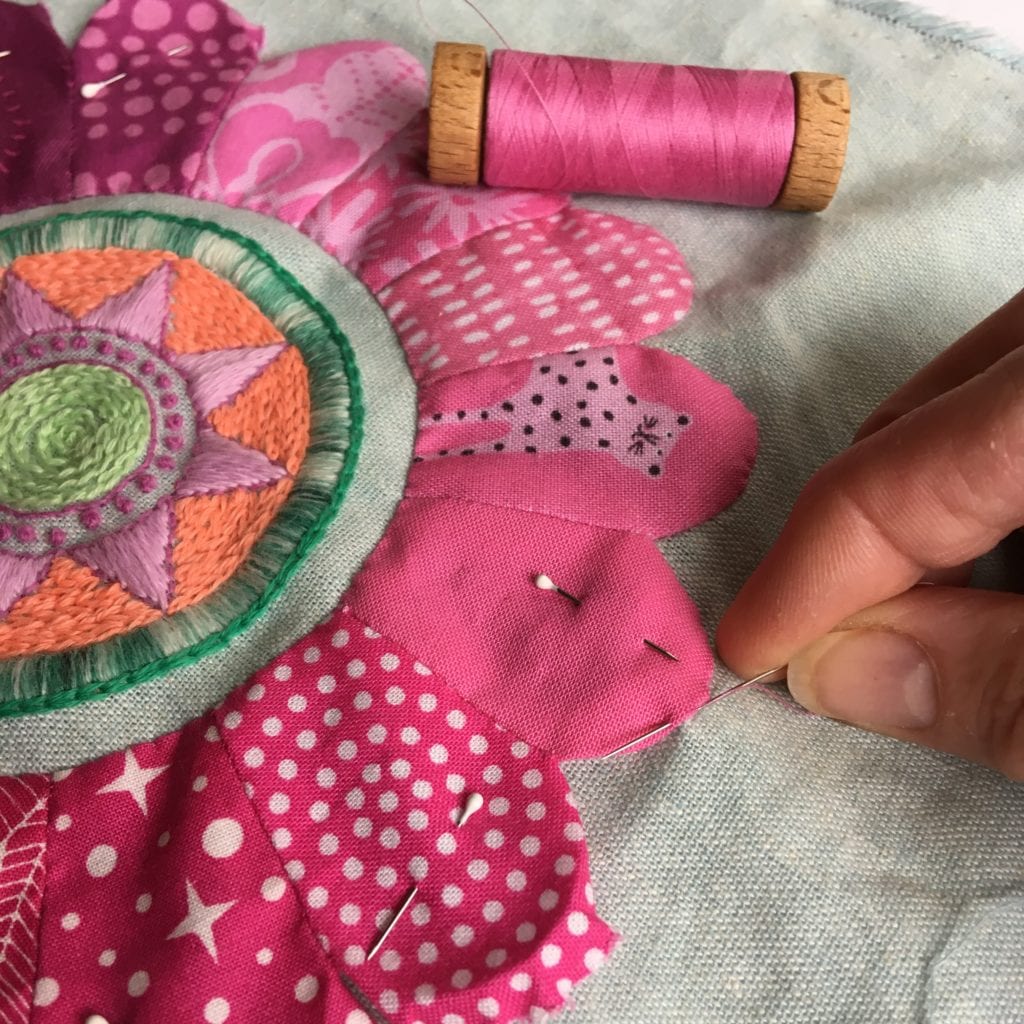 I then pinned my Dresden ring over the embroidery using Clover applique pins.
I switched to a matching Aurifil 80wt thread to stitch this down, using tiny neat slip stitches.
Once stitched give it another careful press and then you are ready to insert it back into your hoop. Stretch and tighten as before.
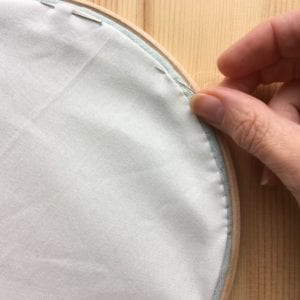
Press the excess fabric to the back and trim away all but half an inch from the edge.
 Place the lining fabric square underneath and draw around using the outer edge of the hoop.
Cut out and press a quarter inch seam all the way around the edge (towards the wrong side).
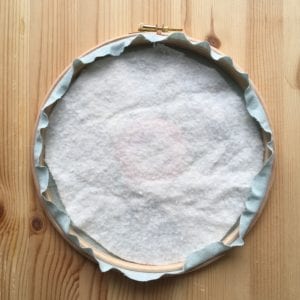
I like to place a piece of wadding inside the hoop before stitching the lining. It stops you seeing through the linen to the back of the work, which can happen in some lights. It only needs to be roughly cut so I usually do this by eye (not the actual cutting, for that I use scissors ;)).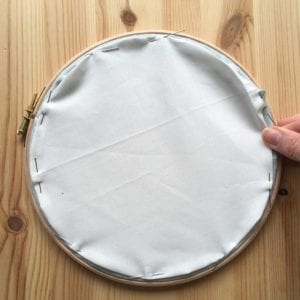
 Pin the lining to the half inch of remaining linen. Stitch all the way around using a slip stitch.
This is how I always finish my backs, however you may have your own ways (maybe better ones!) and if so please share these in a comment.
This is just one idea for your hoop art, and as I said I will share another tutorial in a few days. However your hoop art can be pure patchwork, pure embroidery or a mixture of the two. Or some other form of textile art that I haven’t thought of yet! Maybe some Kantha stitching, or a mixed media collage? Or why not use an intricate FPP block and frame that in your hoop?
There is so much you can do with this, so get creative! If you do fancy some embroidery then I can offer a couple of free patterns amongst my tutorials.

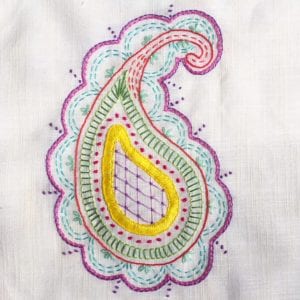
There’s my Mini Bear Portrait pattern and my Paisley Passion pattern for a start.
Or maybe you are short on time and ideas? Why not buy one of Sew Motion’s fabulous Hoop Art kits?!
We actually have a few in stock in our Edinburgh store for local folks but you can view them all and buy one online here .
And Lovely Louisa is offering a 10% discount to all my readers, just use code Stitch10 at checkout to claim it!!
I have one more inspiration piece to share. I made this back in 2012 for a Flickr Swap and my partner was my dear friend Dolores. I have received a beautiful embroidery in return.
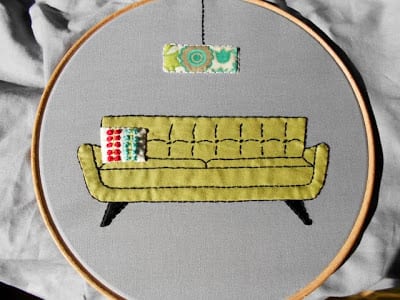
You can read more about this piece in this post. The theme was Modern Classic Furniture and I was very pleased with my interpretation!
I do hope you have found some inspiration here, whether you are coming to the Stitch Gathering or not. I also hope you enjoy making the mini Dreseden and/or embroidery. And if you do and share the finished item then please credit me and link back to this tutorial wherever possible.
More on Hoop Art in my next post!
This is fabulous, it will be lovely to see all of the final finished hoops and to see lots of amazing creativity. x
Loving the one you made for Dolores!
Thank you so very much for the great tutorial, it makes me even more impatient for your book next year!😁
Thank, you for the tutorial, I also love you’re using the 12 weight aurifil thread for the embroidery. Love your designs .
Elke