
Tiny Improv World Quilt
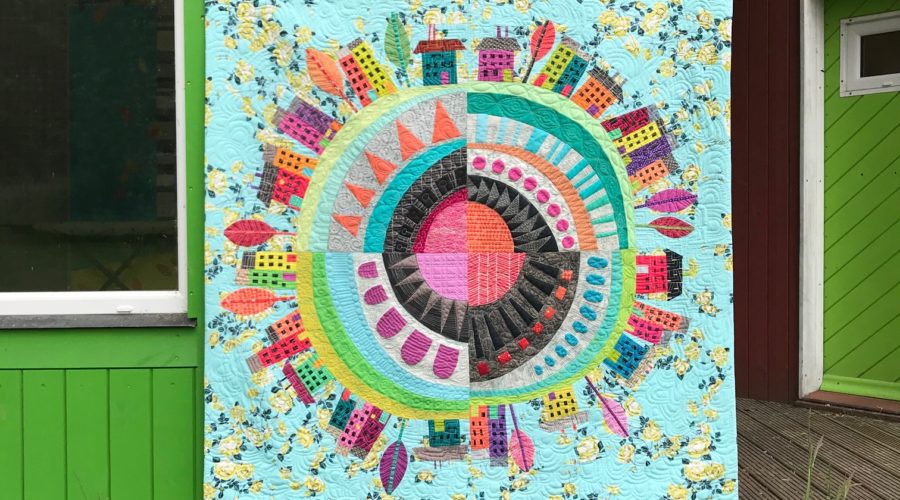
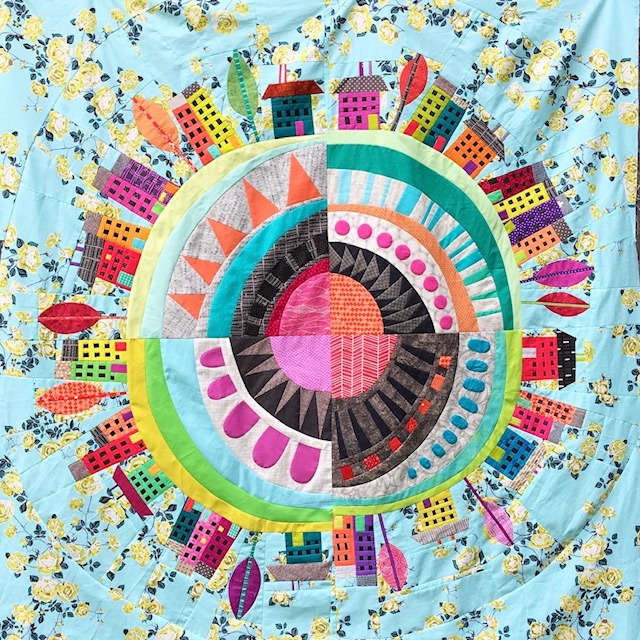
Today I’m delighted to share my finished Tiny Improv World quilt. The quilt top was finished during the first lockdown when I put together many collected sample pieces from all the Tiny Improv Streetscape classes I had taught.
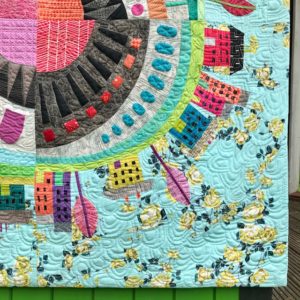
I actually didn’t have quite enough (having made plenty into puches and bags!) and so I needed to make some extra tiny houses and trees to go all the way around the world.
To start with I hadn’t actually thought about what I was going to do in the centre, it had to be something fairly detailed to balance out all the busy action around the edge.
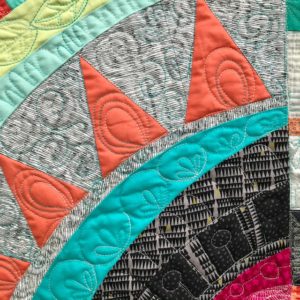
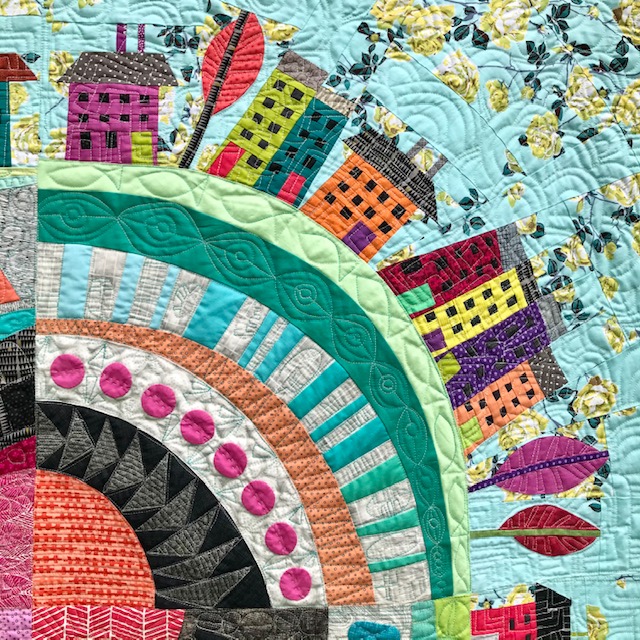
 My solution was to create curved bands of patchwork, both pieced and appliqued, using my Freehand Foundation Piecing technique. This approach is simliar to the one I used to create both my Dandelion Clock quilt and my 40 layers of Patchwork quilt. If you fancy a go yourself then I can offer my Thread House Schoolhouse Dandelion Clock Block on-demand video class. And if you want to try out some Tiny Improv Streetscape (which includes trees too) there is a video classes for that too! Check them all out here.
This centre idea was so successful that I turned it into a whole new class called ‘Journey to the Centre of the Earth’ which I used to make my recent ‘Journey to the Centre of a Flower’ quilt which I blogged about last month here.
Just an update on that quilt and my entry to the FATA gallery at Festival of Quilts, my quilt was rejected. But that’s ok, I’m pretty familiar with this feeling as I’ve had many rejections from QuiltCons in the past. I was just a little sad that it was then too late to enter it to the regular competition (which is not juried) so it wouldn’t hang at the show at all. but, like Cinderella, it will still go to the ball! It’s going to be hanging in the Aurifil stand! So if you are heading to FOQ and want to see it IRL you still can.
But back to this quilt which became one of the many quilt tops that sat in a pile waiting for my Handi Quilter Moxie long arm machine to arrive. It then sat a bit longer while I got good enough (IMHO) to quilt it!
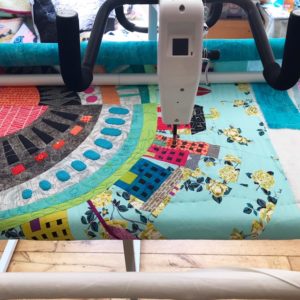 So far I have been basting my quilts on the Moxie using the different rails, where you put the backing on two rails and the top on one and the wadding goes in between (this will probably not make much sense if you are not familiar with a long-arm). This works really well if you are happy to do an overall pattern and quilt from the top down to the bootom, working in rows. I’ve been very happy to do this on all my previous quilts but I really wanted to work from the centre out on this quilt and use some more detailed intricate patterns.

I took advice form the lovely Liz at Pinhole Quilting, who supplied the machine. She told me that I could baste the quilt as I had previously and then stitch large manual stitches in wavy lines all over it to stabilise it. You then take it off the quilt-top rail and roll it back to the centre to start quilting. This worked very well and I am as happy as I can be with my quilting (I think with FMQ you always think you could have done better)!
 Liz told me to leave the basting stitches in until I had finished but they were annoying me too much so I kept cutting them away before I worked on an area. This approach doesn’t seem to have caused any harm.
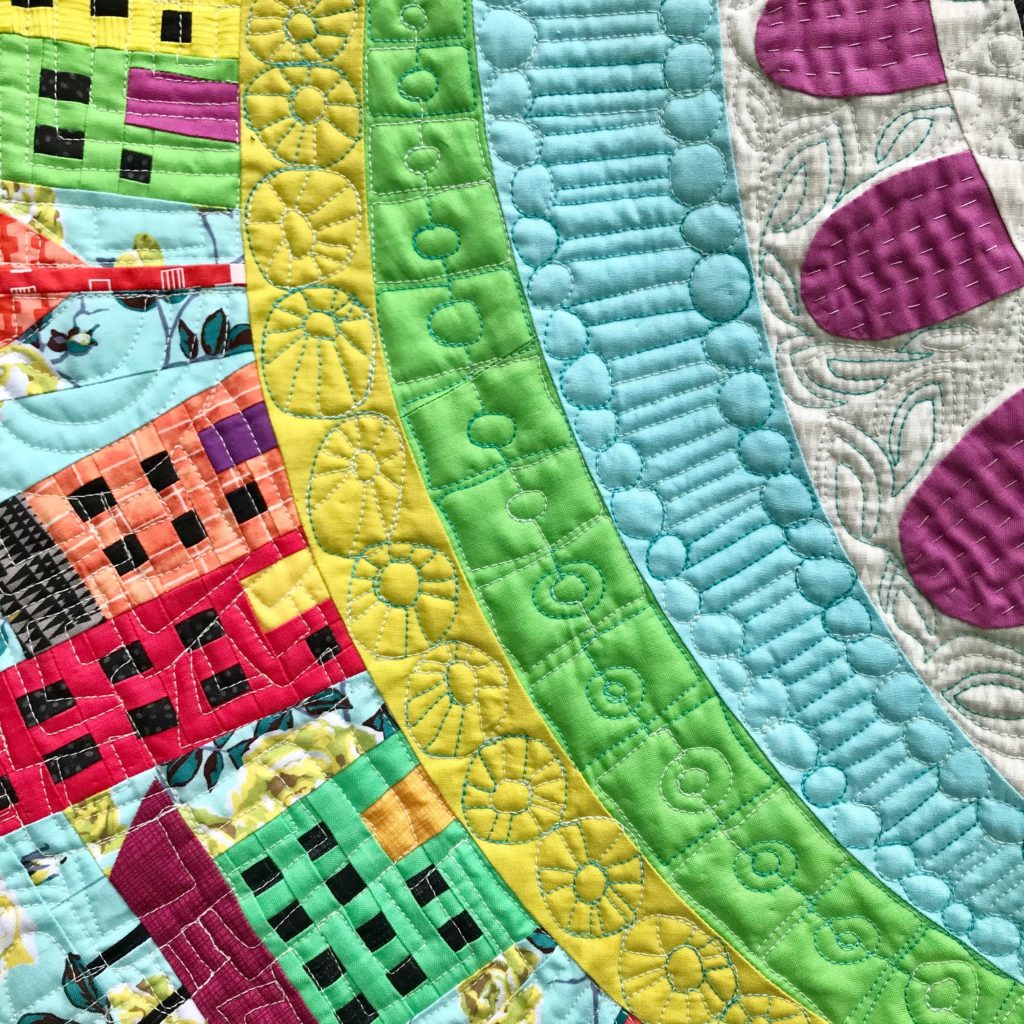
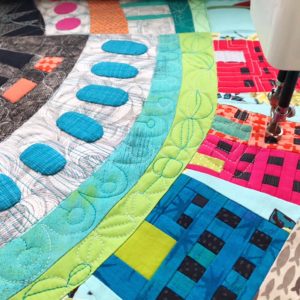
I had such fun creating these different patterns in the centre! With a thought to the geology of this fabric world I even attempted some trilobites (below)! I also put things like fish, leaves and shells in the band closest to the edge.
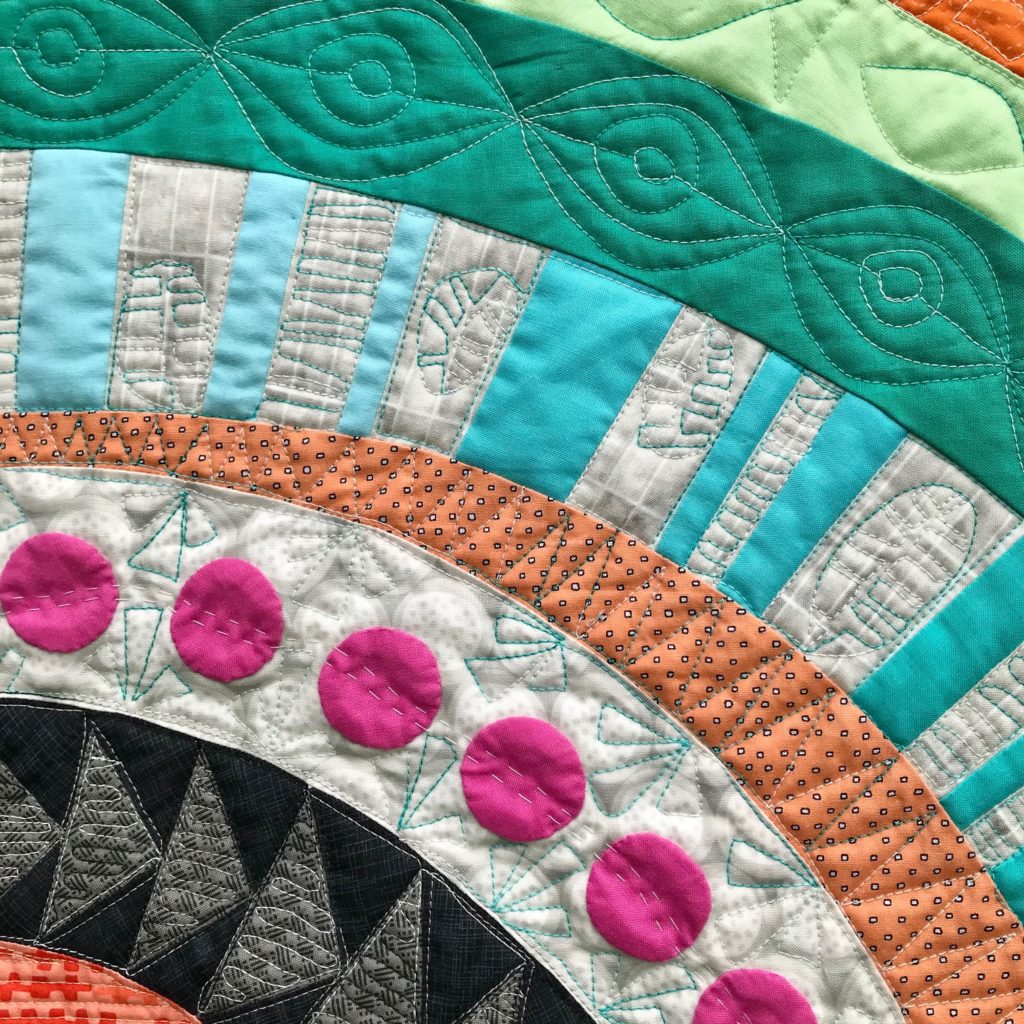
I mainly used Aurifil thread 40/3 in variegated black and white and variegated turquoise and white. Using the variegated can be a bit risky as it means some areas really stand out with more contrast, so there is a bit of imbalance, but I do love the movement and interest it gives.
 Again I had zero problems with tension or thread breakage. I used So Fine in my bobbin (I have used this in the bobbin on every quilt so far!). I did the whole thing with my ruler base and foot in place and used my skinny ruler for filling some of the areas.
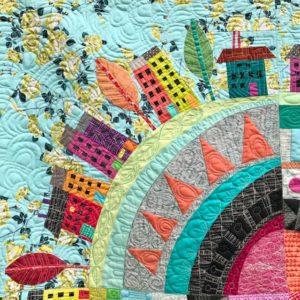
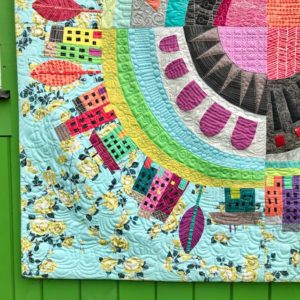
When the centre was finished I moved out to the houses, trees and sky. I used a square interlocking rainbow over the houses to evoke the straight lines you would find there and a curved interlocking rainbow for the sky as I thought it looked like both clouds and rainbows. I used my ruler for the trees to create branches and this whole area was stitched with Aurifil 40/3 in off-white.
I couldn’t bring myself to machine stitch over the needle-turn applique as I knew I would ruin the whole thing, so I added hand quilting details when it was off the machine. These were stitched with Aurifil 28wt in shade 2600.
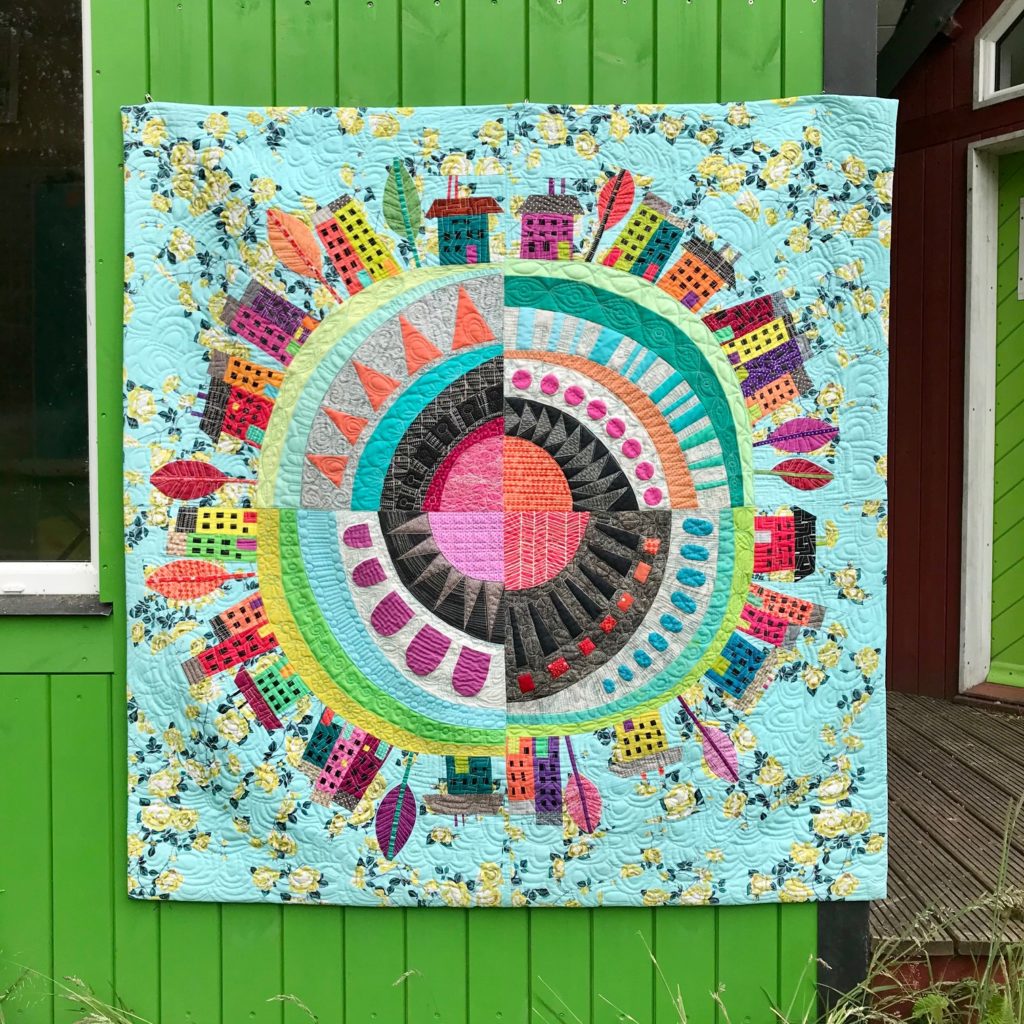
It was finished with a faced binding which I feel works better for more of an ‘art quilt’. It’s not a large quilt, only 58″ so I good one to try out this more ambitious quilting. I certainly learnt a lot quilting it on the Moxie and feel I took a bit of jump forward with this one. It was also good to try out this different way to load the quilt on to the machine.
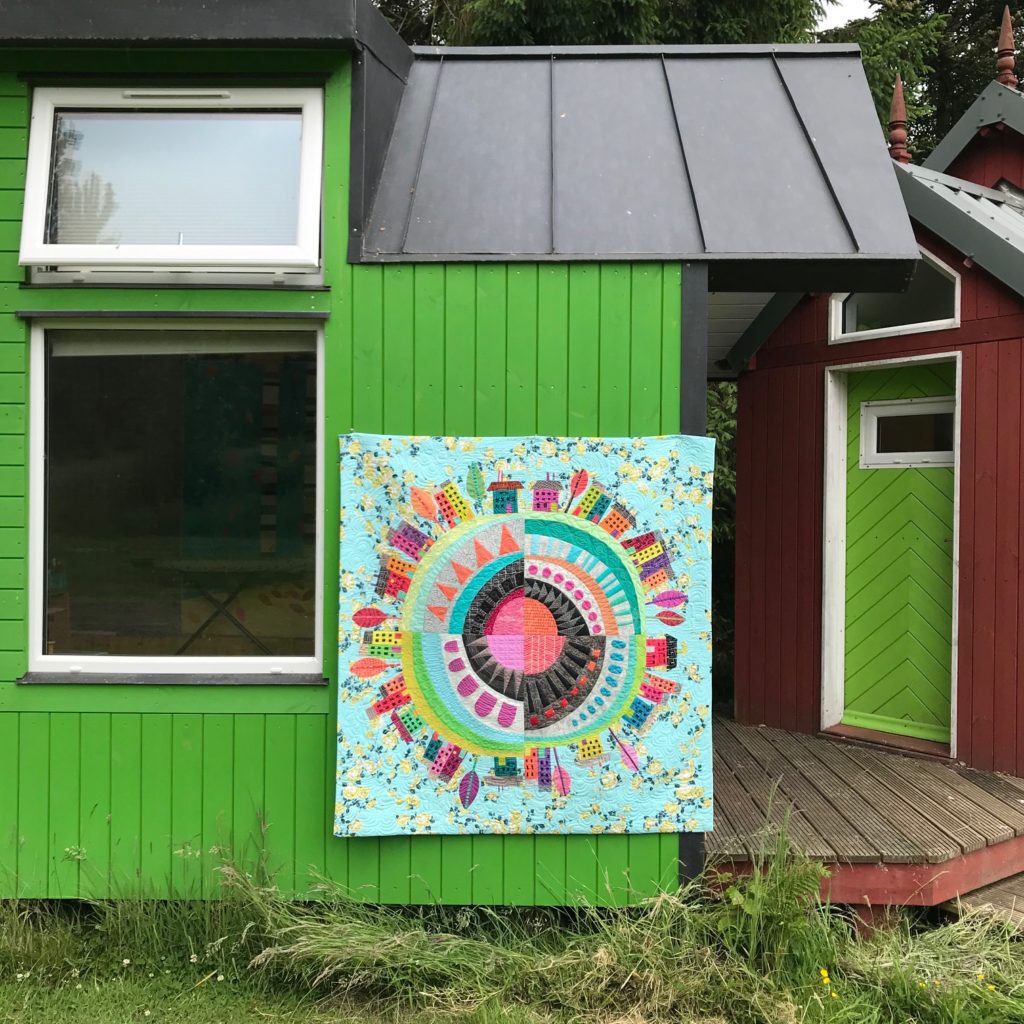
I thought it would be appropriate to photograph it on the side of my Schoolhouse tiny house with our Nest House tiny house in the background! The colour worked perfectly as well (but I need to get that long grass cut!).
I’m very pleased to tell you that this one is going to hang at FOQ! I have entered it for the Quilter’s Guild themed category which this year is ‘coming together’. I thought it fitted in well, with the houses and trees symbolising humankind and nature side by side encircling the earth. The amazing rose strewn Anne Maria Horner sky fabric and all the cheerful colours add to the hopeful vibe.
If you think you might be interested in finding out more about the Moxie head to Pinhole Quilting’s website here. While you are their why not sign up for their newsletter. You will see a box on the sign-up form asking for a Moxie Mentor Referral Code. If you enter my code JA102 you will get a big pack of thread and accessories worth over £100 (as listed above) if you go ahead and order a Moxie!
Lovely Jo & I’m so impressed with your FMQ. Wish I could be going to FOQ, which I did attend back in 2019 whilst visiting UK to see our family. Seems a lifetime ago now. I’ve finished 3 flower rows now, though it won’t be as wide as yours & am looking forward to the next installment. Take care & hugs.
Your finished quilt looks absolutely stunning. I love all of that quilting detail you’ve included. It’s a visual feast!
Love this Jo, it is really stunning, and all the small world houses sitting around the world. Just love it and the quilting as well
This is a wow quilt in every way!! Design, colour, quilting, and every little detail make such a show stopper. I would love to have this in my home. x
Absolutely AMAZING!.
Thanks for all the detail Jo. It’s a great learning experience for me to read what you did where and how you made those decisions. Often I am frozen with indecision!
I love it Jo . You are so creative and inspiring . How do you find the time to design and create ? I have still to finish my dandelion clock wall hanging but it is making me stretch myself to do free motion quilting on my small sewing machine . Please keep writing your blogs .
Another amazing quilt. I cannot believe how creative you keep on achieving -your FMQ is an inspiration. Looking forward to seeing this in all it’s glory very soon
I have been sewing little houses since your online streetscapes workshop, now I have another idea of what to do with them! Love your quilt.
Fabulous quilt Jo, love all your different patterns and it was very interesting to hear how Liz suggested you baste it for quilting. Have got my first quilt on my Moxie and trying out some different patterns. It’s definitely a learning curve !