

Folded Patchwork Tutorial
Today I am taking part in the Oakshott Colourshott bloghop! I am the first stop on the hop and very excited to be sharing this new tutorial with you all!

You can check out all the other stops on the bloghop over at Lilys Quilts.

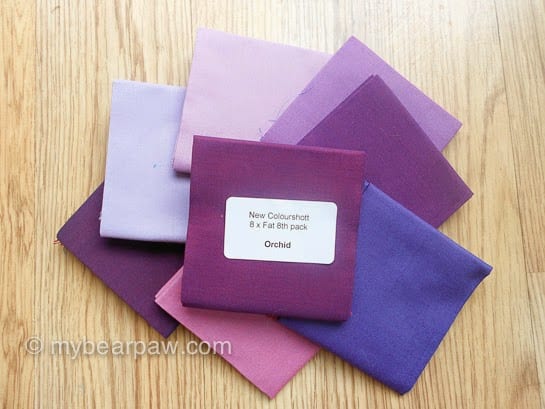
A few weeks back the very kind people at Oaskhott Cottons sent me one of their Colourshott Fat Eighth Bundles in this heavenly purple patette called ‘Orchid’. There are 8 fabulous colourways in these bundles all in Oakshott’s trademark iridescent shot cottons.
I had an immediate inspiration for how I would use the bundle.
Back in what I like to call my ‘First Age of Quilting’ there was quite a craze for Japanese Folded Patchwork. I remember quite clearly members of my Quilter’s Guild group showing me their samples of this, and though I never tried it at the time I always planned to one day.
Fast forward to a couple of years ago when I’d started teaching classes and was on the look out for new subjects and techniques to teach. I remembered the Japanese Folded Patchwork and googled it to see what I could find. There was a lot of stuff out there but nothing that resembled what I remembered. Everything was shown with a curved folded edge, making it look too much like Cathedral Window (which I was already teaching). There was also one book but it had been out of print for a few years.
Thoroughly stumped I put the whole idea on the back burner…
…unitl I saw these Colourshott fabrics. Somehow I knew right away that I had to try the folded patchwork with them and I also knew that I could rememebr enough to just make up my own version of the technique. So I’m not calling it ‘Japanese’ anymore, this is my version!
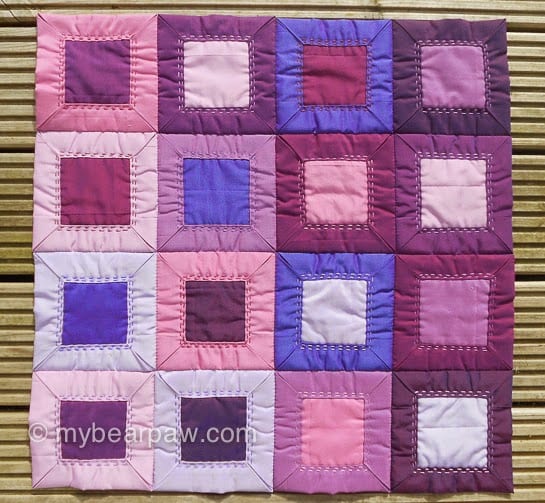
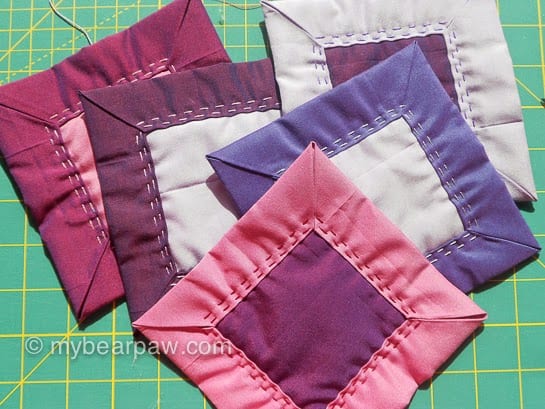
Folded Patchwork involves making lots of ‘tiny quilts’ and then sewing these together to make a larger quilt. I have made a mini quilt here but it may grow… more on this later!
Folded Patchwork Tutorial

From your Oakshott Colourshott Fat Eighth Bundle cut:
16 large squares each measuring 9 inches (2 of each colour)
16 small squares each measuring 4.5 inches (2 of each colour)
16 squares of wadding/batting each measuring 5.5 inches
matching cotton thread
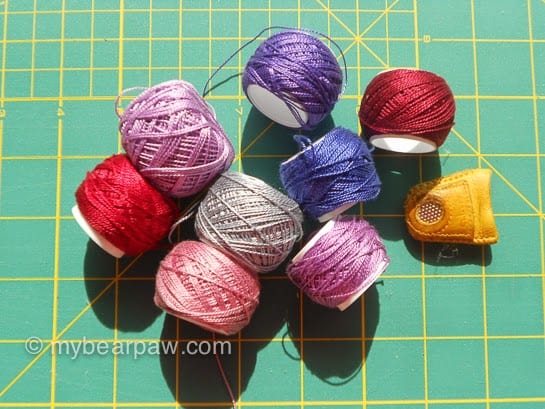
perle cotton number 8 in a few co-ordinating colours
Method:
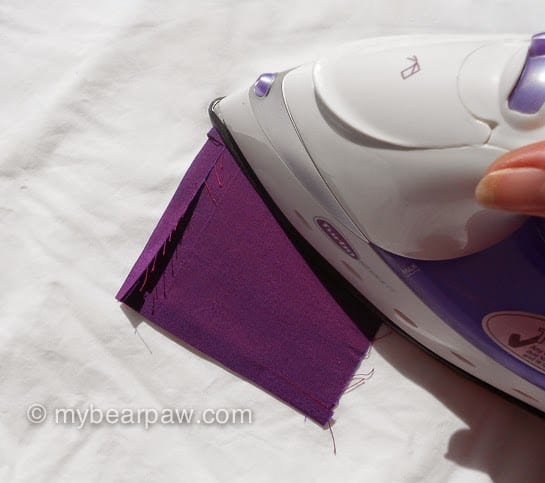
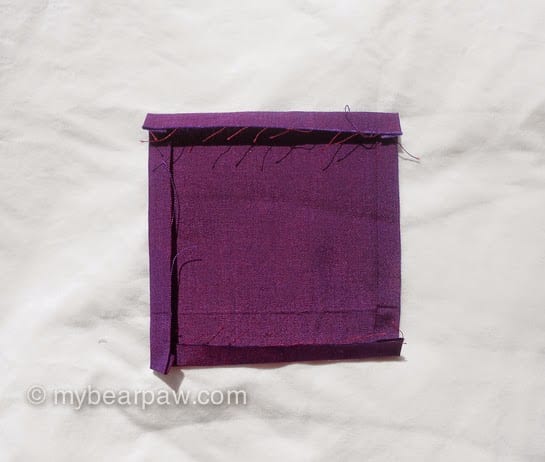
Press a quarter inch seam around each side of your small square.
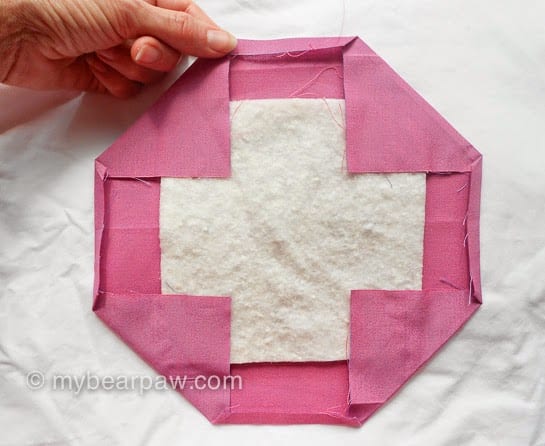
Place your wadding square in the centre of your large square and fold the corners over as shown.
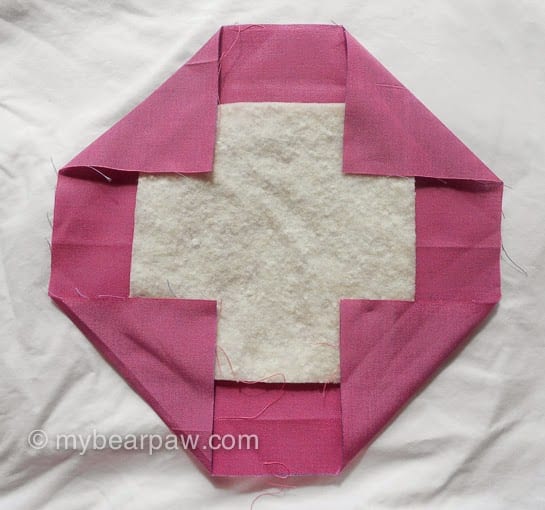
But don’t fold the fabric too close to the corner, leave approx. an eighth of an inch around the wadding before folding as shown below. Press.
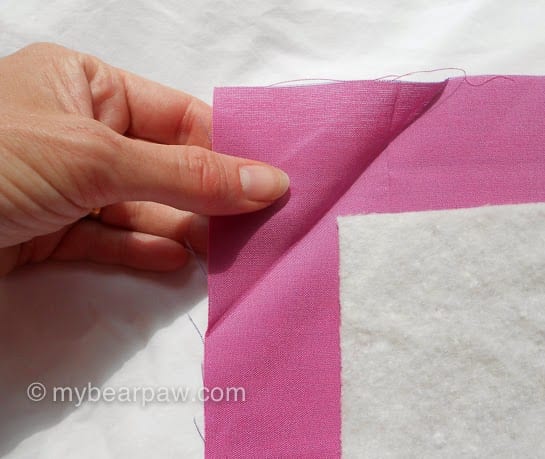
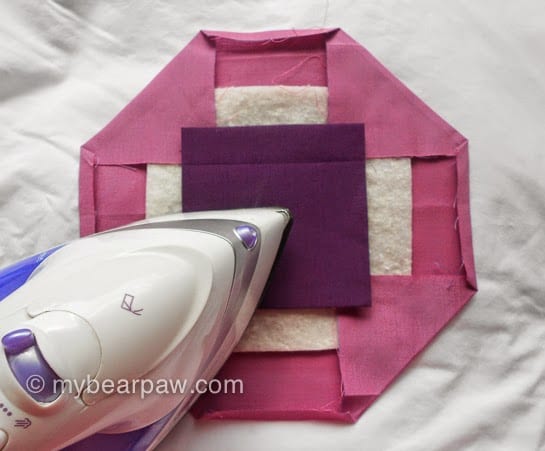
Fold over and press each of the straight sides a quarter of an inch.
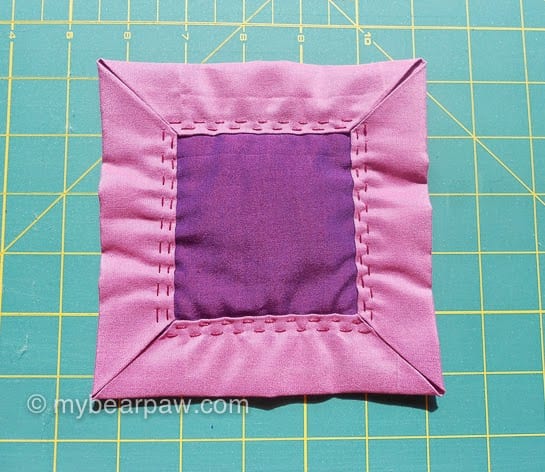
Lay your small square, folded seams down, on to the centre of the wadding, so that it covers the tips of the large square corners. Press lightly to adhere.
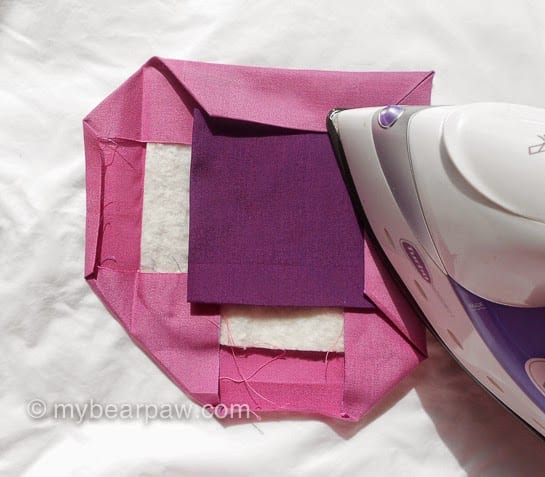
Now fold the rest of your straight sides over the wadding square so the corners mitre neatly. Press.
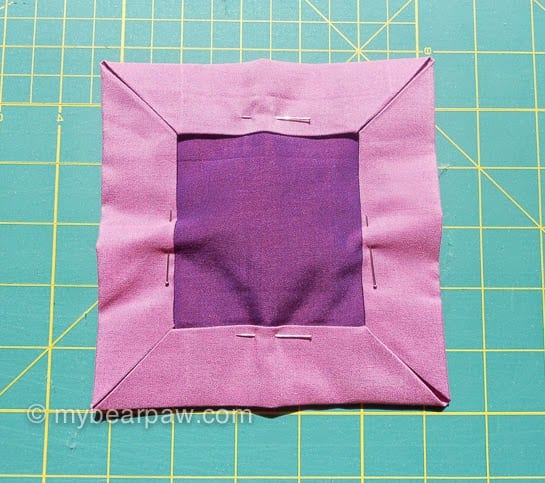
Pin folded edges to secure. It can take a bit of practice to get the folding right, you might need to un-fold and re-fold to get your mitres to line up. But persevere as it gets easier the more you do!
Make up all 16 squares in this way, placing darks with lights and lights with dark and generally mixing the whole bundle up.
This anchors the whole little quilt together.
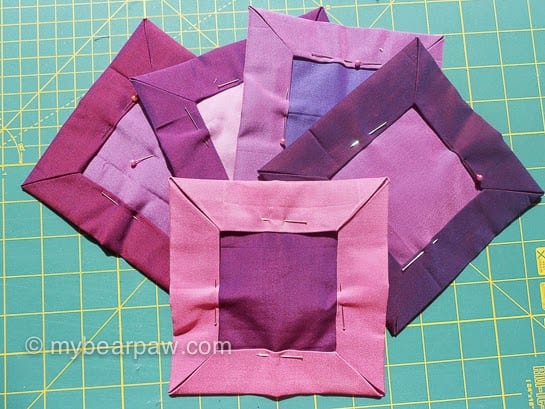
Once you have all 16 sewn this way you need to lay them out and decide how they should go together.
First of all I thought they should be like a checkerboard.
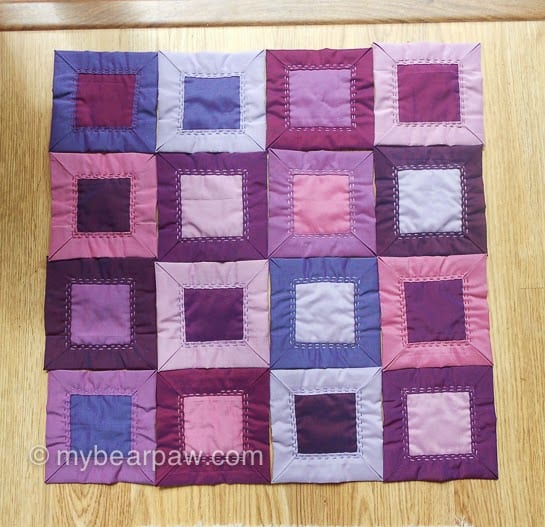
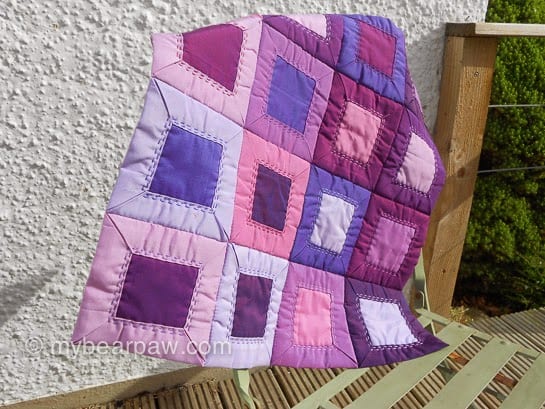
But then I thought that was a little too obvious. So I made them gradate from dark to light.

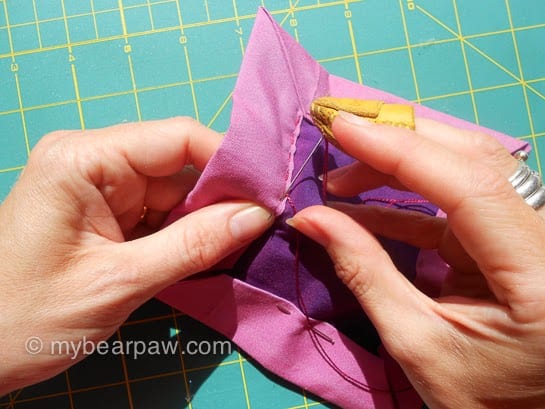
Now all you need to do is sew them together. I used a small whip stitch, just like you would use to sew EPP pieces together. First sew the rows of 4 together, then sew the rows together.
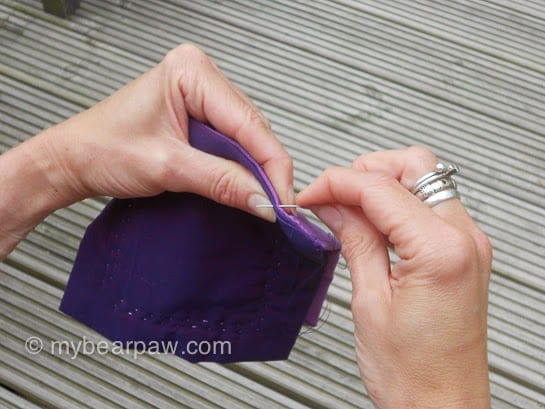
I changed my thread colour as I went along the line so it matched the fabric colour.
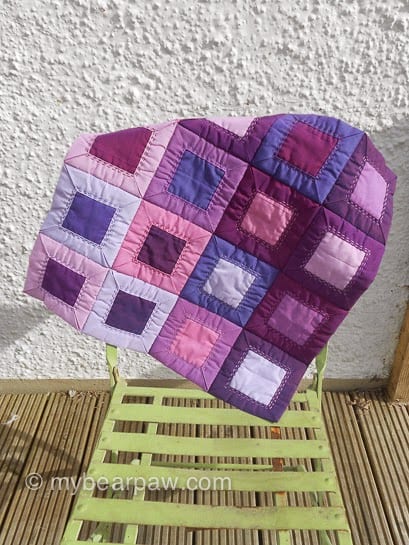
Here’s what the back looks like. It’s a finished quilt already, nothing more to do except maybe bind it if you liked.

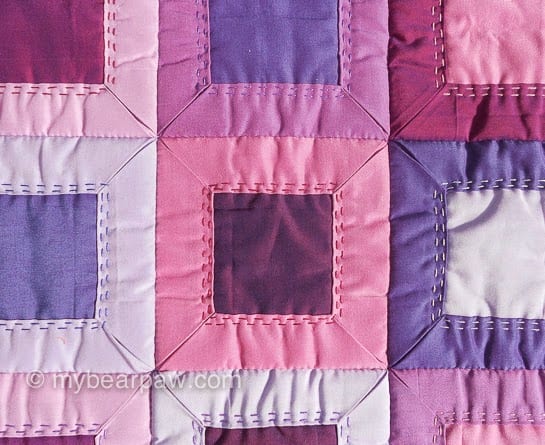
Or you might want to add some more quilting to the centres. I am still thinking about whether to quilt a circle in the centre of each of the squares. Or maybe a cross? Or a few of each?
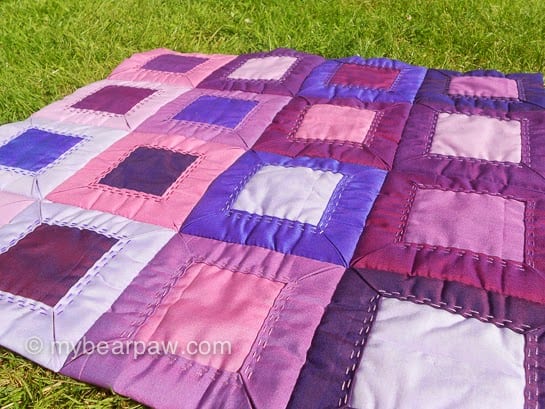
Also I’d like to extend the whole project to make a full sized quilt. If I got hold of each one of the Oakshott Colourshott Bundles I could make a square with each one and then sew them all together – how cool would that be??!
I used most of the bundle to make this mini which measures 22 inches (56cm) and I think 9 squares would make a great sized throw. I just need to persuade Oakshott to put together one more bundle just for me!
I hope you have enjoyed this tutorial and found it useful. If you have a go at these yourself I’d love to hear about it! But please remember to link back to this post if you blog about your own attempt.
Next up tomorrow on the Oakshott Colourshott bloghop is lovely Kerry at Very Berry Kerry. I can’t wait to see what she has come up with!
Here is the full schedule
This method reminds me of Cathedral windows, what a great idea and a really different way to do a framed square! The fabric shines in this design.
Lovely colors and great technique! Thanks for the tuto!
Beautiful! I love your tutorial and the fabric is to drool over!
this is an interesting technique, and definitely new to me. A bit too much handsewing for my liking though!
Thank you so much for this tutorial. I have saved this one to try. Beautiful work. crystalbluern at onlineok dot com
The Oakshott bundle is gorgeous, what a novel way to use it too!
Ack! This is a great idea Jo…thanks for sharing. What a great way to use leftovers too and once you have all the squares cut out and pinned a great portable project.
What a lovely project – I think a quilt made like this would be wonderful! I love the way you've used the bundle!
Just gorgeous. I love what you've done and now know what I can take with me on holiday to sew. Thank you so much. Just perfect.
What a great tutorial. Using this method would make a fun quilt too. Thank you.
that's so pretty!
A nice modern variation of the Japanese version.
Lovely project Jo, thanks for sharing
What a great idea thanks for sharing!
Does June really have 31 days?!
You always come up with the most innovative patterns! Love the bundle you have chosen, such pretty colours
I've never seen this type of block… Thanks for the tutorial!!! Love those yummy colours!
Another great idea for a sit 'n sew project.
Really cute and such an interesting idea!
Such a lovely mini Jo – really showcases the fabrics and set off beautifully by your stitching x
Really love your Tutorial! the little Quilt is soooo cool! Thank you for teaching us too… definitely on my Gotta Do List! 🙂
I love it
Thank you for a great tutorial. Another idea to add to the long list. I love that when you've sewn the squares together it's finished. But just like Cathedral Window there are those pesky mitred corners.
Teresa x
That is so clever Jo! xo
Lovely idea, and the result is stunning!
Great idea and technique and it works perfectly with oakshotts.
Wonderful tutorial. Thank you.
Why do the edges of the small square need to be folded under? Aren’t those edges being covered by the larger square’s edges? Thanks. I like this idea.
Thank You Jo, very clear step by step instructions and a lovely quilt.